Showing posts with label vanilla. Show all posts

Sunday, November 16, 2014

(Flourless) Peanut Butter Blossoms


Sometimes, you think you know a person.

Seven years ago in October, I met Mr. Vittles.  Five years ago (from almost the same day) I married him.

Two days ago... I found out his favorite cookie.

Friday I had gotten a flourless peanut butter blossom recipe from someone at work, but it had a few ingredients I was unsure of.  So I did a quick internet search and found a recipe that had only peanut butter, sugar, egg, and vanilla in the dough.

I was still a little skeptical that it would make a good cookie, but it looked so easy it was worth a potential fail.  Especially when I took into consideration the only person I'd be disappointing is myself. 

Or so I thought.

When I took them out of the oven Friday night, Mr. Vittles asked "Are those gluten-free?"  

"Ummm... yes, duh, I'm eating them."

But apparently his actual question was whether or not the original peanut butter blossom recipe is gluten-free.  I said that I didn't think so, but I honestly didn't know - I hadn't made them in years.  I thought maybe my mother-in-law would know, because she usually makes them at Christmas.

That's when he said "Yeah I know. Those are my favorite cookies."

Wha-what?

All this time I had thought his favorite cookies were scotcheroos, a chocolate & butterscotch crispy rice cookie that his grandmother makes.  But apparently I was wrong.  Peanut butter blossoms take the #1 spot on his cookie list.

Who knew???

Then I figured these would be a huge disappointment to a Blossom Connoisseur such as himself.  The first pan I made wasn't even rolled in sugar, and he loooves his treats sweet.  So I tried to redeem the second pan by rolling them in coarse sugar.  


Much to my surprise, he said they were more peanut-buttery than his mom's, but still really good.  Success!

On another note... I would like to dedicate this post to my mom, who would have been 60 years old today.  


We just celebrated my dad's upcoming 60th birthday with a fabulous surprise party, and I only wish that she was here to celebrate as well.

She is the one who fostered my love of baking and creating, and I know she would love the idea of this blog.  

Mom, I miss you every day, and thank you for everything.  I would not be the person I am today were it not for you.  I hope you are somewhere having a huge piece of cake that's as delicious as all the treats you baked for us over the years.  Pssst... I love you!

(Flourless) Peanut Butter Blossoms
  • 1 cup smooth peanut butter (I used Jif's Natural creamy peanut butter)
  • 1/2 cup packed light brown sugar 
  • 1 egg
  • 1/2 teaspoon vanilla extract
  • 14 Hershey's milk chocolate kisses
  • Extra sugar, for rolling (optional)
Preheat oven to 350 degrees F. Unwrap chocolate kisses, and set aside.  Line a baking sheet with nonstick foil or parchment paper, and set aside as well.

In a medium bowl, combine peanut butter, brown sugar, egg, and vanilla.  Stir until well-combined.  If rolling balls in sugar, place some in a shallow dish.  Wet hands until damp, then roll about 1 Tablespoon of dough into a ball.  Roll in sugar (if using) and place balls onto prepared baking sheet at least an inch apart. 

Bake 10-12 minutes until set and lightly browned (although dough will still be soft).  After removing from oven, press a chocolate kiss into the center of each cookie.  Let cool on baking sheet for 5-10 minutes, before transferring to wire rack to cool completely.

Makes 14 cookies.  Recipe slightly adapted from nutritiouseats.com 

Friday, July 4, 2014

Baked Apple Cinnamon Oatmeal


Happy 4th of July y'all!

It's currently raining here, courtesy of Hurricane Arthur, so there is not much celebrating to report from the Vittles household.


The rest of the holiday weekend is supposed to be beautiful, but I knew most of today was supposed to be a wash.  So last night I made this oatmeal to bake in the morning.  

I never liked oatmeal until recently, though I was also never sure why.  Much like hot tea, it seems like something I would enjoy, yet every time I had it I found it to be... bleh.

I still don't know what brought me around to it.  Maybe the fact that I started feeding it to the Mini, and eating her inevitable leftovers?  Maybe the fact that I started having it with a little brown sugar and cinnamon?  Maybe the fact that I don't have a lot of "hearty" breakfast options since going gluten-free?

Not really sure.  But in the meantime, the Mini is also starting to get a little more discerning with her tastes - she has started asking for specific things at mealtime, and refusing others.  (Our newest favorite is cherries.)  But so far, this has been a hit.  

It's also great left-over, so no worries if you don't eat the whole pan.

Hope everyone has a fun & safe holiday - Happy Birthday, America!

Baked Apple Cinnamon Oatmeal
  • 2 C. uncooked quick-cooking oats
  • 1/2 C. packed brown sugar 
  • 1 t. ground cinnamon
  • 1/8 t. ground cloves
  • pinch salt
  • 1 t. baking powder
  • 1 1/2 C. milk
  • 1 t. vanilla extract
  • 1/2 C. unsweetened applesauce 
  • 2 T. butter, melted 
  • 1 large egg, beaten 
  • 1 apple, peeled, cored & diced

Preheat oven to 375°.  Grease an 8" square baking dish with cooking spray, and set aside.*

In a large bowl, whisk together the oats through baking powder, & set aside.  In separate bowl, combine the milk, vanilla, applesauce, butter, and egg.

Add milk mixture to oat mixture; stir well. Fold in diced apples. Pour mixture into prepared baking dish & bake for 20-25 minutes, or until set in middle. Allow to cool 5 minutes, then serve warm.

*Note: This recipe can be made the night before, and stored in the refrigerator.  If making ahead, skip the step of preheating oven until ready to bake.  Also you may need to add an extra few minutes to bake time.

Recipe adapted from Cooking Light, as posted on MyRecipes.com

Sunday, June 22, 2014

Red White & Blue Mini Vanilla Cheesecakes


Strawberries have always been one of my favorite things about summer.

Much like my obsession with pumpkin in the fall, we always have plenty of strawberries on hand during the summer.  I look for any excuse to eat them or use them in recipes!

Now it seems our Mini has inherited this love as well, except she refers to them as "strawbees."

Not long ago she went strawbee picking with some of her cousins, and apparently took her job very seriously.


I was also told that she did not eat one single, solitary strawberry while they were at the orchard!

She made up for it at home of course, but I was still able to snag a few to adorn these mini cheesecakes.

I am loving this recipe because you get to enjoy the creamy richness of a cheesecake without having to deal with the fickleness of baking one that's full-sized.


And... you get to cover them with blueberries and "strawbees" (or any other fruit of your choice.)  But of course, I love the red, white & blue theme for the 4th of July!

Red, White, & Blue Mini Vanilla Cheesecakes

  • 1 1/2 C. graham cracker crumbs
  • 5 T. melted butter
  • 3 T. sugar
  • Pinch salt
  • 2 (8-oz. packages) cream cheese*, room temperature
  • 2/3 C. sugar
  • 1 vanilla bean, split and seeded
  • 2 eggs, room temperature
  • 2 t. pure vanilla extract
  • Sliced strawberries & blueberries, for decoration

Preheat oven to 325°F. Line one 12-cup muffin tin with paper liners.**

Mix together graham cracker crumbs, melted butter, 3 T. sugar, and salt. Place 2 tablespoons of the graham cracker mixture into bottom of paper liners. Using the bottom of a small juice glass or your hands, press mixture down firmly into each cup.

Using electric mixer, beat cream cheese, 2/3 C. sugar, and vanilla bean scrapings until light and fluffy. Add eggs and vanilla extract, and beat well.

Divide batter evenly amongst cups (each should be about 3/4 full). Bake for 22 to 24 minutes, or until the centers are just set. Cool in pan on wire rack, then transfer to plate and chill for 4 hours or overnight in an airtight container.

Before serving, top with sliced strawberries & whole blueberries.  Makes 12 cupcakes.  Cupcakes are good for 3-5 days when refrigerated.

Notes:
*You can substitute Neufchâtel for some or all of the cream cheese, that is what I used for a slightly lower fat version.
**I really like the Reynolds StayBrite® baking cups (available in most grocery stores) for these, because they are thick and peel away from the cheesecakes easily.

Recipe Adapted Slightly from Bree at goboldwithbutter.com

Sunday, December 1, 2013

Lamingtons (Chocolate Coconut-Covered Cakes)


Have you ever made Lamingtons before?

Have you ever even heard of Lamingtons before?

Me either.  But over the summer, my dad saw some show on television about a bakery in NYC that makes these.  He was going on and on about how amazing they looked, except he couldn't remember what they were called.

After some digging online, I discovered these magical chocolate & coconut-covered square cakes were called Lamingtons and originated in Australia.

Well, my dad was supposed to come over last weekend to celebrate his birthday, so I decided I would surprise him and make these for dessert.  I found what looked like an easy recipe on one of my go-to sites, Joyofbaking.com, so I figured I'd be on my way to deliciousness in no time.

Or... not.

The cake part came out fine, but when it came to coating them in chocolate icing and rolling them in coconut, I was a complete disaster.  It took me way longer than it probably should have, and I made an absolute mess.  All the while, the blog's photo of Stephanie Jaworksi's beautifully covered cakes were taunting me, saying "This is totally possible - you just SUCK."

Well I think I managed to get about 6 of the 16 squares thoroughly covered (in addition to my dining room table and floor) before I threw in the towel.  For the remaining squares, I just ladled some chocolate icing over the tops, sprinkled them with coconut, and called it a day.

Our scheduled dinner ended up being cancelled anyway, because my dad got super sick (no, it was not the Sickness of Death from my last post, but it did leave him bed-ridden for 2 days!)  I still gave the Lamingtons to him, because I am never. making. these. again.

Not that it should stop YOU from trying, however - you can get the recipe here.  (Apologies, normally I would not do that to you, but for once I followed the recipe to the letter.  So per the rules of blogging etiquette, I cannot re-post it here on V&B!)

I will tell you that I had a bite of one, and saved a couple squares for Mr. Vittles, and we both agreed they tasted pretty amazing.

That is, as long as someone else makes them!

Lamingtons Recipe can be found at Joyofbaking.com

Monday, August 26, 2013

Fudgy S'mores Brownies


Marshmallow... chocolate.... graham cracker... what's not to love about s'mores?  They are the perfect combination for summer.

But sometimes you don't have a campfire, or other open flame to roast your mallows.

Or sometimes you do.... but then you accidentally drop a flaming marshmallow on your 15-year old niece's foot, and decide that maybe this whole s'more thing is a more dangerous business than you realized.

(Yes, that really happened - ask my father-in-law!)

Or.... maybe you just want something a little easier and less messy.  Who knows?

But if you fall into any of those categories, these brownies are for you.  I happen to be in the fudgy brownie camp (vs. the cakey brownie) and these definitely fit the bill.  The graham and marshmallow make them even more rich and delicious.


My father-in-law was here this weekend, helping Mr. Vittles hang drywall upstairs, so I wanted to make something nice.  I figured this way he could enjoy a s'more without the possibility of giving anyone a second-degree burn!

Fudgy S'mores Brownies

  • 10 T. (1 1/4 sticks) butter
  • 1 1/4 C. sugar
  • 3/4 C. plus 2 T. unsweetened cocoa powder
  • 1/4 t. salt
  • 1 t. pure vanilla extract
  • 2 large eggs
  • 1/2 C. all-purpose flour
  • 3/4 C. marshmallows (use the mini ones, or cut large ones into smaller pieces with a clean pair of kitchen shears)
  • 1/2 C. graham crackers, broken into small pieces

Preheat oven to 325 degrees Fahrenheit, and position rack to lower third of oven.  Line the bottom and sides of an 8×8-inch square baking pan with parchment paper or foil, leaving an overhang on two opposite sides. Lightly grease with cooking spray, and set aside.

Combine the butter, sugar, cocoa, and salt in a medium microwave-safe bowl.  Microwave for one minute, then remove and stir.  Microwave an additional minute and a half, in 30-second intervals, stirring in between, until the butter is melted and no lumps remain.  (Mixture will be grainy).  Stir in the vanilla with a wooden spoon or rubber spatula, and set the mixture aside until it cools slightly.

Then add the eggs one at a time, stirring vigorously after each one.  When the batter looks thick, shiny, and well-blended, add the flour and stir until no streaks remain.  Then beat vigorously for 40 strokes with the wooden spoon or a rubber spatula.  Stir in graham crackers and marshmallows, and spread evenly in the lined pan.

Bake until a toothpick inserted into the center emerges slightly moist with batter, 22 to 27 minutes. Let cool completely on a rack.  Lift up the ends of the parchment or foil liner, and transfer the brownies to a cutting board.  Cut into squares and serve.

Brownie Recipe adapted from Mels Kitchen Cafe (who adapted from Smitten Kitchen, who adapted from Bittersweet)  

Saturday, July 6, 2013

Soft Lemon Cookies


I hope you guys enjoyed your Fourth of July holiday!

Mr. Vittles and I had a great day off, and we were busy bees with the Mini.  She actually had a few "firsts," such as...

...first time in her baby pool;


...first time seeing fireworks;


...and first time not having a complete melt down at a social outing.

(Mommy was probably most excited about the last one, not sure about her though.)

We stopped by my grandmother's house, where my aunt, uncle and cousins were visiting in addition to my grandmother's friends from Florida.  We then went to a barbecue at our friends' house nearby.  The Mini barely napped in the afternoon, but she was so well-behaved I could hardly believe it.

Our friend's mother was holding her for almost half the party, and Mr. Vittles and I kept looking at each other like, "Has our child been abducted by aliens?"

Then, the fireworks were more than 2 hours past her bedtime, but we decided to wake her up and give it a go.  We weren't sure how she'd react to the loud noise, so we watched from a marina one town over - she really liked looking at them, however did not enjoy the boat horns of an over-zealous yachter nearby.  For that reason, we left before the finale but I would still consider it a success!

I would also consider these lemon cookies to be a success.


If anyone has ever had my ricotta cookies, these have a similar consistency (very soft and cake-like).  But the lemon adds a freshness that is perfect for summer.

Soft Lemon Cookies
  • 1/3 C. milk
  • 2 t. lemon juice
  • 1 3/4 C. flour
  • 1 t. baking powder
  • 1/4 t. baking soda
  • 1 t. lemon zest
  • 3/4 C. granulated sugar
  • 1/2 C. (1 stick) butter
  • 1 egg
  • 1 t. vanilla
Glaze
  • 3/4 C. powdered sugar
  • 1 T. + 2 t. water or milk

Combine milk with lemon juice, and set aside.  Let sit 5 minutes.

In a medium bowl, whisk flour, baking powder, and baking soda to combine.  Set aside.

In a large bowl, combine lemon zest with sugar.  Using your fingers, rub the zest into the sugar until very fragrant and evenly-distributed.  Add butter, and beat on medium speed with a mixer until butter is pale and fluffy (about 2 minutes).

Add milk mixture, egg, and vanilla.  Beat on medium speed until combined.

Add half flour mixture, and mix on low until incorporated.  Add remaining flour mixture, and mix on low.  Increase speed to medium, and mix until well-combined, scraping down sides of bowl with a rubber spatula as needed.  Let dough chill for a few hours in refrigerator or overnight.

When ready to bake cookies, preheat oven to 350 degrees.  Grease a cookie pan, or line with non-stick foil or parchment.

Using a small cookie scoop or tablespoon, drop dough by rounded spoonful onto prepared sheet about 2 inches apart (I put 8 cookies on my sheet, staggered - these will expand).  Bake 8-10 minutes or until edges are starting to brown.

Remove from oven, and let cool on sheet 1-2 minutes before transferring to wire rack to cool.  When cooled completely, make glaze by mixing powdered sugar with water or milk until runny.  Dip cookies in glaze, and return to wire rack to dry.  Makes about 2 dozen cookies.

Recipe Adapted from Taste of Home's Community Forum 

Sunday, May 19, 2013

Cookies & Cream Marshmallow Crispy Treats


A while back I made a comment that no idea I ever have seems to be original.

(Maybe with the exception of Coconut Kona Ice Cream... there are still barely any recipes for coconut coffee ice cream on the internet, and mine predates the ones that exist.  So HA!)

That being said - I'm sure someone has already thought of mixing Oreos into Rice Krispie treats.  But... I refuse to 'Google' it and rain on my own parade.  I made this without looking up anything (including the basic crispy treat recipe) so I'm calling it original.  So there.

Anyway, last night our friends Kristen & Keith were nice enough to babysit the Mini while we went into the city to celebrate my sister-in-law Melissa's ENGAGEMENT! (Ahh!)

It was a bit of a last-minute surprise and our usual babysitting hopefuls were all either at the same dinner, unavailable, or too far in the wrong direction of NYC.  But Kristen came through like a champ, and I wanted to leave her and Keith a treat.

Keith and I have worked together for over 5 years.  He was one of the first people to teach me my job, and also my first friend there.  I don't get to hang out with his wife, Kristen, as much as I would like but I know her better than you'd think just from talking to Keith every day at work.

So I got two boxes of her favorite candy, and made these crispy treats for Keith.

 He has an Oreo obsession that knows no bounds.


When we got home last night, I was surprised that Kristen was actually the first one to comment on how good these were.  I'm just glad they both enjoyed them.

Now... let the pre-wedding festivities commence!  Congratulations to Melissa and Rick!!

Cookies & Cream Marshmallow Crispy Treats
  • 4 1/2 C. crispy rice cereal
  • 15 Oreo cookies, crushed (about 1 1/2 C.)
  • 1 10.5 oz. bag mini marshmallows
  • 4 T. butter
  • 1 t. vanilla extract

Grease a 9x13 baking pan and set aside.

Combine rice cereal and crushed cookies in a large bowl, and mix until evenly distributed.

In a 5 qt. saucepan, heat marshmallows and butter over medium-low heat, and stir until melted and smooth.  Remove pan from heat and stir in vanilla until combined.

Add rice cereal & cookie mixture, and mix to coat.  Spread evenly in prepared pan, using either a greased spatula or piece of waxed paper.  Allow to cool then cut into squares.

Original Recipe

Thursday, December 20, 2012

Cranberry Spice Infused Vodka


Ok so how is it nearly Christmas already?

I know I always say how time is flying, but seriously... nothing makes the time go faster than taking care of a baby!

Which is kind of funny considering every day is like Groundhog Day.  Basically they sleep, eat, poop, repeat... and inevitably your day is centered around that.  Nothing new to the moms out there, but to anyone who doesn't have kids yet - yes, it's really true.  Of course there is some slight variation, but essentially every day is the same.

The first few weeks are SUPER rough (or at least they were for me) and you think "Oh I'm home from work, I should be doing so much stuff."  And then you do none of that stuff, because it's amazing how time consuming sleeping, eating, pooping & repeating can actually be!

However, life is starting to mellow out in the Vittles household and before I know it, I'll be back to work.  And probably crying that I won't see my little monkey all day... and that she's growing up & changing so fast. (Yes I know she's only 8 weeksold,  but when it's YOUR baby they really do change incredibly quickly).

Speaking of Miss Mara.... I do have to take a moment to brag about how stinkin' cute she is. Check out a few of her professional pictures I mentioned last post (by Sarah Fuller, of Purple Circle Photography):

2012 Sarah Fuller

2012 Sarah Fuller

2012 Sarah Fuller

FYI, my mother-in-law knit her that fabulous stocking (may as well brag about that, too, while I'm at it!)  And yes... it is actually big enough for her to fit in.  Santa will have his work cut out for him filling that bad boy!  Thanks Gigi :)

In any case... since things are calming down, I've had a chance to make some of my homemade gifts for friends & family.  My favorite this year is this Cranberry Spice Infused Vodka.


I'm not much of a drinker, but I'm still kind of a sucker for all those flavored liquors that seem to be cropping up at the store.  At Thanksgiving I saw a pumpkin spice liqueur that I wished I could drink (and now I could, but let's face it, Pumpkin Spice is spent til next year).

So when I saw an idea in Country Living magazine for infused vodka, I started searching for other interesting recipes.  I came across one for the Cranberry Spice on About.com, and changed it slightly to suit the containers I bought.  (If you're wondering, I bought 16 oz. swingtop glass 'flask' bottles, and made labels on my computer - the below recipe was enough to fill two bottles.)

Super fun for the holidays!


Cranberry Spice Infused Vodka

  • 32 oz. vodka
  • 1 1/2 C. fresh cranberries
  • 8 whole cloves
  • 1 whole nutmeg, cracked
  • 1 whole vanilla bean, cut in half
  • 1 1/2 sticks cinnamon, cracked
  • 9 whole allspice berries, cracked

Place cranberries & spices in the bottom of a large pitcher or container (I used a large, widemouth mason jar with a lid) and pour vodka over them. Cover & let steep 3 days, then strain & discard berries/spices.  Place liquor in decorative containers, if desired.

Recipe Adapted from About.com

Monday, September 10, 2012

Pumpkin Pie Frappe... In The Raw


Is it just me, or is anyone else done with summer?

Maybe it's because I'm currently lugging around a 2 1/2-pound watermelon in my stomach, but I am totally over this season.

It doesn't help that Fall is my absolute favorite time of year, and I probably got a taste of it too early going up to Canada a few weeks ago. I want it to be here NOW!

I want cool, crisp air. I want jeans and sweatshirts. I want fallen leaves and apple-picking.

I want PUMPKIN SPICE!

Who's with me on that?

I recently applied through BlogHer to review In The Raw sugar, and when I was looking at their collection of amazing recipes, I noticed all the fall-themed ones were jumping out at me.

So naturally, I had to make the Pumpkin Pie Frappe ... which totally lives up to its name, and gets me even more excited for the upcoming season change!

Is it wrong that I want to swim in this creamy, pumpkiny goodness?


But in all seriousness - for those of you who are regular readers, hopefully you know by now that I'm very picky about my reviews. Making money off of a hobby is great, but that's not why I blog, and I would never personally endorse a company, product, or recipe I didn't truly like.

So that being said, I highly recommend checking out In The Raw's products. Like me, you've probably seen their sugar and Stevia packets in coffee shops and the like, but did you know that these products are also offered in bulk for baking and cooking?

Check out the lineup of goodies I received from In The Raw, which included their all-natural Turbinado sugar, organic agave nectar, and zero-calorie Stevia. So fun!


In all honesty, I was a strictly-white sugar type of gal until a couple years ago when I was diagnosed with a hormone imbalance; it puts me at a higher risk for diabetes if I'm not mindful about my carb intake. So at that point, I started looking into less-refined sugars and sugar alternatives and was pleasantly surprised to find out there are some really great options available.

For one, Stevia is the only low-calorie sweetener that I actually enjoy - I think it tastes the closest to 'regular' sugar, and I love that it's natural, not made from chemicals.

Agave nectar is great too because it's slightly sweeter than sugar, so you can use less, and it has a lower glycemic index. (In The Raw's Agave is also organic, so that's a bonus!)

But if all that health stuff doesn't tickle your fancy ... I recently discovered that In The Raw has this hilarious Au Natural In The Raw app that will 'censor' your sassy food photos.

Yep you heard me right. You can blur out your goodies', umm ... goodies?

In the age of 'pinning' and 'food porn' sites, one of the most fun things about baking is sharing your creations via photo. And now your hottest desserts can go "au natural" on the internet... without fear of showing too much!


How cute is that?? To view other photos or make your own, just visit hotintherawaction.com (and perhaps warn your significant other first, in case they see the site in your browser history - ha!)

And if that wasn't enough fun for you ... In The Raw is also giving you all a chance to win a $100 Cooking.com gift card! Entering is easy peasy, just visit the recipe section of their website, and leave a comment on this post telling me which recipe you'd most like to make.

Official Sweepstakes Rules:
No duplicate comments.
You may receive (2) total entries by selecting from the following entry methods:
a) Leave a comment in response to the sweepstakes prompt on this post
"b) Tweet (public message) about this promotion; including exactly the
following unique term in your tweet message: ""#SweepstakesEntry""; and leave the URL to that tweet in a comment on this post"
c) Blog about this promotion, including a disclosure that you are receiving a sweepstakes entry in exchange for writing the blog post, and leave the URL to that post in a comment on this post
d) For those with no Twitter or blog, read the official rules to learn about an alternate form of entry.
This giveaway is open to US Residents age 18 or older. Winners will be selected via random draw, and will be notified by e-mail. You have 72 hours to get back to me, otherwise a new winner will be selected.
The Official Rules are available here.
This sweepstakes runs from 9/10/12-9/30/12.
Please also be sure to visit the In The Raw brand page on BlogHer, where you can read other bloggers' posts and get more chances to win.

In the meantime... bring on the pumpkin spice!

Pumpkin Pie Frappe
  • 1/3 C. canned pumpkin puree*
  • 1/4 C. Sugar In The Raw®
  • 1/4 t. ground cinnamon
  • 1/8 t. ground allspice
  • 1 C. whole milk
  • 4 C. vanilla ice cream (slightly softened)
  • Grated nutmeg for garnish
Combine all the ingredients in an electric blender and blend until smooth. Serve in frosted glasses and garnish with the nutmeg. Makes 4 servings, about 3 1/2 cups.
*Be aware that there is a difference between pumpkin puree and pumpkin pie canned mix. The pumpkin puree works best for this recipe.
Note: The frappe can be stored in the freezer if not serving immediately. The consistency will be like soft ice cream.

Recipe from In The Raw

Monday, June 11, 2012

Flourless Peanut Butter Cookies


I can't believe this weekend is Father's Day already!  I am excited to spend it with all my "dads" - my father, step-father, and father-in law.

I am super lucky... they are all the greatest in their own way.

Mr. Vittles and I already bought gifts for my dad & father-in-law, but I still need to figure out what to make for my stepdad, Chris... he is an extremely mellow, quiet, 'surfer-dude' who doesn't care much for traditional gifts.

The gifts he likes best are homemade.

So here's a story for ya.  A little over a year ago, he was driving to one of his favorite surfing destinations when his roof rack came completely off his car, holding two of his favorite surfboards, and smashed onto the side of the highway.

He was naturally devastated - his boards are probably the only possessions he owns that he actually cares about.  Mr. Vittles offered to dispose of the pieces for him, and then secretly kept them in the garage for a project.

So for Chris' birthday this past March, we presented him with this amazing bench that Mr. V designed & made from the broken surfboards.


Chris was... ecstatic.


Now unfortunately for me... I do not have the talents my husband does, and I will not be crafting anything from wood to rival this gift.

But fortunately for me... Chris happens to love baked treats (even though he probably eats healthier than most people I know), and this fits more comfortably into my range of abilities.

Some of his favorite goodies are my mother-in-law's chocolate cake, ricotta cookies, and also good old-fashioned chocolate chip cookies.

He also loooves peanut butter - he puts it on everything.

Like... things that are totally inappropriate for slathering in peanut butter, such as tuna fish and meatloaf.

My personal favorite is when he makes giant, thick pancakes that take up the entire width of the frying pan, spreads peanut butter over the top, then adds tuna fish and honey.

Yeah... barf.

However, for all that peanut butter madness, he does not like baked goods with peanut butter in them.  Go figure!

It's ok though.  Because you know what that means?

More peanut butter cookies for me.


These are surprisingly yummy for not having any flour or butter in them... I used Natural Jif for these (the creamy natural kind, not the grainy natural kind that needs to be stirred) and the consistency is awesome.  Mr. V would probably prefer them a bit softer, but they're not crunchy either.

Maybe if I just added some tuna fish to the batter they would be a good candidate for this weekend?

Flourless Peanut Butter Cookies

1 C. creamy peanut butter
1/2 C. packed light brown sugar
1/2 C. granulated sugar
1 large egg
1 t. vanilla extract
1 t. baking soda
1/4 t. salt

Heat oven to 350° F. Line a baking sheet with parchment paper.

In a large bowl, mix together the peanut butter, sugars, eggs, vanilla, baking soda, and salt until smooth.

Shape the dough into 1" balls (you can use a cookie scoop - just mush back together if it cracks in half) and place cookies 2 inches apart onto prepared baking sheet. Using the tines of a fork, flatten each ball, creating a crisscross pattern.

Bake until puffed and golden, 10 to 12 minutes.  Let cool slightly on the baking sheets, then transfer to a wire rack to cool completely.  Makes about 2 dozen.

Recipe Adapted Slightly from Real Simple

Saturday, January 7, 2012

“Magic” Peppermint Ice Cream


The time of year after the holidays can get annoying.  Is anyone with me on this?

I hate going back to work after having all this time off (especially in a year like 2011 was, where Christmas & New Years fall on a Sunday and most people get Monday off).

I hate taking down Christmas decorations.

I hate that I always put last year when I write the date.

I hate hearing people's New Year's resolutions, especially when they get all crazy like, "Oh, I resolved not to eat chocolate any more, and run 5 miles a day."

Ummm... good luck with that.

And you know what else I hate (that's actually completely unrelated, but equally annoying)?

When bloggers post incredible-looking recipes that require specialized equipment that I don't own.

And then I have to go out and buy things like a mandoline sliceran ice cream machine, and a donut pan, and then I can't fit all this #%*& into my kitchen anymore, and HOW DARE YOU brainwash me with these delicious treats?

{sigh}

But I am totally guilty of this myself.  Red Velvet Ice Cream.  Apple Chips.  Mini Baked Apple Cider Donuts.  Oatmeal Chocolate Chunk Ice Cream....

...ok ok, I know, sorry!

There's still more that belong on that list - and we all know I probably won't stop there.

Sooo... I will try to make up for it (just a little bit) right now.

This ice cream is magic because you don't need an ice cream maker!

And even if you have an ice cream machine, you may still want to try this because this method is a) way easier and b) pretty cool.  The ice cream comes out rich & creamy, and very scoopable even after days in the freezer.

By the way, for all you white-chocolate haters out there, worry not.  I'm not entirely sure why there is an ounce of white chocolate in the original recipe ... probably to do with the texture or a slight upgrade in taste?  But in no way does this ice cream taste like white chocolate, so don't be deterred by that.

P.S. - the reason why I made peppermint ice cream in the first place is because I saw this 'peppermint punch' on Pinterest and instead of eggnog someone suggested pouring ginger ale and Bailey's over the ice cream! Haven't tried it yet but I am definitely going to :)

“Magic” Peppermint Ice Cream

  • 1/2 C. sweetened condensed milk
  • 1 oz. white chocolate, chopped fine (or you can use white chocolate chips)
  • 1 1/2 t. peppermint extract
  • 1 1/2 t. vanilla extract
  • Pinch salt 
  • couple drops of red food coloring (optional)
  • 1/4 C. sour cream
  • 1 1/4 C. cold heavy cream

Microwave sweetened condensed milk and white chocolate in large bowl until chocolate melts, stirring halfway, in 30-second intervals.  Let cool.  Stir in peppermint, vanilla, salt, red food coloring (if using) and sour cream.

With electric mixer on medium-high speed, whip heavy cream to soft peaks, about 2 minutes.  Whisk one-third of whipped cream into white chocolate mixture.  Fold remaining whipped cream into white chocolate mixture until incorporated.  Mixture will be very light & airy.

Place in airtight container and freeze until firm, at least 6 hours or up to 2 weeks.  Serve.  Makes about 1 quart.

Recipe Adapted from Cooks Country

Friday, December 23, 2011

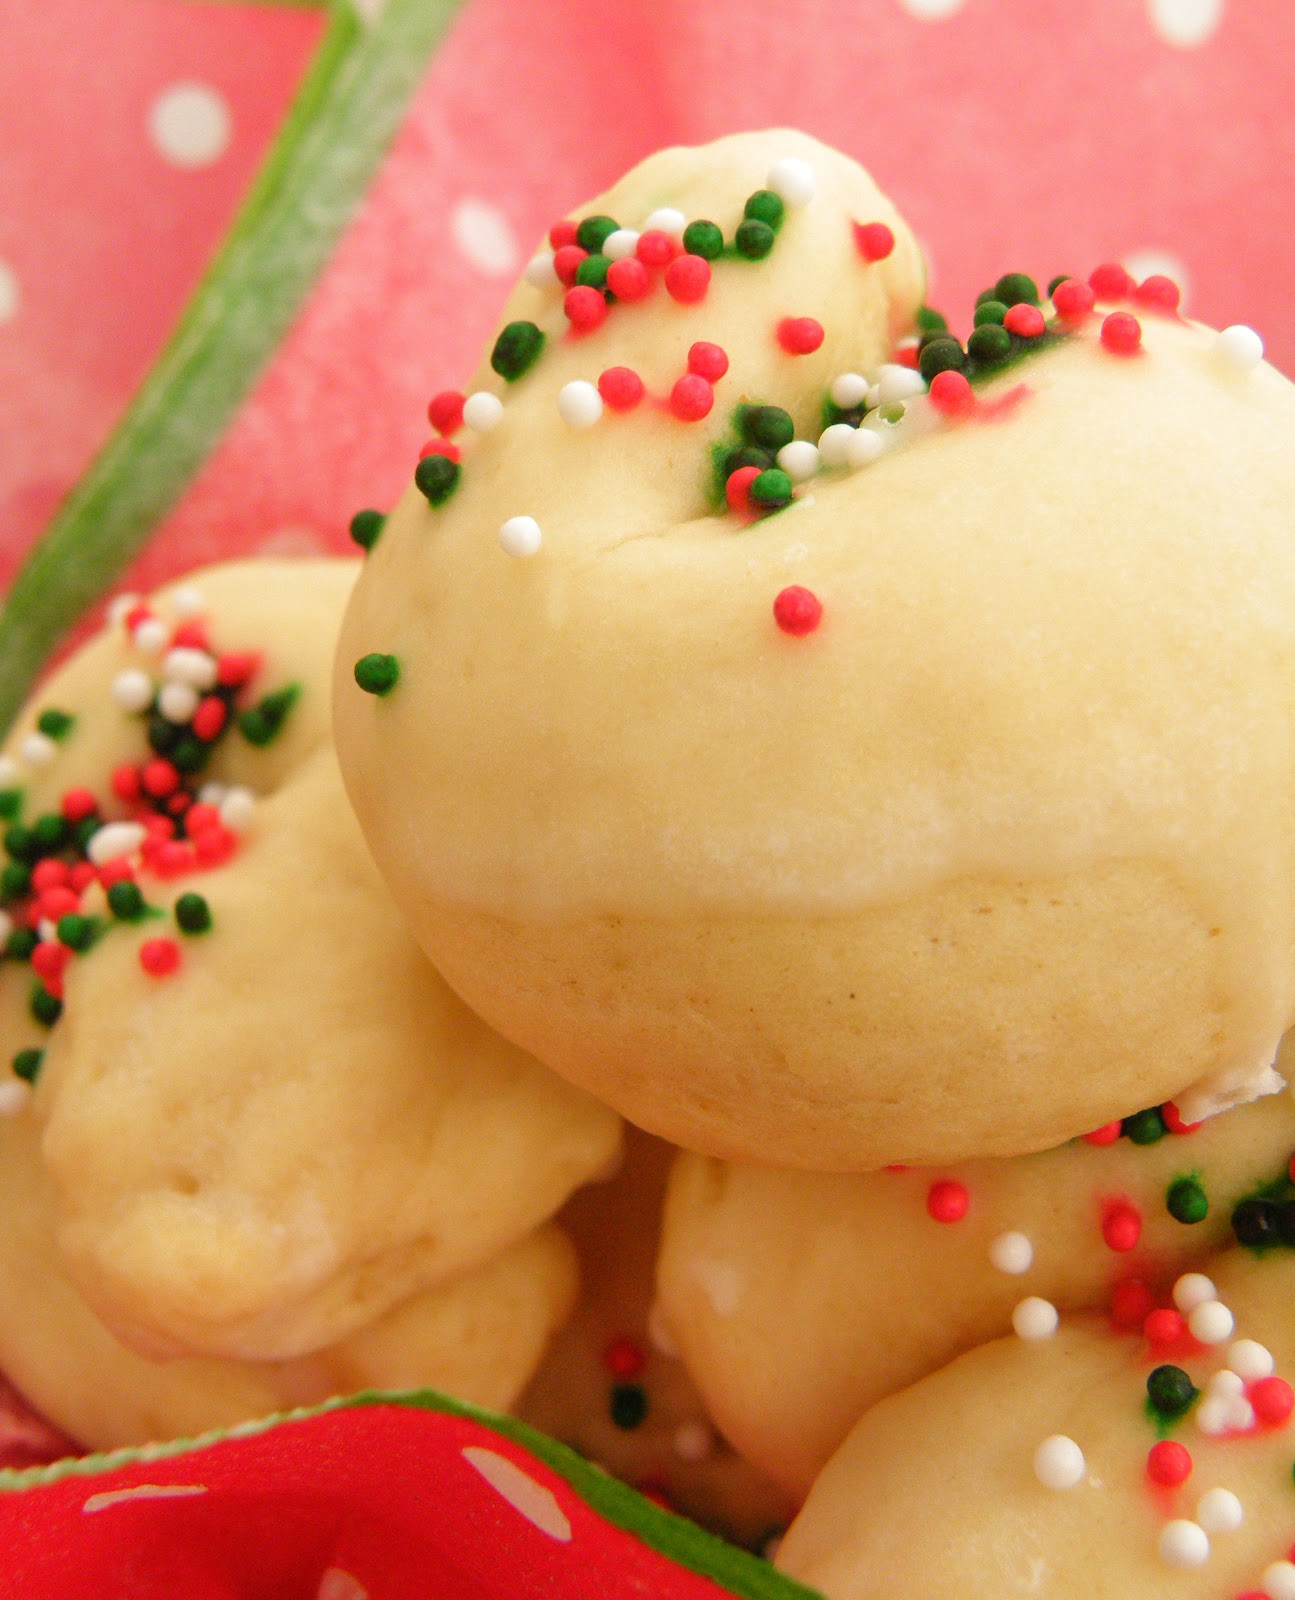
Italian Knot Cookies


I wanted to share with you one of my favorite cookies in the whole wide world.

Yaya Vittles, my paternal grandmother, always has these at the holidays.  Either she makes them herself, or her friends do and bring them over.

However, trying to get the correct recipe out of my grandmother proved to be quite a task.

Years ago, I asked her for it, and she somehow ended up writing half the correct amount of sugar, and forgot the oven temperature.  Needless to say, they came out awful, and I ended up losing the recipe anyway.

Then a few years later, I asked her for it again, and that attempt left out the baking time and the eggs.  

Ummm... yeah.  Not so helpful.  

So then I ended up getting a much more reliable recipe from my mom's side - supposedly this one came from my great-grandmother's family, who was from Italy.  

my great-grandmother (who I called 'Gigi')

(But these days you can find similar recipes all over the internet - it's very popular with Italian Americans.  My brother-in-law's girlfriend Kristen was making them too today, with her family's recipe.)

In any case, they're similar to the ricotta cookies Mr. Vittles loves, but these have anise extract in them. 


Wait, though, before I completely lose you here - let me tell you that I do not typically like anise.  Or licorice, or anything like it.

But in this case, it gives these cookies a subtle, anisette-like flavor that (I think) is awesome.

I know it's kind of an acquired taste though, so I'll usually put half anise & half vanilla extract.  Feel free to do that if you're unsure.  

You can also use all lemon extract, if you like?

Personally, I think they're best with anise, but then again that's how I grew up with them :)  Totally up to you!

Italian Knot Cookies

Cookies:
  • 3 C. flour
  • 1/2 t. baking soda
  • 1 T. baking powder
  • 1/2 C. (1 stick) butter
  • 1/2 C. sugar
  • 3 eggs
  • 2 t. pure anise extract 
Icing:
  • 1 1/2 C. powdered sugar
  • 4-5 T. milk (first try 4, then add a little at a time if necessary)
  • 1/2 t. anise extract
Preheat oven to 400 degrees, and line a baking sheet with nonstick foil or parchment paper.

In a medium bowl, combine flour, baking powder, and baking soda.  Set aside.

In large bowl of a mixer fitted with paddle attachment, beat butter, sugar, eggs, and anise on medium speed until combined (it's ok to have chunks of butter floating in the egg).  

With mixer on low speed, gradually add the flour mixture, scraping sides as necessary.  Increase speed to medium low, and beat until dough forms.

Using a small cookie scoop or tablespoon (for uniformity), scoop balls of dough and roll them into fat ropes.  Holding one end in each hand, place on end over the other and press to adhere, forming crescent, knot-like shapes.  (Alternatively, you can just roll them into balls).  

Place on prepared baking sheet, and bake 8-10 minutes until puffed and bottoms are golden.  Leave 1 minute on the baking sheet, then transfer to a wire rack to cool.  

Once cookies are completely cooled, whisk powdered sugar with milk and anise until smooth.  Icing should be somewhat runny.  Dip tops of cookies into icing, and then decorate with colored nonpareils if desired.  Put back on rack to let icing dry.  Store cookies in airtight container.  Makes about 3 dozen

Family Recipe

Sunday, November 20, 2011

Pumpkin Coconut Tapioca


Are you sick of pumpkin yet?

Hope not.  (After this one, I still have another pumpkin recipe up my sleeve!)

My friend Natalie tried the original recipe for this pudding and loved it.  And she knows how much I enjoy coconut, so she was kind enough to share the link.

Not surprisingly, Mr. Vittles didn't like this (he's not a fan of the texture of tapioca), but he was getting quite a kick out of my attempts to photograph it.


I admit, it doesn't look all that appetizing.

But if you enjoy pumpkin and coconut, I'm pretty confident you will love this pudding.

If you are unsure of the spice, feel free to leave the cinnamon out (the original recipe did not have it).  I just thought it added a little something... reminds me of rice pudding!

Pumpkin Coconut Tapioca

  • 1 1/2 C. milk
  • 1/3 C. + 1 T. sugar
  • 1/3 C. small pearl tapioca (also called tapioca seeds - not quick-cook)
  • 13.5 oz. can of coconut milk
  • 1/2 C. canned organic pumpkin
  • 1/2 t. pure vanilla extract
  • 1/2 t. ground cinnamon

Bring the milk and sugar to a simmer over medium heat. Add the tapioca and stir continuously for the first 5 minutes to prevent clumping. (Turn down heat if mixture starts to boil over).

Continue cooking, stirring frequently to prevent burning, until the tapioca pearls are almost completely translucent and the mixture is very thick, 10-15 minutes.

Add the coconut milk and turn down the heat to low. Continue cooking until the tapioca pearls are completely translucent.

When the tapioca is done, stir in the canned pumpkin, vanilla, and cinnamon.  Chill until firm.

Recipe Adapted from Marc Matsumoto, as seen on PBS.org

Tuesday, October 4, 2011

Chocolate Chip Cherry Cake


Mr. Vittles loves cherry & vanilla.

He also loves Cherry Garcia ice cream by Ben & Jerry's.

And he really loves his wife who makes him cakes that combine cherry, vanilla, chocolate, & whipped cream.


Now I already told you his favorite cake is angel food cake with chocolate whipped cream, which is what I made on his birthday.

But his dad and sister both have birthdays have right after his, so we celebrate them all during a family meal.

...where my mother-in-law not only cooks a fabulous meal, but dutifully makes each of their favorite desserts.

This year, I asked her what I could bring, and since she knew Mr. Vittles already got his angel food cake, she suggested an alternate dessert for him.

I knew it was the perfect opportunity to make this cake, which I've been saving in my recipe annals for just such an occasion.

The assembly is a little time consuming, though, so I actually cheated and used a boxed vanilla cake mix.

Just don't tell Mr. Vittles' grandmother.  I already got in trouble on Sunday for the angel food cake I made last year that only had two layers and a level of chocolate whipped cream that had her 'concerned.'

(Thank goodness I made three layers this year, because I bet Nana Vittles could sniff out a liar from a mile away.)

Either way, I think it's safe to say my husband is one of the luckiest guys in the world.

Like... really?  A grandma who's worried he's not getting enough chocolate whipped cream, and a wife who makes him two birthday cakes?

Hmph.  Lucky.


And did I mention he's also pretty special?

'Cause I wouldn't hand-dip maraschino cherries for just anyone :)

Chocolate Chip Cherry Cake

Cake
  • 1 recipe white cake batter (either a cake mix with all its necessary ingredients, or your favorite recipe) 
  • 1 (21-ounce) can cherry pie filling  
  • 1/2 C. mini chocolate chips  

Chocolate-Dipped Cherries
  • 1 1/2 C. chocolate chips (or you can use more of the mini)
  • 1 T. vegetable shortening  
  • 1 (10-ounce) jar maraschino cherries with stems, drained and wiped dry 

Vanilla Buttercream
  • 3 C. confectioners sugar
  • 1 1/2 C. butter (3 sticks) 
  • 1 T. vanilla extract
  • 1 T. heavy cream 
  • 4 drops red food coloring

Whipped Cream
  • 1/2 C. heavy cream
  • 1 - 2 T. sugar

Preheat oven to to temperature required for white cake recipe.  Grease and flour two 9" cake pans, and set aside.

Drain and rinse cherry pie filling under running water. Press cherries between several layers of paper towels until very dry. Chop cherries fine and reserve 1/2 cup (discard remaining cherries, or reserve for other use).

Make white cake batter per instructions.  Gently fold cherries and 1/2 C. mini chips into cake batter, and divide evenly among prepared pans.  Bake on middle rack according to directions for your white cake recipe in two 9" pans.  (Probably 25-30 minutes in 350 degree oven, but check your recipe or cake mix box).

While cake is baking, dip maraschino cherries: Melt remaining 1 1/2 cups chips and shortening in bowl. Holding stems, partially dip dry maraschino cherries into chocolate and place on parchment-lined plate. Refrigerate until hardened, at least 10 minutes.

Once cake has cooled, make buttercream: In standing mixer fitted with whisk attachment, beat butter at medium-high speed until smooth, about 20 seconds. Add confectioners' sugart; beat at medium-low speed until most of the sugar is moistened, about 45 seconds.

Scrape down bowl and beat at medium speed until mixture is fully combined, about 15 seconds; scrape bowl, add vanilla, heavy cream, and red food coloring, and beat at medium speed until incorporated, about 10 seconds.  Then increase speed to medium-high and beat until light and fluffy, about 4 minutes, scraping down bowl once or twice.

Place one layer of cake on a cake plate or platter.  Using an offset spatula, spread buttercream evenly over layer, and top with second layer of cake.  Spread remaining buttercream over top and sides of cake, and smooth out frosting.

Make whipped cream: Place 1/2 C. heavy cream in bowl of stand mixer fitted with whisk attachment.  Add sugar as desired, and whip on on highest speed possible until mixtures stiffens & soft peaks form.  Mound whipped cream in center of cake and pile on chocolate-dipped cherries.  (If desired, you can pipe whipped cream from a pastry bag fitted with a decorative tip).  Serve immediately or refrigerate until serving.

Recipe Adapted from Cooks' Country

Thursday, July 7, 2011

Coconut Rum Horchata


So on my way home from work today, I got into a car accident.

Really it was just a fender bender - both cars were completely drivable, and thankfully no one was hurt.

And, it was in no way my fault.

Yessssssssssss.

(Just sayin'.)

But get this - I was hit by a woman making an illegal left turn into a Dunkin' Donuts.

Who, as it turns out, did not even have a license to drive a car.

I guess she really needed some donuts?

I can kinda relate though.

After waiting an hour in the heat, humidity, and impending thunderstorms for the officer to do his thing, I was wishing like Cher that I could turn back time and pour me some of this coconut rum horchata I made over the weekend.

I mentioned I had something up my sleeve for "Rum Day" at the beach, and let me tell you - this drink did not disappoint.

If you've never heard of horchata, it is a traditional sweet Mexican drink made with rice and cinnamon.  Which sounds kinda weird, but trust me when I say it basically tastes like rice pudding in liquid form.


Now I honestly have no idea how 'traditional' the original recipe is that I adapted, but I decided to take it to another level and use coconut milk & coconut rum.

Holy smokes.


Even people who said they do not like coconut thought this drink was awesome.

FYI - it's also quite scrumptious without the rum, so don't feel compelled to add it.

Unless you had an afternoon like mine.

In that case, feel free to double the amount!

Coconut Rum Horchata

  • 1 C. uncooked long grain rice
  • 2 quarts warm water
  • 1/2 t. ground cinnamon
  • 1 C. coconut milk
  • 1/4 C. fat free half & half
  • 1 (14-ounce) can sweetened condensed milk
  • 1 1/2 t. pure vanilla extract
  • 1/2 C. coconut or light rum, or to taste (this is optional – drink is great virgin!)

Mix the rice and warm water together in a bowl, and let stand for half an hour. Reserving the water, drain, and place the rice in the bowl of a food processor. Add the cinnamon and process until a paste forms. Return the rice to the water and let stand at least 2 hours, stirring occasionally as the water turns milky white.

Strain the rice through a very fine sieve (I used a coffee filter) into a bowl or pitcher, and discard the solids. Re-strain liquid to ensure all particles are removed.  Stir in coconut milk, half & half, condensed milk, vanilla, and rum (if desired) until evenly blended. Refrigerate at least 2 hours before serving.

To serve, divide ice cubes between eight glasses, and pour the chilled horchata over the ice.  Serves 8.

Recipe Adapted from Allrecipes.com

Sunday, July 3, 2011

Red, White & Blue Berry Trifle


Happy 4th of July, everybody!

Despite the rain we had all day, Mr. Vittles and I went to a cookout at my dad & stepmom's house tonight.

The weather didn't get us down one bit.  We ate a veritable feast of grilled steaks, sweet corn on the cob, grilled zucchini & carmelized onion, and mozzarella di bufala with basil, tomato, and balsamic glaze.

Woooo wee.  I had to practically roll myself outta there.

As Mr. V put it, my dad doesn't know how to cook for less than 50 people.

But... that didn't stop me from eating it all.

Plus this trifle.

I was feeling in the holiday spirit, so I wanted to make a red white & blue dessert.  I found this recipe on Martha Stewart's website, and thought it was such a fun, festive dish.


But knowing that we'd be eating a ton for dinner, I wanted to use something a tad lighter than your typical store-bought pound cake.

I decided on this yogurt cake, which is really more of a quick bread - definitely not as sweet or as rich as a pound cake.  But waaaay better for you.

The lemon-lime syrup and whipped cream cheese icing probably negate that, but that's ok :)

There's also berries and those are healthy.

Right?

If you're feeling less guilty than I, feel free to use your favorite recipe or store-bought pound cake - but I included the yogurt cake recipe in case you want to give it a try.

In any event, I am pretty excited for the holiday this year.  There's a lot of good stuff on the docket for tomorrow.

For starters, my dad, stepmom & their friends all go to the same beach and it's our 2nd annual 'Rum Day' where everyone brings a rum drink to try.

Last year I made the Choco-Almond Chai Tai, which turned out to be a hit.  And this year I have something equally weird but fun up my sleeve.

Heh heh.  More to come on that soon.

I am also excited for the fireworks in Asbury Park tomorrow night - which I must admit is unusual for me.  I know it sounds awful, but growing up in a town where they put on a weekly fireworks show in the summer really desensitized me to them.

But it's been years since I was able to just go down the street to watch fireworks, until now.  This year I can see them without having to drive and deal with traffic, parking, and all the general craziness that usually comes with 4th of July at the Jersey Shore.

We live so close to the beach/boardwalk that we can just walk to see the fireworks.  And we have some friends coming over tomorrow night to do just that.

How lucky are we?

Anyway, hope you all have a safe & happy holiday! Enjoy, and Happy Birthday, America!


Red, White & Blue Berry Trifle

• 1/4 C. plus 1/3 C. sugar
• 2 T. fresh lemon juice
• 2 T. fresh lime juice
• 1 homemade (see suggested recipe below) or store-bought pound cake loaf, cut into 3/4-inch-thick slices
• 8 oz. Neufchatel or reduced-fat cream cheese, room temperature
• 1 C. heavy cream
• 1/2 t. pure vanilla extract
• 3 C. fresh blueberries (three 1/2-pint containers), rinsed and dried
• 3 C. fresh strawberries, rinsed & dried then hulled & sliced

Make lemon syrup: In a small saucepan, bring 1/4 cup sugar, lemon juice, and 1/4 cup water to a boil over medium heat, stirring to dissolve sugar. Let cool completely, then brush over both sides of cake slices. Quarter each slice.

With an electric mixer, beat cream cheese with remaining 1/3 cup sugar on high speed until lightened. With mixer on medium speed, gradually add heavy cream in a steady stream; continue beating until mixture is light and airy (mixture will be like a very soft whipped cream - should take a few minutes of mixing).

Arrange half the cake pieces in the bottom of a 2-quart serving dish. Spoon half the cream-cheese mixture over cake in dollops; spread to sides of dish. Scatter half the blueberries and strawberries on top. Repeat layering with remaining cake, cream-cheese mixture, and berries, piling berries in the center.

Cover, and refrigerate until chilled, at least 1 hour and up to overnight.  Serves 6.

Trifle recipe adapted from MarthaStewart.com

Whole Wheat Yogurt Cake

• 1/2 C. butter (1 stick), softened
• 1/2 C. coconut palm sugar (or brown sugar)
• 5 T. agave nectar
• 1 t. vanilla extract
• 1 egg
• 1 C. whole wheat pastry flour
• 1 C. all-purpose flour
• 1/2 t. cinnamon
• 1 t. baking soda
• 1/2 t. baking powder
• 1 C plain, nonfat Greek yogurt

Preheat the oven to 350°F. Grease and flour a 9 x 5 inch loaf pan.

In a large bowl, cream together the butter, coconut palm sugar, agave, and vanilla until light and fluffy. Beat in the egg until smooth. Combine the flour, baking soda, baking powder, and cinnamon in small bowl; stir into the batter alternating with the yogurt.

Spread batter into prepared pan, and bake for 45-50 minutes in the preheated oven, until a knife inserted into the center comes out clean. Cool in pan 10 minutes, then remove and cool completely on wire rack.

Cake recipe adapted from Chobani Yogurt

Thursday, June 16, 2011

S'mores Blondies


So last night I went out with a couple of my girlfriends who I have known for almost 15 years.

Unfortunately between the craziness of life and the distance between us, it seems we don't get together nearly as often as we should.  But we had so much fun catching up over dinner & some cocktails, and as we were reminiscing about old times it started turning into griping about new times. 

Mainly, the fact that once you get to be around 30 years of age, your appearance really starts to change.

And... it can be a little disconcerting.

Some of it is the result of not realizing that when you're young & dumb, you will pay for it later.

Like baking in the sun all day without sunscreen.

Especially when you lived at the beach your whole life, and then went to college in Florida.

Stupid, stupid, STUPID.

Then again, other problems seem to crop up out of nowhere.

For instance, despite the beautiful weather outside, my friend observed that the three of us were all wearing cardigans - not because they're cute, but (as we all admitted) because showing the upper arm/back area has started to get downright dicey.

Not that any of us are overweight, it just seems like things that used to be tight are suddenly... er.... not-so-tight.

As my one friend put it, she woke up one day and noticed she had 'a couple of steaks' on either side of her back.

Now while that is definitely an exaggeration, I will say I know the feeling.

And the worst part is that it's only the beginning.

Ahh!

Something tells me these blondies probably aren't helping? 


Good thing Mr. Vittles spared me the calories & single-handedly ate the entire pan.

Smore's Blondies

  • 1/2 C. Butter (1 stick), melted and cooled slightly
  • 1 C. brown sugar, packed
  • 1 egg
  • 1 t. vanilla extract
  • 1/2 + 1/3 C. all purpose flour
  • 1/4 C. whole wheat pastry flour
  • 1/2 C. Graham Cracker Crumbs
  • 1/4 t. salt
  • 1/4 t. baking powder
  • 3 1-oz. semisweet chocolate squares, chopped (1/2 C.) or chocolate chunks
  • 1 C. miniature marshmallows

Preheat oven to 350F.

Beat together melted butter and brown sugar until smooth.  Add egg and vanilla extract, mix well.

Combine flours, graham cracker crumbs, baking powder, and salt in a small bowl.  Beat butter & sugar mixture on low, and with mixer running, add dry ingredients slowly.  Mix just until no flour streaks remain.  Add chocolate and marshmallows and mix to distribute evenly.

Press into a greased 8 or 9 inch square baking dish (dough will be pretty stiff).  Bake 20-25 minutes, do not over bake (22 minutes was perfect for me).  The blondies should be very soft when you take them out.  Cool completely.

Recipe Adapted from Shove It In Your Face

LinkWithin

Related Posts Plugin for WordPress, Blogger...