Showing posts with label cream. Show all posts

Saturday, August 15, 2015

Creamy Watermelon Popsicles


I know it's been a loooong time since I posted.

I even missed National Watermelon Day! (It was 8/3).

But hey- having a newborn and a toddler leaves very little free time for mommies.  And anyway, there is still plenty of summer left for you to enjoy these yummy popsicles.

You know what I've been enjoying this summer?

This face.


Yup, the Minion was born on June 17!  He was almost two pounds bigger than his sister at 8 lb 4 oz, and 20 inches.

Unfortunately I don't have any crazy stories for you, like driving myself to the hospital less than 2 hours prior to having the baby at exactly 37 weeks or having a 3 day-old baby during the worst hurricane our area has seen in the past 100 years.

Actually, thank God I don't have any crazy stories for you.

This little fella was in no rush, and made a much quieter appearance.  He stayed three days past his due date, to the point where I would have tried almost any trick to evict my overdue tenant.  Then a friend from work texted me the morning of June 16, asking "Have you tried triple chocolate cake yet??"

I stared at the phone, puzzled.  Was that, like, code for something?

But nope, she meant good old fashioned chocolate cake with chocolate frosting. Didn't have to twist my arm with that suggestion!  At worst, I'd have an enjoyable treat and add a pound or so to my already-massive body.

So I made the cake that afternoon, then ate some after dinner.  By 8:30 that night, I could tell the baby was coming.  I told Mr. Vittles he had better shower, because it might be a long night.  By 10PM, we called the doctor - then called my stepdad to come stay with Mini, and got to the hospital a little after 11.  Our little muffin made his appearance at 3:53AM the next day.


He definitely takes after his mommy and big sister with his love of food.  By his one-month checkup, he had already gained over 3 pounds.  I am interested in seeing his weight at his two-month checkup because I swear he's pushing 14 lbs now at 8 weeks.

Speaking of big sisters, the Mini has been a great one so far.  I can tell she is a little attention-starved, and getting sick of all the crying (join the club!), but she has not complained once about having a baby brother.

She might remind guests who come to meet or visit him that "He can't talk yet," but other than indignantly telling a Starbucks barista "My baby brother is NOT cute!" she has been very kind to him.  She kisses him, gives him her most special toys when he cries, and calls him "my Grayden." It's actually pretty adorable.


What's not so adorable is the harsh reminder of how awful it is to wake up in the night (luckily we are down to one time, but it still feels like I haven't slept in years) and spending what seems like one endless day trying to balance two kiddos and my own sanity.

I know this is nothing special, and people do it all the time- many with 3 or even more children. But yikes is it work!  The Mini is a very active little nugget, both in mind and body, so constantly tending to both of their needs often seems like more than a full time job.

I just keep reminding myself it's all temporary. Some day I will long for these summer days of snuggles and giggles and bubbles and mornings at the park and watching "Despickle-To-Me 2" a million and one times.

And, watermelon popsicle juice running down my chin.

Creamy Watermelon Popsicles
  • 3/4 C. sugar
  • 3/4 C. water
  • 4 C. cubed watermelon, seeds removed
  • 3 T. corn syrup
  • 1 T. fresh lemon juice
  • 1 C. heavy cream
Make simple syrup by combining sugar and water in a saucepan over medium heat until sugar dissolves. Allow syrup to cool, then pour into blender with watermelon - blend until liquefied. Strain watermelon mixture thru fine mesh sieve into a large mixing bowl.

Add corn syrup, fresh lemon juice and heavy cream - whisk well to combine.

Chill mixture, then pour into popsicle molds. Freeze overnight until solid, or at least 8 hours.

Makes about 4 1/2 C liquid which makes 10-12 popsicles in Zoku's classic mold (shown in photos). Or, you can use popsicle sticks & any mold of your choosing (paper cups, etc).

Recipe Adapted from Paula Jones, for Dixie Crystals

Friday, March 1, 2013

Thai Iced Tea Ice Cream


So as I recently said on Facebook... time flies when you're having fun.

(And sometimes even when you're not?)

Four months ago Monday, I was a pregnosaurus, scrubbing our shower and wondering why on earth my stomach hurt so badly.

Fast forward to today, and I have the cutest, wiggliest little munchkin on the planet (though I may be just a tad biased ;)).


I had all intentions of posting this yesterday, but as usual the day got away from me.  I had to bring the Mini to the pediatrician for her 4-month check-up, and then I spent the afternoon 'studying' for a promotional Civil Service test at my job.  (Which, as it turned out, was pointless because the majority of questions were not like a typical Civil Service test... all the exercises I practiced were nothing like the ones on our exam.  Go figure!)

In any event, the Mini & I had quite an adventure at the pediatrician.  We arrived in good spirits (see exhibits A & B below) but the longer we waited, the more antsy in the pantsy we became.


the calm before the storm ... in the pediatrician's waiting room

By the time the doctor arrived, the wheels had fallen completely off.

She screamed through almost the entire check-up, so much so that I could barely hear the doctor.  And THEN, just when I thought I had her calmed down, they gave my little love an oral vaccine... which she proceeded to throw up (along with the contents of her stomach) all over herself and the exam table.

(Words no parent wants to hear: "Hmm... I'll have to ask the doctor what we do now.  I've never had a child do that before.")

<Sigh>

So, Rotavirus... whatever you are... you better stand down, buddy.  We have enough issues to deal with around here.

In other news, I went back to work on February 8, so that's been a bit of an adjustment for the Vittles family... but it seems we're starting to settle into our new routine.  My mother-in-law is the BEST for offering to watch the Mini on her two days off.  I think they've been having some fun, which, let's face it, is what grandmas are famous for.  Gigi knits her adorable sweaters, and they go for walks around the house & listen to 2 Chainz.

(Ok fine, the last part isn't true... but wouldn't it be funny if it was?)

Then the Mini goes to my neighbor two days a week, and I stay home an extra weekday until the end of April.  At that point, she will go to my neighbor 3 days a week.

Amidst all this, umm, excitement, it's been pretty hard to find time to try out any new recipes (let alone take pictures and write.)  But for a while now I've been wanting to create an ice cream that tastes like Thai iced tea, and I decided it was time to finally cross that idea off the list.

I'm happy with the way it came out - the tea flavor is not super intense, but I didn't want it to be overpowering.  Also, the neat thing about this recipe is that you do NOT need an ice cream maker - just a way to whip heavy cream!


But before I leave you, I want to tell you guys about something that happened to me recently (relating to my statement above about finding time to blog) that I think is important to bring up.

A couple weeks ago, I got several emails from other bloggers telling me that fan page on Facebook was posting things from V&B, presumably without permission.  When I went to the Facebook page, I saw they had posted a "status" with a picture from one of my recipes and the entire recipe copied & pasted underneath.  However there was also a link to the original post I wrote, crediting the source as V&B.

They were apparently doing this with a lot of recipes, and bloggers were complaining - so eventually the page was shut down by Facebook and only allowed back up if the page administrator(s) took these things down.

Other bloggers were apparently outraged that their content was being "stolen" (although many of their comments to this effect were apparently removed by the page administrators).  Conversely, fans of the site were blasting bloggers for being oversensitive & thinking that their ideas were new.  They claimed that recipes can't be copyrighted, and anyway there is no harm in sharing recipes.

Now I'll be honest.  I don't know whether or not recipes can be copyrighted, and quite frankly I don't care.  I'm not the blog police, or the internet police.  I do this as a hobby, this is not my job.  In fact, I've probably (unknowingly) broken a few of rules from the Blogger Code of Conduct myself.  And whether it's right, wrong, or otherwise - I do not personally consider someone posting my recipe & photo to be stealing as long as they credit V&B somewhere (which these people did do).

I also understand the point that most "new" ideas are actually recycled.  Someone else has probably already thought of it.  A few times I've been sure I've thought of a totally new combination of flavors, only to do a Google search and find out it's already been done.

Furthermore, 'sharing' is great, and as a blogger I encourage it wholeheartedly.  Pinterest is one of my favorite sites, and that's all about the sharing!

But the thing that really bothered me about this whole situation was that the fans of this Facebook page didn't seem to get the fact that food bloggers spend hours thinking of ideas, testing & tweaking recipes, taking photographs, & writing posts.

Like, I don't just read a recipe somewhere and slap it up on V&B, word for word, with someone else's photo.  As tough as it is to find the time, I still try to blog when I can because I like it... and I take some element of pride in what I post.  Mr. Vittles teases me all the time for using the backspace button too much, but that's because I really do think about what I write.

Yes, blogging is a choice, certainly no one is making me do it.  I made the decision to put my ideas and words out there for others to potentially take.  I also earn a small amount of money from advertisements on the blog (though that was not the case until just about a year ago, and I've been writing almost 3 years).

But in my opinion, none of those things mean that I & V&B don't deserve to be treated with a little respect.

Before the aforementioned fan page was 'reconfigured' to adhere to Facebook's policies, I saw that the post with the V&B recipe had been shared almost 1500 times.  Which means waaay more people than that actually saw it, because not everyone who saw it would bother to share it.  And then you have all the people who in turn saw the shares.  But at the bare minimum... 1500 people got a recipe I wrote & photographed without ever having to take so much as a 5-second look at my blog.

Was this recipe some amazing feat of culinary wonder?  No, absolutely not.  I'm a government worker (as you now know) not a chef.  But since I took the time to make it & put it out there, I just think it would be nice for people to drop by V&B to get it.

And in my mind, that's what it comes down to - being nice.  Having courtesy and respect.  I was sad to see some really nasty comments from fans of the Facebook page, about how bloggers need to "get a life," "stop hiding behind their computers," "stop ruining a good thing," and "realize that everything they post is public property."

Well if I could say anything to those people, it's this:  I do have a life, and it's actually pretty busy.  Yet I still spend my precious free time making & posting recipes so people like you will visit my site.  And while you're here, maybe you'll see something else you'd like to make.  Maybe you'll leave a comment that will brighten my day.  But I can almost guarantee you won't do either of those things if the whole recipe is posted somewhere else, and you already got what you wanted.

(And by the way - if bloggers like me never posted our recipes, you'd have a lot less "old" ideas to share with each other.  Just sayin'.)

But... since it seems the people who made those comments could care less where a recipe comes from, it's unlikely I will ever have the chance to tell them much of anything!

So, my wonderful readers, I instead ask a favor of you -- when you find a recipe on ANY blog, that you like and want to share, please just think before you copy & paste the entire thing on Facebook or in a Pinterest pin.  Instead, consider posting a link so they can visit us.  Maybe we'll get a new friend.  To me, that's what blogging is all about!

As always, thanks for reading & for your support!

Thai Iced Tea Ice Cream
  • 1 5-oz. can evaporated milk (2/3 C.)
  • 8 black tea bags
  • 1 14-oz. can sweetened condensed milk
  • 1 pint heavy cream (2 C.)
  • a few drops each of red & yellow food coloring (optional - this will give it an orange hue like Thai Iced Tea)
Place evaporated milk in a microwave-safe bowl or measuring cup.  In 30-second intervals, heat in microwave until steaming, stirring after each.

Place tea bags in hot evaporated milk and steep 5 minutes.  Squeeze out excess milk from tea bags as best you can, and discard bags.

Empty tea mixture into a medium bowl, and mix with sweetened condensed milk until combined.  Add food coloring if desired, and stir until evenly mixed.

In separate large bowl, whip heavy cream until soft-medium peaks form.  Pour tea/milk mixture onto whipped cream, and fold in until mixture is combined & uniform color.

Pour into freezer-safe container, and freeze at least 6 hours or until firm.  Makes about 1 1/2 quarts.

Recipe Adapted from Eagle Brand 

Saturday, January 7, 2012

“Magic” Peppermint Ice Cream


The time of year after the holidays can get annoying.  Is anyone with me on this?

I hate going back to work after having all this time off (especially in a year like 2011 was, where Christmas & New Years fall on a Sunday and most people get Monday off).

I hate taking down Christmas decorations.

I hate that I always put last year when I write the date.

I hate hearing people's New Year's resolutions, especially when they get all crazy like, "Oh, I resolved not to eat chocolate any more, and run 5 miles a day."

Ummm... good luck with that.

And you know what else I hate (that's actually completely unrelated, but equally annoying)?

When bloggers post incredible-looking recipes that require specialized equipment that I don't own.

And then I have to go out and buy things like a mandoline slicer, an ice cream machine, and a donut pan, and then I can't fit all this #%*& into my kitchen anymore, and HOW DARE YOU brainwash me with these delicious treats?

{sigh}

But I am totally guilty of this myself.  Red Velvet Ice Cream.  Apple Chips.  Mini Baked Apple Cider Donuts.  Oatmeal Chocolate Chunk Ice Cream....

...ok ok, I know, sorry!

There's still more that belong on that list - and we all know I probably won't stop there.

Sooo... I will try to make up for it (just a little bit) right now.

This ice cream is magic because you don't need an ice cream maker!

And even if you have an ice cream machine, you may still want to try this because this method is a) way easier and b) pretty cool.  The ice cream comes out rich & creamy, and very scoopable even after days in the freezer.

By the way, for all you white-chocolate haters out there, worry not.  I'm not entirely sure why there is an ounce of white chocolate in the original recipe ... probably to do with the texture or a slight upgrade in taste?  But in no way does this ice cream taste like white chocolate, so don't be deterred by that.

P.S. - the reason why I made peppermint ice cream in the first place is because I saw this 'peppermint punch' on Pinterest and instead of eggnog someone suggested pouring ginger ale and Bailey's over the ice cream! Haven't tried it yet but I am definitely going to :)

“Magic” Peppermint Ice Cream

  • 1/2 C. sweetened condensed milk
  • 1 oz. white chocolate, chopped fine (or you can use white chocolate chips)
  • 1 1/2 t. peppermint extract
  • 1 1/2 t. vanilla extract
  • Pinch salt 
  • couple drops of red food coloring (optional)
  • 1/4 C. sour cream
  • 1 1/4 C. cold heavy cream

Microwave sweetened condensed milk and white chocolate in large bowl until chocolate melts, stirring halfway, in 30-second intervals.  Let cool.  Stir in peppermint, vanilla, salt, red food coloring (if using) and sour cream.

With electric mixer on medium-high speed, whip heavy cream to soft peaks, about 2 minutes.  Whisk one-third of whipped cream into white chocolate mixture.  Fold remaining whipped cream into white chocolate mixture until incorporated.  Mixture will be very light & airy.

Place in airtight container and freeze until firm, at least 6 hours or up to 2 weeks.  Serve.  Makes about 1 quart.

Recipe Adapted from Cooks Country

Friday, December 30, 2011

Gingerbread Coffee Creamer


Did everyone have a nice holiday?

I certainly did.  It was busy but lots of fun.

Last Friday we went up to visit my aunt Jody and her family.  Then Christmas Eve was spent with my dad & stepmom.


We went to her brother's house for Christmas Eve, where Pappy Vittles battled my little cousin Michelle in a vicious game of... tops?


My dad nicknamed his The Wild Weasel.

They also decided to bet on the game, and after so many "double or nothings," Michelle was in the hole about $10K - until she finally managed to beat The Wild Weasel and zero out her debts.

(Thank goodness for that.  She might have had to tap into her college fund before the end of the night!)

Then we spent Christmas Day with my in-laws, and ate a delicious roast beef dinner at Nana Vittles' house.

The highlights of my day included receiving The Booty Pop from my brother-in-law (in retaliation for giving him fart-filtering underwear last year) and winning the family beer pong tournament with Mr. Vittles on Christmas night.

You may not recall, but last year's tournament included cat-dancing and wearing fake mustaches... this year we got to wear fake noses also.


I would say a glorious holiday was had by all.

Although, I never thought I would say this, but at this point I'm soooo sick of eating.

My pants are pretty sick of it too.  Mr. Vittles may have to roll me to work next week in the event that I don't fit into my car.

But there's still time to enjoy the holiday flavor of gingerbread ... and without having to consume a single cookie.

If you're like me, coffee is a must, so why not make it festive?

Do it while you still can, before you're mentally done with gingerbread until next December.

Happy, healthy 2012 to all!

Gingerbread Coffee Creamer

  • 1/2 C. milk
  • 1/2 C. heavy cream
  • 2 T. molasses
  • 1/2 t. ground ginger
  • 1/2 t. ground cinnamon
  • 1/4 t. cloves
  • 1 t. vanilla extract

Whisk together milk, cream, molasses, ginger, cinnamon, and cloves in medium saucepan over medium heat.  When mixture begins to steam, remove from heat.  Stir in vanilla extract.  Strain mixture through a fine mesh sieve and store in refrigerator, up to 10 days.  Makes about 1 cup.

Adapted from Deliciously Organic 

Saturday, March 19, 2011

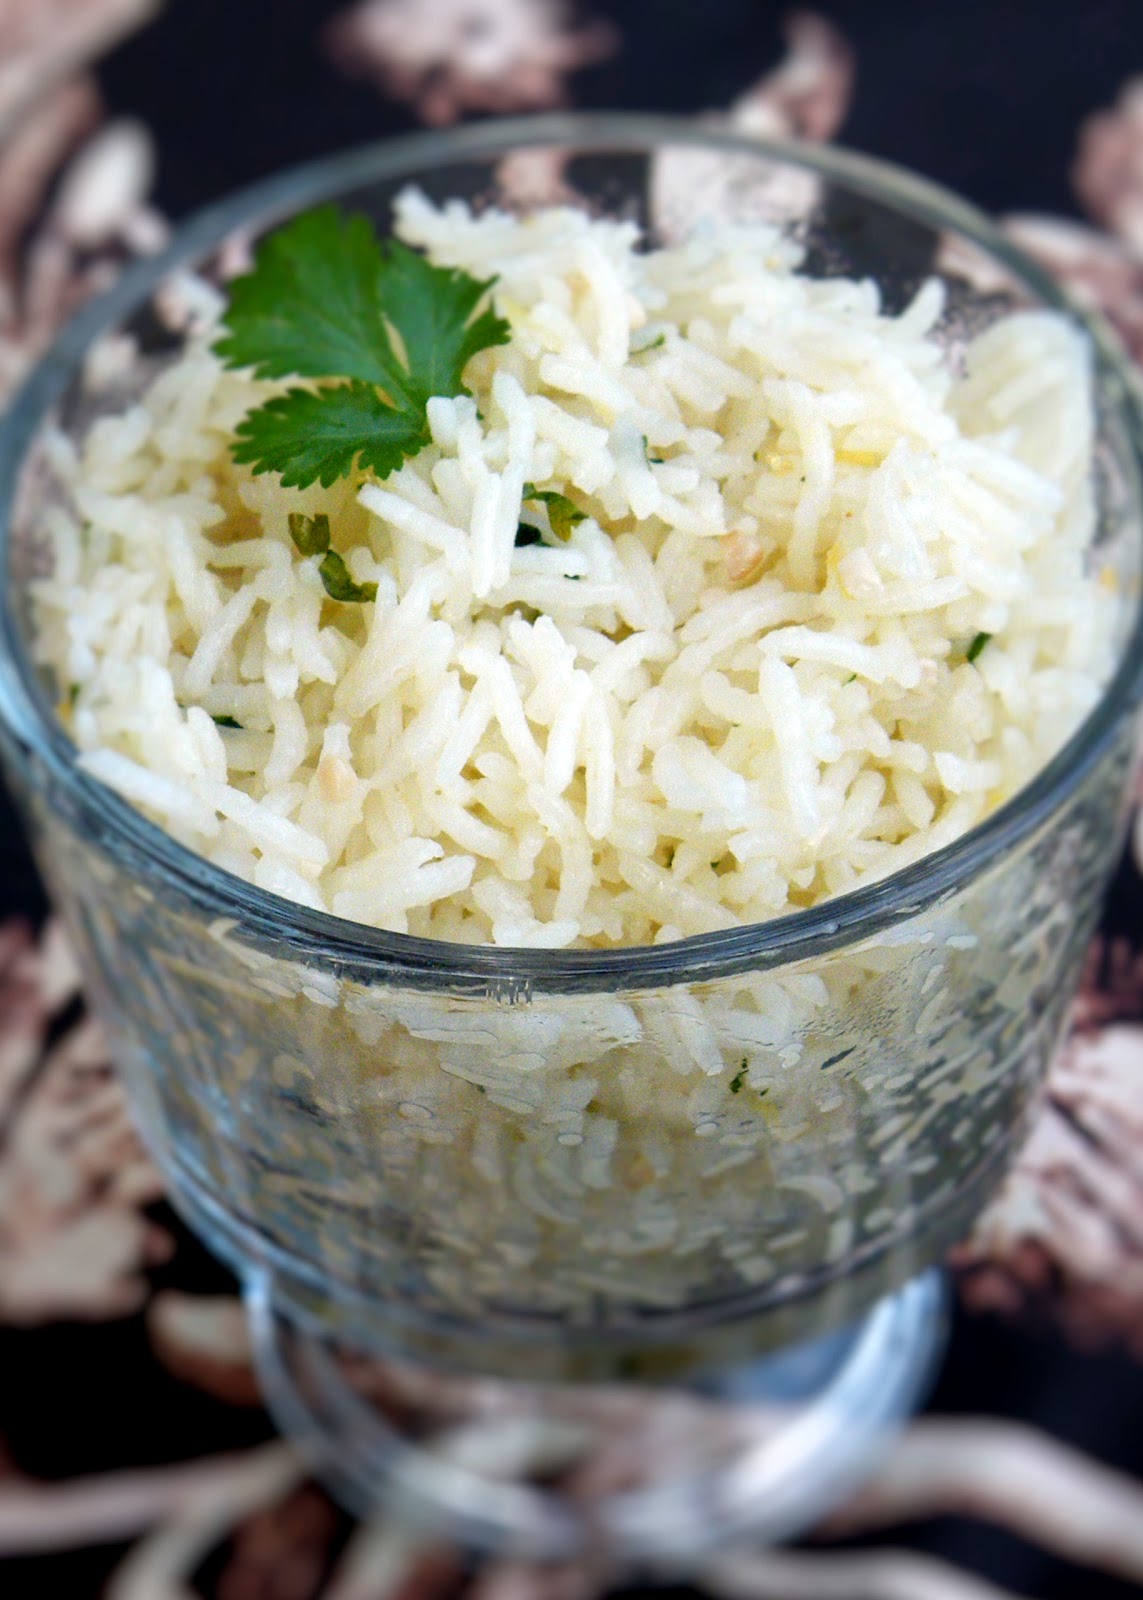
Lemon-Spiked Basmati Rice


A long, long time ago I shared with you a recipe for Chili Lime Basmati Rice.  Since then, it has become my go-to rice recipe and to put it mildly - I'm obsessed with it.

Mr. Vittles calls it "Your Rice" (meaning mine) because every time I make it I can't shut up about how delicious it is.

I pile giant scoopfuls on my plate and sometimes go back for seconds.

I eat the leftovers without anything else as the 'main' dish (because it's really the main dish of MY meal anyway.)

Let me tell you why I love this rice.  First of all- it's made in the oven.  Which is perfect for someone like me, who always manages to completely ruin a pan of rice on the stoveptop.

Second of all, the citrus in the rice makes it smell and taste absolutely heavenly.  Nevermind the cream and the butter, which certainly don't hurt either!

The Chili Lime recipe was the result of minor changes to a recipe by Kathy Casey for Lemon-Spiked Basmati Rice but I recently decided that since I loved the lime so much, I should at least give the lemon one a try.

And while the lime version is still my favorite, the lemon is awesome. 

I beg of you - try one of these versions of this rice.  It will seriously change your life.

Lemon-Spiked Basmati Rice
  • 1 C. basmati rice, rinsed and drained well
  • 3 T. butter
  • 3/4 C. 1/4-inch-diced onions
  • 1 1/2 t. minced garlic
  • small pinch cayenne
  • 1 1/2 C. water
  • 1 T. fresh lemon juice
  • 2 t. minced lemon zest
  • 1 1/4 t. salt
  • 2 T. thinly sliced chives or fresh cilantro
Preheat oven to 375°F. Place the very well-drained rice in a 1 1/2-quart baking dish.

Heat the oil in a nonstick or heavy saucepan. Add the onion and sauté over medium heat until the onions are soft, about 2 minutes. Add the garlic and cook for about 30 seconds. Add the remaining ingredients, except the rice and chives, and bring to a boil.

Stir the mixture into the rice, being sure to scrape up and include all the goodies. Seal tightly with foil and bake for about 20 to 25 minutes, or until the rice is tender and all the liquid is absorbed. Fluff with a fork before serving, then fold in the chives.

Recipe from Kathy Casey

Tuesday, February 8, 2011

Fauxstess Cupcakes


So I know it's a little late for me to be boarding the Fauxstess Cupcake train, but this is honestly the first time I've tried such a recipe.

Mr. Vittles and I went to our friends' Super Bowl party this weekend, and I was on cupcake duty. 

But I didn't want to make just any cupcakes- I wanted to make something special!  And what could be more special than a homemade version of Hostess cupcakes?

I will not lie to you though - these are a lot of work. 

And the cream filling (aka seven-minute frosting) is... terrifying.  It turned out absolutely fine, but those seven minutes were riddled with quite a bit of self-doubt (rivaled only by arm-muscle fatigue.)

However, it was all worth it in the end. 


I thought these were awesome, and everyone at the party seemed to enjoy them as well.  So if you have the free time to make these, I would definitely recommend it!

Fauxstess Cupcakes

Cake Recipe:
  • 1/2 C. plus 2 T. cake flour
  • 1/3 C. Dutch-process cocoa
  • 1/2 t.baking powder
  • 1/4 t. baking soda
  • 1/8 t. salt
  • 2 large eggs, separated and at room temperature
  • 1/3 C. canola oil
  • 1/2 C. plus 2 T. sugar
  • 2 T. water

Preheat the oven to 350.
In a medium bowl, whisk together flour, cocoa, baking powder, baking soda and salt.
In a large mixing bowl, beat together egg yolks, canola oil, 1/2 cup sugar and water until well combined. Add the dry ingredients and stir by hand just until combined.
In a clean medium bowl, beat egg whites at high speed until soft peaks form. Gradually add remaining 2 tablespoons sugar and beat until stiff and glossy. Beat one quarter of the whites into the batter to lighten the mixture. Add remaining whites and gently fold the mixture together until no streaks remain.
Evenly divide the batter between the wells of a 12-cup muffin tin coated with nonstick spray (they will be about one-half full). Bake until the cupcakes spring back when lightly touched in the center, about 13 to 16 minutes. Remove and let the cupcakes cool slightly before turning them out onto a wire rack to cool completely.

Once cupcakes are almost cooled, make cream filling.

Cream Filling (Seven Minute Frosting):
  • 2 large egg whites
  • 1/2 C. sugar
  • 1/4 C. light corn syrup
  • 2 T.s water
  • 1 1/2 t. pure vanilla extract

Combine filling ingredients with a pinch of salt in a metal bowl set over a saucepan of simmering water and beat with a handheld electric mixer at high speed until frosting is thick and fluffy, 6 to 7 minutes. Remove bowl from heat and continue to beat until slightly cooled. Reserve 1/2 cup of the filling to use for piping the swirls on top of the cupcakes at the end.
Once cupcakes are completely cooled, use a sharp knife to slice circles (that end up being cone-shaped pieces) out of the center of each cupcake.  Keep in mind that the closer your sliced circle is to the outside circumference of the cupcake, the bigger the well in the center of the cupcake will be (and the more filling will go on it!).  So slice according to your preference.


Once the cone is cut out of the cupcake, set it aside and fill the well with the cream filling, almost to the top.  (I find that using a pastry bag and large tip was the neatest way to do this, but yo can use a spoon if you prefer). 

Slice off the pointy bottom part of the cake cone so that just the top layer of it remains, then place it on top of the filling.  Press down to adhere.  (How you go through the above steps is up to you - you can either do all the steps on each cupcake one at at a time, or do each step to all the cupcakes, then the next step to all, etc.)

Once all cupcakes are filled, make the ganache.

Chocolate Ganache:
  • 1/4 cup cream
  • 4 ounces bittersweet chocolate, finely chopped
  • 1 tablespoon unsalted butter, softened

In a small saucepan, heat cream until steaming. Remove from the heat, add chocolate and let stand for 5 minutes. Add the butter and stir until smooth. Transfer the frosting to a small bowl and dip the top of each cupcake to thoroughly coat.
Spoon the reserved filling into a pastry bag fitted with a very small plain tip and pipe swirls across the center of each cupcake. Refrigerate the cupcakes for 10 minutes to set the frosting.
Recipe from Beantown Baker, (via Heather Drive, Smiten Kitchen, and Culinary in the Desert)

Monday, September 27, 2010

Angel Food Cake with Chocolate Whipped Cream


I don't know about you, but week-long birthday celebrations are always OK in my book.

Mr. Vittles is old .. I mean, thirty years-old as of Saturday, and we had multiple celebrations this year in his honor.

The first was last Saturday, the 18th, where two amazing things happened- one, I was actually able to surprise my husband with a party at an art gallery.

And two, I convinced him to step foot in said art gallery.

Ok, so it was only under the guise of attending my friend's parents' surprise 40th anniversary party... but he went there nonetheless.  (FYI, an art gallery is a perfect venue for a party - it's a big empty room that's already been decorated for you!  Especially if you find a fabulous, non-stuffy place like this one.)


Mr. V is a tough one to keep secrets from, though.  He is not only very smart but very nosy.  Not that I don't have a little Curious George in me too, but this is a difficult trait to work with with when you're trying to plan a party right in front of someone without them knowing.

Thankfully he works almost twice the amount I do (yes, I have a full-time job) so I was able to do most of it when he wasn't home.  Everything else I was able to do out in the open because he thought I was helping my friend.

Bwah hahahaha!

So the good news is that he was super surprised, but the bad news is that I have broken all trust in our marriage.

!!

Kidding.

I think?

But either way, we had a fabulous night filled with good friends, close family, delicious food & desserts, and lots of alcohol.  Then, when the formal party was over, a group of us went to a bar, stayed up way past our bedtime (not that that's saying much for Mr. V and I), and some of us even passed out in a pile of spilled cookies in the hotel room.


What could be better than that?

Devon Vittles put it best when she said "If your 30th birthday party is any indication of how much fun you are going to have in the next decade, I'd say you are all set."


Insanity.

Anyway, since I purchased a cake for the party, I decided I should make the V Man's favorite cake on Friday.  But his actual birthday (September 25) was spent in Cape May celebrating the marriage of our friends Bryan and Pauline, so he has barely had a chance to eat any of this cake yet.

It's probably not as good as when his mother or Nana Vittles makes it, though - it's my first go-around and Nana "wings it" so I had no real measurements to accompany the list of ingredients.


It's also slightly painful for me to cover a virtually fat-free cake in an entire pint of whipped cream & melted chocolate - especially since, like these flourless chocolate cookies, angel food cake is made almost entirely of sugar.

So between you, me, and the entire internet community (which includes my mother-in-law who reads this blog religiously)-

I made my cake with less whipped cream & glaze than my in-laws do.  

(Ahh! I thought lightening might strike me down as I typed that but I seem to have all my limbs & mental facutlies, so I guess we're all good.)

Mr. V... was none too happy to hear this.

Maybe that's why the cake was still sitting in the fridge untouched until about an hour ago?

He claims he was waiting for candles and a song.  He also says that he's going to tell my dad on me (?) because not only did I refuse to sing to him, I did not do the Birthday Dance of Joy that is customary in my family.

I pointed out that I already gave him a cake with candles and sang 'happy birthday' at his party, but there's no reasoning with him.


And to think I voluntarily agreed to an eternity of this abuse!

Luckily he was able to get the full-fat/full-deliciousness version, complete with song and candles, at his final celebration yesterday (courtesy of Pammy Vittles).  So all is right in the world, and it's a happy birthday indeed :)

Now if you love sweets on top of sweets like Mr. V, just double the whipped cream and glaze amounts below for one angel food cake - you will also want to cut the cake into 3 layers rather than two to make room for the extra whipped cream!

Angel Food Cake with Chocolate Whipped Cream
  • 1 angel food cake (either made from your favorite recipe or purchased from a store)
  • 8 oz. heavy cream
  • 3 T. unsweetened cocoa powder
  • 1/4 C. - 1/2 C. powdered sugar (depending on how sweet you like it)
  • 1/2 t. vanilla extract
  • 2 T. butter
  • 1 oz. baking chocolate (I used semi-sweet)
  • 2 T. milk
  • 1/4 C. powdered sugar, plus more as needed for desired consistency
Cut completely cooled cake horizontally to create 2 layers.  Place bottom layer on plate.  In medium bowl, combine heavy cream, cocoa, vanilla, and 1/4 C. powdered sugar.  Whip with whisk attachment on a mixer until stiff peaks form, about 4 minutes.  Spread whipped cream over bottom layer of cake, and replace the top layer of the cake.

In a separate medium, microwavable bowl, combine butter and baking chocolate.  Melt together in 10-15 second increments, stirring after each until smooth.  Add milk and 1/4 C. confectioners sugar, and mix until combined (I used a hand mixer here, still fitted with whisk attachment, for convenience).

Add more confectioners sugar if needed to reach desired consistency.  Pour glaze over the top of the cake, allowing to drip down sides.  Serve immediately, or refrigerate to serve cold.  Refrigerate any leftovers.

Family Recipe, Origin Unknown

Thursday, May 6, 2010

Strawberry Shortcake Cookies


This Sunday is Mother's Day.

Last year on Mother's Day, I went to a flea market with my mom, and we picked out plants for her garden and my deck.  Then we went back to my house and I cooked breakfast for her and my stepdad.

Now this is my first Mother's Day in 27 years without my mom, and all I have left of her are these memories.

  Me & Momma Vittles - Mother's Day 1986

I am thankful to have an amazing stepmother and mother-in-law to celebrate with, but I would do anything to celebrate with her too.

So if you have a mother (and/or mother-figure) in your life, I hope you let her know how special she is to you every single time you have the opportunity.

Don't wait for a special occasion. You never know what tomorrow might bring.

But Mother's Day is the prime time to show her that she means the world to you, so don't drop the ball on this one.

Tell her how proud you are to have her as your mother.

Tell her you're sorry for all the times you were god-awful to her (I don't care how awesome you are now - you were god-awful to your mother at some point in your life.)

Tell her how much you appreciate everything she's done for you, and all the sacrifices she's made for you.

Tell her how happy you are to have her in your life.  

Just tell her you love her.

And these cookies might help get your point across.


Strawberry Shortcake Cookie
  • 12 ounces strawberries, hulled & cut into 1/4" dice (2 C.)
  • 1 teaspoon fresh lemon juice
  • 1/2 cup plus 1 tablespoon granulated sugar
  • 2 cups all-purpose flour
  • 2 teaspoons baking powder
  • 1/2 teaspoon coarse salt
  • 3 ounces (6 tablespoons) cold unsalted butter, cut into small pieces
  • 2/3 cup light cream
  • Sanding sugar, for sprinkling

Preheat oven to 375 degrees & line baking sheets with parchment paper.  Combine strawberries, lemon juice, and 2 tablespoons granulated sugar.

In a separate large bowl, whisk together flour, baking powder, salt, and remaining 7 tablespoons granulated sugar.  Cut in the cold butter with a pastry cutter, or rub in with your fingers, until mixture resembles coarse crumbs.

Stir in cream until dough starts to come together, then stir in strawberry mixture.

Using a 1 1/2-inch ice cream scoop or a tablespoon, drop dough onto baking sheets spacing evenly apart & sprinkle with sanding sugar.

Bake until golden brown, 18-22 minutes. (Monitor carefully towards the end). Transfer to wire rack & let cool.

Cookies are best served immediately, but can be stored in an airtight container at room temperature for up to 1 day.


Recipe Adapted from Martha Stewart Living, June 2009

LinkWithin

Related Posts Plugin for WordPress, Blogger...