Showing posts with label ice cream. Show all posts

Sunday, July 24, 2016

Peanut Butter Cup Ice Cream (No Machine Required)


Here we are at the end of July already.  A few weeks ago, Mr. Vittles and I were sitting out on the deck, enjoying some toasted marshmallows around the chimnea after the kiddos went to bed.

At one point, some neighborhood kids went flying by on their bikes, laughing and seemingly having the time of their lives.

It made me nostalgic for my own childhood, when summer meant something entirely different.  "Remember when we were kids and summer was awesome?" I said aloud.

My husband replied "Yup. Now it's just hot."

And really, that's so true. At some point, summer loses its magic and becomes more of a pain than a wonder.  Sure you get to go to the pool or beach and do things like eat outside.  But for the most part, you just have to do all the same stuff you do all year, except now you get to sweat while you do it.

But that line of thinking got me wondering if maybe I needed to take a breather from 'adulting' once in a while, and enjoy summer like a kid again.

So one beautiful afternoon, while The Minion napped, The Mini and I blew bubbles and played in the treehouse.  We laid down in the grass for what seemed like ages just looking up at the clouds through the trees.  And it was wonderful.

The Minion turned one last month and got lots of fun outside gifts like a pirate ship water table, a balance bike, and a whale sprinkler - so we've been having lots of fun with those.


Then this week, I decided to show the Mini how we could made ice cream the old-fashioned way, with rock salt, ice, and some elbow grease. But I always see recipes for vanilla, and while that's nice and traditional, I wanted to try something different.

Mini is all about the baking experimentation, so that was fine with her.  We got the "gredients" (as she calls them) at the store, to try a peanut butter version.  I have always been intrigued by the peanut butter powder I seem to see everywhere now, and I figured this would be the perfect application.  We also bought a huge sleeve of peanut butter cups, and Mini was coveting them like a pirate hoarding buried treasure.

"These are all for me, right?"

"No.  They are for everyone.  We have to share."

Immediate tears. "But I want ALL of them!"

Boy, do I know that feeling.  Peanut butter cups are pretty much the best thing ever.  I convinced her to let me cut one up for our ice cream, then we took turns shaking our concoction. By 'taking turns' I mean I did about 95% of the shaking.... and I must say, it came out great.


It was a pretty hot day, and this does melt more quickly than store-bought ice cream, so we had to eat super fast - but she didn't seem to mind!


As it turns out, I still got to enjoy some vanilla yesterday, when my nephew Holt came over to play.  The Mini was on a road trip with her dad to go see my brother-in-law compete in an Ironman triathlon (go Uncle Nick!), so it was just Holt and I with the Minion.

I let Holt pick between the two flavors, and he is apparently more of a traditionalist.  He is also a much more jovial shaker...


...although despite his enthusiasm, the length of my 'turn' was only reduced by approximately 5% in comparison to my first session, haha!  (Needless to say, every kid wants to shake until they try it for about 10 seconds, so get your 'guns' out for this one.)  But our ice cream came out just as good, and vanilla is the perfect canvass for lots of sprinkles! Yum.


Happy summer, y'all!

Peanut Butter Cup Ice Cream 

Ice Cream:
1/2 C. half and half
1 T. sugar
1 T. + 1 t. peanut butter powder, such as PB2 (I found it at Walmart, in the peanut butter section)
1 large Reese's peanut butter cup, cut into small pieces
1/8 t. vanilla extract

Other Ingredients:
1 large & 1 small ziploc bag
lots of ice
1/2 C. rock salt (such as Morton's ice cream salt, I found it at Walmart in the salt section)

Combine all ice cream ingredients (half & half thru vanilla extract) in a sandwich or quart-sized ziploc bag.  (I would recommend first placing the bag over a cup or bowl to stabilize it, before you add the ingredients).  Seal bag tightly & set aside.

Next, fill a large, gallon-sized ziploc bag about halfway with ice.  Add rock salt and shake to distribute.  Nestle small bag inside the large bag, so that it is surrounded by ice cubes.  Then seal large bag, and shake consistently anywhere from 5 to 10 minutes, or until the ice cream mixture thickens to desired consistency.  Make sure the small bag stays surrounded by ice as much as possible. Serve and eat immediately.

Makes 1 to 2 servings (depending on the size of your consumer(s)!)

*Helpful hints: The shaking part can get quite messy as the ice melts, and the large bag may start to leak, so I definitely recommend doing the shaking outside.  I also recommend setting out your serving bowl(s) before you make the ice cream, so you can empty it out and start eating right away- it does melt fairly quickly.  (Or maybe I'm just too impatient and I don't shake it long enough, ha!)  You can also experiment with more or less peanut butter and/or peanut butter cups to your taste.  Enjoy!

Recipe adapted from Food.com 

Friday, March 1, 2013

Thai Iced Tea Ice Cream


So as I recently said on Facebook... time flies when you're having fun.

(And sometimes even when you're not?)

Four months ago Monday, I was a pregnosaurus, scrubbing our shower and wondering why on earth my stomach hurt so badly.

Fast forward to today, and I have the cutest, wiggliest little munchkin on the planet (though I may be just a tad biased ;)).


I had all intentions of posting this yesterday, but as usual the day got away from me.  I had to bring the Mini to the pediatrician for her 4-month check-up, and then I spent the afternoon 'studying' for a promotional Civil Service test at my job.  (Which, as it turned out, was pointless because the majority of questions were not like a typical Civil Service test... all the exercises I practiced were nothing like the ones on our exam.  Go figure!)

In any event, the Mini & I had quite an adventure at the pediatrician.  We arrived in good spirits (see exhibits A & B below) but the longer we waited, the more antsy in the pantsy we became.


the calm before the storm ... in the pediatrician's waiting room

By the time the doctor arrived, the wheels had fallen completely off.

She screamed through almost the entire check-up, so much so that I could barely hear the doctor.  And THEN, just when I thought I had her calmed down, they gave my little love an oral vaccine... which she proceeded to throw up (along with the contents of her stomach) all over herself and the exam table.

(Words no parent wants to hear: "Hmm... I'll have to ask the doctor what we do now.  I've never had a child do that before.")

<Sigh>

So, Rotavirus... whatever you are... you better stand down, buddy.  We have enough issues to deal with around here.

In other news, I went back to work on February 8, so that's been a bit of an adjustment for the Vittles family... but it seems we're starting to settle into our new routine.  My mother-in-law is the BEST for offering to watch the Mini on her two days off.  I think they've been having some fun, which, let's face it, is what grandmas are famous for.  Gigi knits her adorable sweaters, and they go for walks around the house & listen to 2 Chainz.

(Ok fine, the last part isn't true... but wouldn't it be funny if it was?)

Then the Mini goes to my neighbor two days a week, and I stay home an extra weekday until the end of April.  At that point, she will go to my neighbor 3 days a week.

Amidst all this, umm, excitement, it's been pretty hard to find time to try out any new recipes (let alone take pictures and write.)  But for a while now I've been wanting to create an ice cream that tastes like Thai iced tea, and I decided it was time to finally cross that idea off the list.

I'm happy with the way it came out - the tea flavor is not super intense, but I didn't want it to be overpowering.  Also, the neat thing about this recipe is that you do NOT need an ice cream maker - just a way to whip heavy cream!


But before I leave you, I want to tell you guys about something that happened to me recently (relating to my statement above about finding time to blog) that I think is important to bring up.

A couple weeks ago, I got several emails from other bloggers telling me that fan page on Facebook was posting things from V&B, presumably without permission.  When I went to the Facebook page, I saw they had posted a "status" with a picture from one of my recipes and the entire recipe copied & pasted underneath.  However there was also a link to the original post I wrote, crediting the source as V&B.

They were apparently doing this with a lot of recipes, and bloggers were complaining - so eventually the page was shut down by Facebook and only allowed back up if the page administrator(s) took these things down.

Other bloggers were apparently outraged that their content was being "stolen" (although many of their comments to this effect were apparently removed by the page administrators).  Conversely, fans of the site were blasting bloggers for being oversensitive & thinking that their ideas were new.  They claimed that recipes can't be copyrighted, and anyway there is no harm in sharing recipes.

Now I'll be honest.  I don't know whether or not recipes can be copyrighted, and quite frankly I don't care.  I'm not the blog police, or the internet police.  I do this as a hobby, this is not my job.  In fact, I've probably (unknowingly) broken a few of rules from the Blogger Code of Conduct myself.  And whether it's right, wrong, or otherwise - I do not personally consider someone posting my recipe & photo to be stealing as long as they credit V&B somewhere (which these people did do).

I also understand the point that most "new" ideas are actually recycled.  Someone else has probably already thought of it.  A few times I've been sure I've thought of a totally new combination of flavors, only to do a Google search and find out it's already been done.

Furthermore, 'sharing' is great, and as a blogger I encourage it wholeheartedly.  Pinterest is one of my favorite sites, and that's all about the sharing!

But the thing that really bothered me about this whole situation was that the fans of this Facebook page didn't seem to get the fact that food bloggers spend hours thinking of ideas, testing & tweaking recipes, taking photographs, & writing posts.

Like, I don't just read a recipe somewhere and slap it up on V&B, word for word, with someone else's photo.  As tough as it is to find the time, I still try to blog when I can because I like it... and I take some element of pride in what I post.  Mr. Vittles teases me all the time for using the backspace button too much, but that's because I really do think about what I write.

Yes, blogging is a choice, certainly no one is making me do it.  I made the decision to put my ideas and words out there for others to potentially take.  I also earn a small amount of money from advertisements on the blog (though that was not the case until just about a year ago, and I've been writing almost 3 years).

But in my opinion, none of those things mean that I & V&B don't deserve to be treated with a little respect.

Before the aforementioned fan page was 'reconfigured' to adhere to Facebook's policies, I saw that the post with the V&B recipe had been shared almost 1500 times.  Which means waaay more people than that actually saw it, because not everyone who saw it would bother to share it.  And then you have all the people who in turn saw the shares.  But at the bare minimum... 1500 people got a recipe I wrote & photographed without ever having to take so much as a 5-second look at my blog.

Was this recipe some amazing feat of culinary wonder?  No, absolutely not.  I'm a government worker (as you now know) not a chef.  But since I took the time to make it & put it out there, I just think it would be nice for people to drop by V&B to get it.

And in my mind, that's what it comes down to - being nice.  Having courtesy and respect.  I was sad to see some really nasty comments from fans of the Facebook page, about how bloggers need to "get a life," "stop hiding behind their computers," "stop ruining a good thing," and "realize that everything they post is public property."

Well if I could say anything to those people, it's this:  I do have a life, and it's actually pretty busy.  Yet I still spend my precious free time making & posting recipes so people like you will visit my site.  And while you're here, maybe you'll see something else you'd like to make.  Maybe you'll leave a comment that will brighten my day.  But I can almost guarantee you won't do either of those things if the whole recipe is posted somewhere else, and you already got what you wanted.

(And by the way - if bloggers like me never posted our recipes, you'd have a lot less "old" ideas to share with each other.  Just sayin'.)

But... since it seems the people who made those comments could care less where a recipe comes from, it's unlikely I will ever have the chance to tell them much of anything!

So, my wonderful readers, I instead ask a favor of you -- when you find a recipe on ANY blog, that you like and want to share, please just think before you copy & paste the entire thing on Facebook or in a Pinterest pin.  Instead, consider posting a link so they can visit us.  Maybe we'll get a new friend.  To me, that's what blogging is all about!

As always, thanks for reading & for your support!

Thai Iced Tea Ice Cream
  • 1 5-oz. can evaporated milk (2/3 C.)
  • 8 black tea bags
  • 1 14-oz. can sweetened condensed milk
  • 1 pint heavy cream (2 C.)
  • a few drops each of red & yellow food coloring (optional - this will give it an orange hue like Thai Iced Tea)
Place evaporated milk in a microwave-safe bowl or measuring cup.  In 30-second intervals, heat in microwave until steaming, stirring after each.

Place tea bags in hot evaporated milk and steep 5 minutes.  Squeeze out excess milk from tea bags as best you can, and discard bags.

Empty tea mixture into a medium bowl, and mix with sweetened condensed milk until combined.  Add food coloring if desired, and stir until evenly mixed.

In separate large bowl, whip heavy cream until soft-medium peaks form.  Pour tea/milk mixture onto whipped cream, and fold in until mixture is combined & uniform color.

Pour into freezer-safe container, and freeze at least 6 hours or until firm.  Makes about 1 1/2 quarts.

Recipe Adapted from Eagle Brand 

Monday, September 10, 2012

Pumpkin Pie Frappe... In The Raw


Is it just me, or is anyone else done with summer?

Maybe it's because I'm currently lugging around a 2 1/2-pound watermelon in my stomach, but I am totally over this season.

It doesn't help that Fall is my absolute favorite time of year, and I probably got a taste of it too early going up to Canada a few weeks ago. I want it to be here NOW!

I want cool, crisp air. I want jeans and sweatshirts. I want fallen leaves and apple-picking.

I want PUMPKIN SPICE!

Who's with me on that?

I recently applied through BlogHer to review In The Raw sugar, and when I was looking at their collection of amazing recipes, I noticed all the fall-themed ones were jumping out at me.

So naturally, I had to make the Pumpkin Pie Frappe ... which totally lives up to its name, and gets me even more excited for the upcoming season change!

Is it wrong that I want to swim in this creamy, pumpkiny goodness?


But in all seriousness - for those of you who are regular readers, hopefully you know by now that I'm very picky about my reviews. Making money off of a hobby is great, but that's not why I blog, and I would never personally endorse a company, product, or recipe I didn't truly like.

So that being said, I highly recommend checking out In The Raw's products. Like me, you've probably seen their sugar and Stevia packets in coffee shops and the like, but did you know that these products are also offered in bulk for baking and cooking?

Check out the lineup of goodies I received from In The Raw, which included their all-natural Turbinado sugar, organic agave nectar, and zero-calorie Stevia. So fun!


In all honesty, I was a strictly-white sugar type of gal until a couple years ago when I was diagnosed with a hormone imbalance; it puts me at a higher risk for diabetes if I'm not mindful about my carb intake. So at that point, I started looking into less-refined sugars and sugar alternatives and was pleasantly surprised to find out there are some really great options available.

For one, Stevia is the only low-calorie sweetener that I actually enjoy - I think it tastes the closest to 'regular' sugar, and I love that it's natural, not made from chemicals.

Agave nectar is great too because it's slightly sweeter than sugar, so you can use less, and it has a lower glycemic index. (In The Raw's Agave is also organic, so that's a bonus!)

But if all that health stuff doesn't tickle your fancy ... I recently discovered that In The Raw has this hilarious Au Natural In The Raw app that will 'censor' your sassy food photos.

Yep you heard me right. You can blur out your goodies', umm ... goodies?

In the age of 'pinning' and 'food porn' sites, one of the most fun things about baking is sharing your creations via photo. And now your hottest desserts can go "au natural" on the internet... without fear of showing too much!


How cute is that?? To view other photos or make your own, just visit hotintherawaction.com (and perhaps warn your significant other first, in case they see the site in your browser history - ha!)

And if that wasn't enough fun for you ... In The Raw is also giving you all a chance to win a $100 Cooking.com gift card! Entering is easy peasy, just visit the recipe section of their website, and leave a comment on this post telling me which recipe you'd most like to make.

Official Sweepstakes Rules:
No duplicate comments.
You may receive (2) total entries by selecting from the following entry methods:
a) Leave a comment in response to the sweepstakes prompt on this post
"b) Tweet (public message) about this promotion; including exactly the
following unique term in your tweet message: ""#SweepstakesEntry""; and leave the URL to that tweet in a comment on this post"
c) Blog about this promotion, including a disclosure that you are receiving a sweepstakes entry in exchange for writing the blog post, and leave the URL to that post in a comment on this post
d) For those with no Twitter or blog, read the official rules to learn about an alternate form of entry.
This giveaway is open to US Residents age 18 or older. Winners will be selected via random draw, and will be notified by e-mail. You have 72 hours to get back to me, otherwise a new winner will be selected.
The Official Rules are available here.
This sweepstakes runs from 9/10/12-9/30/12.
Please also be sure to visit the In The Raw brand page on BlogHer, where you can read other bloggers' posts and get more chances to win.

In the meantime... bring on the pumpkin spice!

Pumpkin Pie Frappe
  • 1/3 C. canned pumpkin puree*
  • 1/4 C. Sugar In The Raw®
  • 1/4 t. ground cinnamon
  • 1/8 t. ground allspice
  • 1 C. whole milk
  • 4 C. vanilla ice cream (slightly softened)
  • Grated nutmeg for garnish
Combine all the ingredients in an electric blender and blend until smooth. Serve in frosted glasses and garnish with the nutmeg. Makes 4 servings, about 3 1/2 cups.
*Be aware that there is a difference between pumpkin puree and pumpkin pie canned mix. The pumpkin puree works best for this recipe.
Note: The frappe can be stored in the freezer if not serving immediately. The consistency will be like soft ice cream.

Recipe from In The Raw

Monday, July 16, 2012

Citrus Sherbert


So I've been wanting to share with you all some very special news...

Mr. & Mrs. Vittles have a proverbial bun in the oven!


I'm about to be 23 weeks, and we just found out this past week that it's a baby GIRL!

She was a little shy at my 20-week ultrasound, so we had to go back two weeks later.

(Being difficult already!)

But we are super excited to be having a baby, and are so lucky that everything has been normal and right on track thus far.

Aside from some tiredness (and insane hunger) in my first trimester, I've honestly felt really good this whole time.

And even though I'd of course be thrilled either way, as my pregnancy has gone on I found myself hoping it was a girl.

Mr. Vittles' nickname for me is "Smalls" (like, "You're killin' me, Smalls!" from The Sandlot?)  So early on, he nicknamed our munchkin Mini Smalls.

Now it seems especially appropriate :)

On a more serious note though, I know what kind of special bond I had with my own mom (who passed away almost 3 years ago) and I feel so blessed that I'll have my own daughter to share that with.

My due date is November 14 - which just happens to be two days before her birthday.  Somehow I feel like she has been with me every step of the way!

Like me, my grandmother was also an only child, and I know she had a very special connection to her mother (who passed away just a few weeks after my mom was born, in 1954).

my grandmother, as a little girl, with her parents

I told you last year how I was so honored when Grammy gave me her mother's recipe box, and I found some really neat recipes- like the Easy Chocolate Pudding.

And as I mentioned in that post, I also discovered that my great-grandmother loved the flavor orange... a very high proportion of the total recipes involved oranges in some way!

But the one that intrigued me most was for Orange Sherbert.  

I've made a lot of ice cream, but never sherbert!  However, I thought this recipe perhaps needed a little more... er, instructions.


And since I love grapefruit, I also decided to do a mixture of juices.


What can I say?  I guess I just can't leave well-enough alone!

(A trait Mr. V has no doubt been enjoying for the past 5 years.  Can't wait to bug our child with it too.  Hehe!)

Citrus Sherbert

•  2/3 C. sugar
•  1/2 C. water
•  1/2 C. orange juice, at room temperature
•  1/2 C. grapefruit juice, at room temperature
•  1 T. lemon juice
•  1/2 C. heavy cream
•  3/4 C. lowfat milk 
•  1 t. vanilla
•  2 T. good quality vodka (optional, but it helps a lot with the consistency if you are planning on freezing the mixture)

In medium saucepan, bring sugar and water to a boil over medium-high heat.  Stir to dissolve sugar, then continue to boil 7-8 minutes longer until mixture thickens.

Add room-temperature orange, grapefruit, and lemon juices and stir well to combine.  (It’s important that the juice is room temperature and not cold, otherwise the sugar syrup will instantly harden.)  

Cool to room temperature, and pour into a large coverable container or bowl.  Add cream, milk, and vanilla, and stir to combine.  Cover and chill at least 30 minutes in refrigerator, then transfer to bowl of an ice cream maker.

Freeze according to manufacturer’s instructions.*  If using vodka, add it a few minutes before the mixture is done churning.   Serve from container for soft consistency, or transfer sherbert to a coverable, freezer safe container and freeze.  Makes a little less than a quart. 

*Note: There is also a method if you don’t have an ice cream maker (or you're like me and forgot to freeze the canister) – complete all steps prior to freezing mixture in ice-cream maker.  Instead pour into an 8” square glass pan and freeze about 25 minutes.  Remove from freezer and stir well, scraping up the ice that’s forming and incorporating it into the still-liquid parts.  Continue stirring every 20-30 minutes for the next couple of hours.  Then transfer to coverable, freezer-safe container and freeze until ready to serve.

Recipe Adapted from Family Recipe (Origin Unknown)

Sunday, April 15, 2012

Frozen Peanut Butter Cup Pie


It's in the low 70's outside right now, and the weather forecast for tomorrow tells me it's going to be 85 degrees.

So I think it's safe to say, summer is on it's way!

(So is global warming perhaps, because I don't know that I've ever seen such a warm winter in New Jersey?)

I love summer but the older I get, the more I hate being hot.

I hate being cold too - but at least you can put on sweatshirts and blankets.  There's no escaping oppressive heat.

Mr. Vittles and I have not lived in a house with good air conditioning probably since we both lived at our parents' house.  My first apartment after college (which was really more of a shed?) had one only window unit that I could barely afford to run anyway.  So my house was consistently in the upper 50s in winter and the 80s in summer.  Fun times.

Then our last apartment had central air... but little to no insulation.  So it really never got below the mid-70's at best.

In our place now, we have window units, but it's a large house and we were too cheap to buy a bunch of them - so we only had one for each floor of the house.

Sweat city.

Our new house that we're buying also does not have central air.  I think we're going to look into installing it, but we're not sure yet if that's going to be possible.

I sometimes wonder though how people lived before air conditioning.  Especially in warm climates.  I mean, even in the northeast we still get heat waves where the temperatures reach the upper 90s and lower 100s.

I guess you just get used to it?

Not me though.  Mr. Vittles always teases me that I have a very small window of comfortable temperatures. I think it's between 70 and 73, actually.  If our house is 65 degrees (which it usually is in the winter) then I'm freezing.  If it's 76 degrees in summer, I'm sweating.

Ridiculous, I know.

But there's nothing worse than having to turn on your oven when it's hot out.

So... with the prospect of summer brings the need for no-bake treats!


I saw a recipe on Confessions of A Cookbook Queen for Frozen Peanut Butter Butterfinger Pie and knew I had to save it for summer.

And... also make it immediately.

Just to, ummm, make sure it's good and all.

(Are you buying that excuse?)

In any event, I also knew that Mr. Vittles is not much of a fan of Butterfinger bars, so I figured peanut butter cups were a safer bet.  I also figured I'd throw some hot fudge in the mix for good measure.


This pie may give you cavities, but it will also make you (and your hot kitchen) very happy.  I promise.

Frozen Peanut Butter Cup Pie

  • One chocolate or Oreo Pre-made Pie Crust (6 oz.)
  • 8 oz block cream cheese, softened (I used 1/3 reduced fat from Philly)
  • 3/4 C. sweetened condensed milk
  • 1/2 cup creamy peanut butter
  • 1/4 cup powdered sugar
  • 8 oz tub Cool Whip, thawed (I used a light version)
  • 7 “snack size” Reese’s Peanut Butter Cups, chopped
  • 1/2 C. hot fudge topping (I used Hershey's Extra Dark)
  • Chocolate syrup, for decorative drizzling (optional)

In the bowl of a mixer, combine cream cheese, condensed milk, peanut butter, and powdered sugar.  Beat on medium speed until smooth and completely combined.

Using a rubber spatula, fold in the Cool Whip until combined.  Add chopped candy.

Pour hot fudge topping into bottom of crust (heat the fudge in microwave first if cold or too stiff).  Spread fudge evenly to cover bottom.

Pour peanut butter mixture into pie crust.  Drizzle top with chocolate syrup, if desired.  Cover and freeze until firm.

Adapted from Confessions of A Cookbook Queen

Saturday, January 7, 2012

“Magic” Peppermint Ice Cream


The time of year after the holidays can get annoying.  Is anyone with me on this?

I hate going back to work after having all this time off (especially in a year like 2011 was, where Christmas & New Years fall on a Sunday and most people get Monday off).

I hate taking down Christmas decorations.

I hate that I always put last year when I write the date.

I hate hearing people's New Year's resolutions, especially when they get all crazy like, "Oh, I resolved not to eat chocolate any more, and run 5 miles a day."

Ummm... good luck with that.

And you know what else I hate (that's actually completely unrelated, but equally annoying)?

When bloggers post incredible-looking recipes that require specialized equipment that I don't own.

And then I have to go out and buy things like a mandoline slicer, an ice cream machine, and a donut pan, and then I can't fit all this #%*& into my kitchen anymore, and HOW DARE YOU brainwash me with these delicious treats?

{sigh}

But I am totally guilty of this myself.  Red Velvet Ice Cream.  Apple Chips.  Mini Baked Apple Cider Donuts.  Oatmeal Chocolate Chunk Ice Cream....

...ok ok, I know, sorry!

There's still more that belong on that list - and we all know I probably won't stop there.

Sooo... I will try to make up for it (just a little bit) right now.

This ice cream is magic because you don't need an ice cream maker!

And even if you have an ice cream machine, you may still want to try this because this method is a) way easier and b) pretty cool.  The ice cream comes out rich & creamy, and very scoopable even after days in the freezer.

By the way, for all you white-chocolate haters out there, worry not.  I'm not entirely sure why there is an ounce of white chocolate in the original recipe ... probably to do with the texture or a slight upgrade in taste?  But in no way does this ice cream taste like white chocolate, so don't be deterred by that.

P.S. - the reason why I made peppermint ice cream in the first place is because I saw this 'peppermint punch' on Pinterest and instead of eggnog someone suggested pouring ginger ale and Bailey's over the ice cream! Haven't tried it yet but I am definitely going to :)

“Magic” Peppermint Ice Cream

  • 1/2 C. sweetened condensed milk
  • 1 oz. white chocolate, chopped fine (or you can use white chocolate chips)
  • 1 1/2 t. peppermint extract
  • 1 1/2 t. vanilla extract
  • Pinch salt 
  • couple drops of red food coloring (optional)
  • 1/4 C. sour cream
  • 1 1/4 C. cold heavy cream

Microwave sweetened condensed milk and white chocolate in large bowl until chocolate melts, stirring halfway, in 30-second intervals.  Let cool.  Stir in peppermint, vanilla, salt, red food coloring (if using) and sour cream.

With electric mixer on medium-high speed, whip heavy cream to soft peaks, about 2 minutes.  Whisk one-third of whipped cream into white chocolate mixture.  Fold remaining whipped cream into white chocolate mixture until incorporated.  Mixture will be very light & airy.

Place in airtight container and freeze until firm, at least 6 hours or up to 2 weeks.  Serve.  Makes about 1 quart.

Recipe Adapted from Cooks Country

Sunday, July 17, 2011

Oatmeal Chocolate Chunk Ice Cream


Growing up, I had just about every summer job you can imagine.

I always babysat, but I got my first 'real' job at 14, the summer before I went into high school.  I worked in the gift shop of a local aquarium on the boardwalk.

From there, I went on to work as a chambermaid in a bed & breakfast, an assistant manager of a frozen yogurt stand, a counselor at a day camp, a typist at a newspaper, an inventory-taker (!), and even a telemarketer (!!).  I also worked in a tanning salon, and the nursery of a gym where parents would drop off their kids while they worked out.

But one of my personal favorite employers was a Ben & Jerry's ice cream shop I worked at during college.

First of all, I got a really cool bulging forearm muscle from scooping hard ice cream.  And secondly, I got to eat delicious ice cream every day, which is basically a dream come true.

To be honest, I took advantage of that perk much more at the frozen yogurt place than Ben & Jerry's (let's not lie, a cup of ice cream on a daily basis would be a little much).  But I did treat myself at least once a week.

And I probably tried 75% of the flavors there, but I always came back to Oatmeal Cookie Chunk.

Ummm... whoa.  Cinnamon sweet cream base with chunks of oatmeal cookies and fudge.  What could be bad about that?

So when I realized that July is National Ice Cream month, I decided I needed to try & replicate my old favorite.


But I wanted it to be completely homemade and I didn't feel like first whipping up a batch of oatmeal cookies just to crumble up for ice cream. So I devised a sort of crispy, sugary oatmeal crumble instead.

And while it's not a dead ringer... it's pretty freaking close.

Not to mention pretty freaking delicious.

And the cool part about it is it's an eggless ice cream! I've never made one of those before, but it came out really well.

Which reminds me- don't be tempted to replace the corn syrup, that's part of what keeps it scoopable (if you're like me & try to avoid the stuff whenever possible, this might make you feel better).

Either way... I think my former employer would approve.

Oatmeal Chocolate Chunk Ice Cream

Oatmeal Crumble
  • ½ C. old fashioned oats
  • 2 T. butter
  • 2 T. brown sugar
  • 1 T. granulated sugar
  • 1/2 t. ground cinnamon
  • pinch salt

Cinnamon Ice Cream
  • 2 C. lowfat milk
  • 1 T. plus 1 t. cornstarch
  • 2 oz. cream cheese, softened
  • 1 C. heavy cream
  • 1/2 C sugar
  • 2 T light corn syrup
  • ½ t. cinnamon
  • 1 t. vanilla
  • 1/8 teaspoon kosher salt
  • 1/2 C. chocolate chunks

Make the oatmeal crumble: Preheat oven 350 degrees and grease a baking sheet.

In a medium skillet, heat the butter over medium-low until melted. Remove from heat and stir in the oatmeal, sugar, cinnamon, and salt.

Spread oat mixture on prepared baking sheet and cook for 8 minutes, stirring halfway through baking.  Empty oats back into skillet to cool.

Make the ice cream:
  Measure out the 2 C. milk then take 2 T. of it and mix with the cornstarch in a small bowl. In a large bowl, whisk the cream cheese until smooth.  Prepare an ice bath in a container big enough for the bowl with the cream cheese to fit in it.  (An ice bath is just cold water with ice).

In a large saucepan, combine the remaining milk with the heavy cream, sugar, corn syrup and cinnamon over medium heat. Whisking occasionally, bring the milk mixture to a boil, then reduce heat slightly and simmer, about 2 minutes. Off the heat, gradually whisk in the cornstarch mixture.  Return to a boil (watch carefully so it does not boil over) and whisk over medium heat until the mixture is slightly thickened, about 1 minute.

Gradually whisk the hot milk mixture into the cream cheese until smooth. Whisk in the salt and vanilla. Set the bowl in the ice water bath and let stand, stirring occasionally, until room temperature (about 30 minutes).  Then refrigerate mixture until chilled, about 2 hours.

Freeze according to the manufacturer's instructions. With ice cream maker still on, add chocolate chunks & about 2/3 of the oatmeal, and mix to evenly distribute.  Pack the ice cream into a plastic container, and press a sheet of plastic wrap directly onto the surface of the ice cream. Close with an airtight lid, and freeze the ice cream until firm, about 4 hours.  Use remaining 1/3 of oatmeal for sprinkling on served ice cream, if desired.

Ice Cream recipe adapted from Jeni Britton Bauer on Food & Wine; flavor inspired by Ben & Jerry's

Thursday, May 19, 2011

Chocolate & Kahlua Coconut Milk Ice Cream


Do you ever just get tired of life sometimes?

Not in a creepy suicidal way or anything - just more that the prospect of waking up tomorrow and doing everything all over again is bordering on painful.

I get like that every once in a while.  Today is one of those 'whiles.'

This week has consisted of work, rain, boot camp, rain, make dinner, rain, eat dinner, shower, go to bed, rain some more.

I am sick of work.

I am sick of rain.

I am sick of exercising.

Perhaps due to the fact that I actually went to boot camp 2 days in a row this week.

Mr. Vittles was surprised, to put it mildly.

"Boot camp again?" he asked.  "Didn't you just go yesterday?"

"Yes," I said, "but it's either tonight or tomorrow morning, because there are no Friday night classes.  And I want to do my own thing Saturday and not worry about class."

"Ok..." he conceded.

Then, "Are you sure you're not having an affair?"

Joking of course.

I think.

(I would not cheat on my husband... but if I did, let's hope it would be a lot more fun than exercising until I'm sick to my stomach.)

Now there are a few different trainers that run the classes, but the one that runs Thursdays' is BRUTAL.

With a capital B.  For Butt-Kicking

His name is Darrell & he is short, spunky, built beyond belief, and gives the Energizer bunny a run for its money.

Ironically, he is also the inventor of the Fat Darrell sandwich.

??

Go figure.

Now with that fact in mind - when we were leaving class today, he praised us for our hard work but warned us "Don't eat too much ice cream on the way home."

Since he didn't reference the amount of ice cream I can eat AT home, I guess that means unlimited?


Sweet.  Good thing I made this fabulous ice cream on Sunday :)

Chocolate & Kahlua Coconut Milk Ice Cream

  • 2 C. coconut milk (full fat is best, but I used the kind from the refrigerated aisle)
  • 1/2 C. whole coffee beans
  • 1 C. heavy cream
  • 3 T. agave nectar (use more if you like it sweeter)
  • 1/4 C. Dutch-processed cocoa powder
  • 3 T. Kahlua liqueur

Heat coconut milk in medium saucepan over medium heat, and bring to a simmer.  Add coffee beans and stir - remove from heat and let steep 30 minutes.

Strain mixture into a bowl, and discard coffee beans.  Add heavy cream, agave, cocoa powder and Kahlua to the coconut coffee- whisk until smooth.

Pour mixture through fine-mesh sieve (gets out any cocoa powder lumps) into the frozen container of an ice cream maker.  Freeze according to manufacturer's instructions.  Either serve directly from container (will be soft) or allow to ripen in freezer in a freezer-safe container.  Makes about 1 quart.

*For those of you that were looking for a non-dairy ice cream - ha, I tricked you!  No no, just kidding - you can replace the 1 C. heavy cream with another cup of coconut milk.  It will likely get harder in the freezer than the one with cream, so just leave it out on the counter for a few minutes.

Original Recipe

Thursday, January 27, 2011

Red Velvet Ice Cream


Since I had my foot surgery in early January, I have only been out of the house a handful of times.

I'm really not supposed to walk any sort of distance - not to mention when I do walk, it's pretty slow and somewhat embarrassing with my velcro shoes on.

But to help me combat cabin fever, Mr. Vittles has taken me on a few quick jaunts with him... like to get some iced coffee, or get windshield wipers for his car (exciting!) or to get some ice cream (that of course I was craving, not him).

I stayed in the car for the coffee and wipers, but was feeling bold the night of ice cream.  It was about 8:30 PM on an extremely cold night, so we figured there would not be many people there.

But we were wrong.  It was wall to wall people, namely teenagers.

And I was like a deer in headlights.

Being in a packed place when you have two feet with recently broken and shaved bones is scary enough.  But being in that condition in a place packed with "clumsy high schoolers" (as Mr. V pointed out) was absolutely terrifying. 

I stood in one spot, frozen, and constantly alert for any tomfoolery that might result in someone getting pushed into me and stepping on my toes.  I stayed in there long enough to order, then quickly hobbled back out to the car.

Needless to say... no more ice cream jaunts for me, for at least the next couple weeks.

Which just means, I have to bring the ice cream to me. 

This summer I experimented with a recipe for Cake Batter Ice Cream, where I used red velvet cake mix from a box.  It came out alright, but for some reason I was not happy with using cake mix.  (However, I have yet to see a recipe for cake batter ice cream that doesn't use it?)

So with Valentines Day around the corner, I decided to give this another shot - without a recipe, and without cake mix.  Which is a little dicey, because it would be awful to waste all the ingredients that go into a good ice cream!

But then again, I have made a lot of ice cream over the past few years (and learned a lot through some painful mistakes) so I felt pretty confident that I could do my own thing.


And I'm happy to report, this one came out great - very creamy, and it captures all the goodness of red velvet!

Red Velvet Ice Cream
  • 1 C. coconut milk
  • 1 C. half and half
  • 3 egg yolks
  • 2/3 C. sugar
  • 1 t. vanilla extract
  • 2 t. dutch cocoa powder
  • 1 T. red food coloring
  • 1 C. heavy cream

In medium saucepan, over medium-low heat, cook coconut milk and half and half just until steaming.  (This is important - you are about to add the eggs, and if the mixture on the burner is too hot it will cause the eggs to curdle).

Meanwhile, in medium heatproof bowl, whisk egg yolks and sugar until combined.  Pour half of milk mixture into bowl with egg yolks and sugar, and whisk until smooth.  Then pour contents of bowl back into saucepan, and return to burner on medium-low.

Cook custard an additional 3-5 minutes, until you can run your finger across a rubber spatula dipped in the custard and it leaves a trail.  Remove saucepan from heat and add cocoa powder - whisk until combined and no lumps remain.  Then add vanilla extract and red food coloring and whisk.

Transfer mixture to a large, coverable bowl.  Add 1 C. heavy cream, but do not stir.  Cover bowl and place in refrigerator to chill 3-4 hours.

Once mixture is thoroughly chilled, transfer to ice cream maker and freeze according to manufacturer's instructions.*  Then transfer to coverable, freezable container and put in freezer at least 3 hours before serving.  Makes about one quart.

*If you don't have an ice cream maker, check out this article on how to make ice cream without one.  I've never tried it, but Brown Eyed Baker is an amazing blog so I'm sure the author would not lead us astray!

Original Recipe

Thursday, July 1, 2010

Fresh Mint Chocolate Chip Ice Cream


Growing up, my mother liked to grow her own herbs  - among many, many other things.  (Ah, if only I inherited her green thumb!)  And I can remember her saying how mint bordered on being a weed, in the sense that it quickly took over whatever spot it inhabited.

Boy was she right.

If you recall, I received a lovely Easter herb basket from Pammy and Douggy Vittles.  And in said basket was some mint.

Well a little over a month ago I had to transplant the mint into its own pot because it was literally strangling everything else in the original basket.

As it stands now, I would say that 'flourishing' is an understatement.  Despite the fact that some sort of bug appears to be nibbling on the leaves (which I have been after Mr. Vittles to take care of with his arsenal of insecticides from work) this plant is healthy as an ox.

But mint isn't like parsley or cilantro.  You don't use it in a myriad of dishes.

At least not ones that I'm aware of?  When I think of mint, I imagine ice cream and mojitos.

So my first order of business was to make some fresh mint ice cream.

Mind you, fresh mint isn't exactly like mint extract.  If you think you're going to make this ice cream and its going to taste like mint chocolate chip from the grocery store, think again!  I don't really know how to describe it, but it's definitely different.

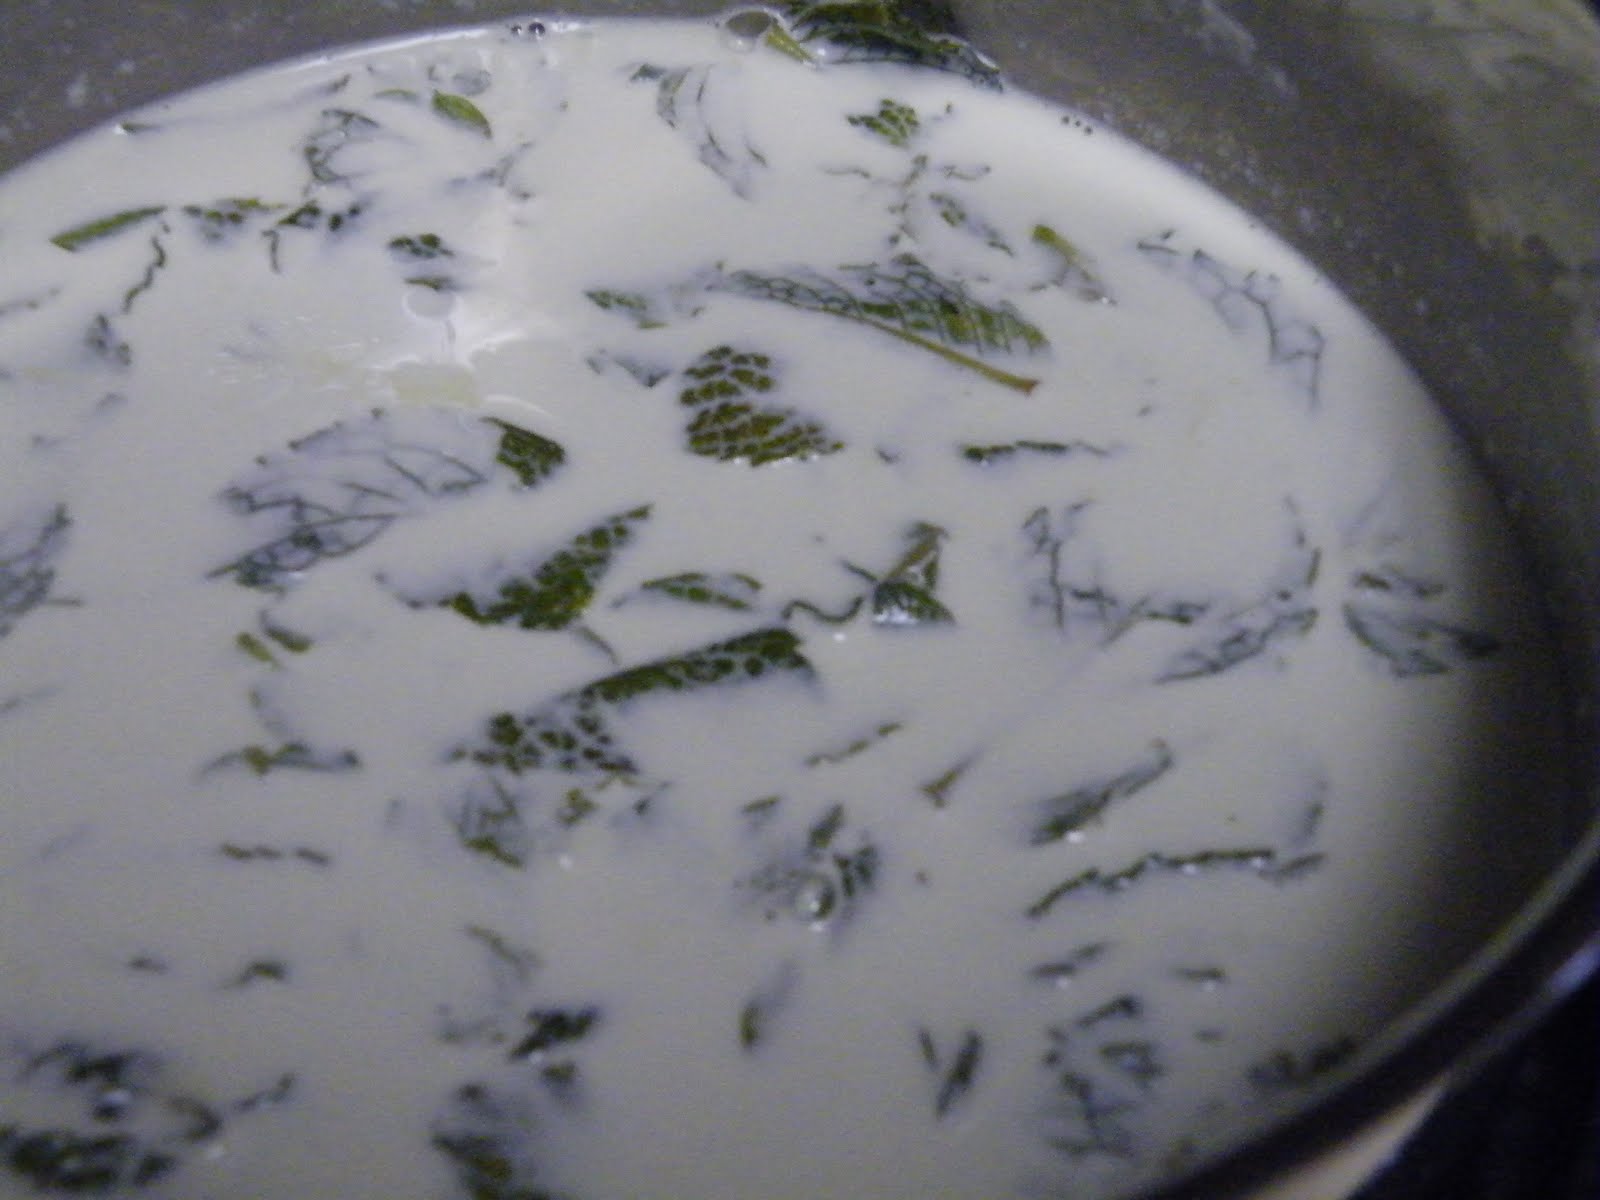
Mr. Vittles came home while I was steeping the leaves and asked if I was "boiling salad."


Which I thought was a pretty good indication he was not going to like it - however, when it was done he said it was "really good."

So don't let the fact that it's not neon green turn you away.

Also - if you don't have an ice cream maker, don't let that stop you either.  I just found this great article on how to make homemade ice cream without an ice cream maker on another of my favorite blogs, Brown Eyed Baker.

Yay!!  You know what they say - I scream, you scream... :)  Enjoy!

Fresh Mint Chocolate Chip Ice Cream
  • 2 C. half and half
  • 1 1/2 C. fresh mint leaves
  • 1/2 C. sugar
  • 3 egg yolks 
  • 1/2 t. vanilla extract
  • 1 C. light cream (or heavy cream, if you have it or you prefer it)
  • 1/2 - 2/3 C. mini chocolate chips
In a medium saucepan, heat half and half over medium heat.  Add mint leaves and bring to a simmer.  Remove pan from heat and cover, allowing to steep 30 minutes.

Once mint has steeped in half and half, prepare an ice bath (large bowl or pan of water with ice cubes).

Strain out mint leaves over a bowl, and discard the leaves.  Return half & half mixture to saucepan, and place over medium-low to medium heat until steaming but NOT simmering.

In now empty bowl, whisk egg yolks and then whisk in the sugar.  Pour in about half of the half & half mixture on the stove into the bowl with the sugar & yolks, and whisk to combine.  Pour contents of bowl into saucepan and whisk entire mixture (this is called "tempering" the yolks - if you add them all at once to the hot liquid they may curdle which is not good!)

Stir and cook about 6-8 minutes longer, until a custard forms (and coats the back of a silicone spatula/spoon).  Remove from the heat and place immediately in ice bath.  Allow to cool to room temperature.

Once mixture is cooled, add in the extract and stir to combine.  Then add the cream, but do NOT stir.  Cover and refrigerate at least one hour.

When mixture is thoroughly chilled, freeze in ice cream maker according to manufacturer's instructions.  You will add the chocolate at the end, when the ice cream is almost frozen, and allow to churn 15-20 seconds to mix in the chips.

Loosely Adapted from Ice Creams and Sorbets by Lou Seibert Pappas

Wednesday, April 21, 2010

Coconut Kona Ice Cream


It seems like coffee is one of those things you either love or you hate.  Rarely do you find a person that drinks just an occasional cup - its either all or nothing.

Personally, I always hated the stuff.  Bitter and nasty.  I wondered how people could actually bring this repulsive beverage to their lips every morning.

And then... a few things happened.

First, I graduated college and got myself a "real" job.

Let me tell you something, my friends.  Commuting every day to New York City from an hour and a half away will drive you to drink a lot worse than coffee.

That's when I realized most people don't drink coffee for the taste, they drink it to stay the h%#$ awake.

But, with this new-found realization, I also discovered cream, sugar, and ice can go into the coffee.

Meaning, it doesn't have to be bitter and nasty ... some people just prefer it that way. 

And then, just when I thought my chilly new friend couldn't get any more delicious, I walked into a Dunkin' Donuts where I found 'coconut' was a flavor choice for iced coffee.

I thought I had died and gone to heaven.

Now I'll admit, the marriage of coconut and coffee is an unlikely one.  But if you like each flavor separately, then take my word that you must give this combo a chance.

Mr. Vittles actually didn't like coffee, either, before met me - not so much because of the taste, but because he doesn't like warm beverages.  However,coconut iced coffee converted him to a believer as well.

Now, as I mentioned a few posts ago, Food Network Magazine has a contest where you come up with an original recipe featuring their "secret" ingredient for that issue.  And when I saw the secret ingredient was coconut for an issue I had read, I felt inspired.


Unfortunately ... my inspiration did not lead me to victory.

Apparently, coconut kona ice cream pales in comparison to coconut SCONES.

(Yup... I'm still bitter.)

But the good news is, I did create one of the most delicious ice creams I've ever tasted.  So at least it was a victory on some level.


I hope you enjoy this creation as much as Mr. V and I.

And please tell me if you do!

It will help me feel less bitter about the scones :) 

Coconut Kona Ice Cream
  • 1 C. sweetened coconut flakes
  • 1 C. half & half
  • 1/4 C. coconut milk
  • 3/4 C. sweetened cream of coconut
  • 1/2 C. whole Kona coffee beans
  • 3 egg yolks
  • 1 C. heavy cream
  • 1 t. vanilla
In medium saucepan over medium heat, stir flaked coconut until browned (about 5 minutes) being careful not
to burn.

Remove from heat and add coconut milk and cream of coconut, stirring after each addition.  Add half & half and whole coffee beans, and return saucepan to burner over medium heat.  Stir until mixture returns to a simmer.

Remove from heat and let beans steep for about 30 minutes.  In the meantime, prepare an ice bath big enough to fit the saucepan.

Strain coconut mixture through medium mesh sieve over a container, pressing the solids with the back of a spatula or spoon to extract all liquid.

While mixture is straining, rinse out saucepan and add 3 egg yolks to pan.  Whisk to combine.  Then discard solids from sieve, and return half the liquid in container to saucepan with the yolks.  Whisk to combine, then add remaining liquid.

Return pan to stove burner on medium-low heat, stirring constantly until mixture thickens & coats back of spatula (about 7-8 minutes). Be careful here - you want this to become a custard, but you don't want to cook the eggs too much and have them get chunky!

Immediately transfer saucepan to prepared ice bath and allow mixture to cool to room temperature, stirring occasionally.

When mixture is cooled, transfer to a coverable container and stir in vanilla.  Then add heavy cream but do NOT stir after addition.  Cover & refrigerate until chilled, at least an hour.

Transfer to ice cream maker & freeze according to manufacturer's instructions. Then transfer to coverable container, and freeze about 3-4 hours before serving.

Original Recipe

Thursday, April 8, 2010

Dark Chocolate Sorbet


When I was younger, I used to get so excited when I came home from school and saw that my mother had gone to the grocery store.  My first thought was, "What did she get me?"

Yes, yes... I was a greedy little monkey.

But Momma Vittles was good to me - she always picked up something with me in mind. 

Now one good thing (or, perhaps the only good thing) about doing the grocery shopping in your household is that you're always sure to come home with something you wanted.

Tuesday, though, I was a very good girl.  I put something back that I wanted because it was too expensive.

Ever had Haagen Dazs' chocolate sorbet?

Man, is it good.  And for someone that looooves chocolate but also realizes that in less than 2 months it will be time to put on a bathing suit, it's the perfect treat.  It has all the richness of chocolate ice cream without all the fat from cream & eggs.

I mean, not that its good for you or anything, but let's be honest - if not chocolate sorbet, it would just be chocolate-something-else right?

Or wait, is that just me...?

Anyway... delicious as it is, I just could not fathom paying $3.99 for a tiny pint of the stuff.

Especially when the first ingredient listed is... water?  Ugh.

And then it dawned on me... I have an ice cream maker and could probably make this at home.


A quick search for "chocolate sorbet recipe" brought up loads of stuff.  But some of the recipes involved too much work.  Like ... allowing the sugar and water to carmelize in the saucepan for 5-7 minutes without stirring. 

Carmelize?  Did I miss the memo that we were making candy now?  Please.

In the wise words of my high school math teacher Mrs. Bertolami - "We do not need to reinvent the wheel here, people."  So, I settled on a nice simple recipe for a nice simple sorbet.

And... it had 3 ingredients.

Ok, which is almost too simple, so I did jazz it up a bit. 

But it came out de-LICIOUS. 

So take that, Haagen Dazs! You think because you came up with a fancy, foreign-sounding name you can charge me $3.99 for frozen water, sugar & cocoa??

I think not.


Rich Chocolate Sorbet

  • 2 C. water
  • 1 C. sugar
  • 1 C. unsweetened cocoa powder
  • generous pinch of salt
  • 1 t. vanilla
  • 2 T good quality dark rum  (optional- mostly it helps the consistency, so it won't freeze too solidly)

Prepare an ice bath.  (*This isn't ice cream so it doesn't have to be crazy, just a few ice cubes in a large pan or bowl of water.  In fact you could probably skip it altogether if you want?  I only did it because it speeds up the cooling process).

In large saucepan, combine sugar & water over medium heat & stir until sugar is dissolved.

Whisk in cocoa and salt, and bring to a simmer. Simmer 3 minutes, whisking constantly.

Remove from heat & stir in vanilla.  Pour mixture into a bowl & set bowl in the ice bath.

Cool mixture to room temperature, stirring occasionally.  Then cover bowl and transfer to refrigerator.  Chill 2 hours, then freeze according to ice cream maker's instructions.  If using alcohol, pour it in about halfway through before mixture is totally frozen.

You can eat the sorbet straight from the ice cream maker, or transfer it to freezer-safe container & freeze for later.  Makes about 3 cups.

**Note: Per a comment I saw on the original recipe, you can supposedly make this without an ice cream maker.  The commenter said to just put it in the freezer in a container and it will be fine.  I haven't tried this so I can't confirm - but if you don't have an ice cream maker, it's worth a shot!


Adapted from Recipezaar

LinkWithin

Related Posts Plugin for WordPress, Blogger...