Sunday, October 30, 2011

Chocolate-Covered Nutella Bites


Halloween was always one of my favorite holidays growing up.

Dressing up, candy, pumpkins, scary stories & movies... what's not to like?

What's funny though is that it was probably my mother's least favorite holiday.

She hated Halloween.

But she was always a good sport about it.

We always carved pumpkins & decorated the house.  She would make me the best costumes, like Raggedy Ann, a bunny, and an Ewok from Star Wars.

She would also watch Garfield's Halloween Adventure with me.  Have you ever seen it?

It's amazing.

Ok... maybe that's a bit of an exaggeration.  But watching that movie is one of my favorite Halloween memories as a youngster.

Garfield convinces Odie to go trick or treating on Halloween so he can get double the treats.  But things take a wrong turn and they end up at an abandoned old mansion, where they learn from a creepy old man that ghost pirates are set to come that very night to get some treasure they left there 100 years earlier.

Yeah.  Ghost pirates.  Whoa.

Well they try to escape, but the old man steals their boat & they can't get off the island.  They end up getting away from the ghost pirates eventually, but Garfield nearly drowns in the process.  Odie saves his life, so Garfield decides to share & gives him half the treats after all.

My mom always used to quote Garfield's catch phrase from that movie - "Candy candy candy!"

(He says it a few times in the movie, but you can see it below around 4:40)


Because let's face it... Halloween is a license to eat as much candy as you possibly can without getting sick.

Sure kids love it, but adults end up buying a bag or two more than what they plan to give out to trick or treaters.

Or maybe that's just me?

Anyway, this year I was feeling bold and decided to try & make a little of my own candy.  I was inspired by a recipe I saw on Pinterest from The Whimsical Princess, for making your own Reese's Peanut Butter Eggs at home.

But in honor of the season, I decided to use fall sprinkles and miniature leaf, pumpkin, and acorn cookie cutters to give them an autumn theme.


The good part is, they are very versatile - you could make these with any sprinkles & in any shape (you could even just roll them in balls if you are too lazy to roll out the 'dough') for any occasion.

Or... any time you just feel like some "candy candy candy!"

Chocolate-Covered Nutella Bites

  • 1/2 C. Nutella spread
  • 1/2 C. Oreo cookie crumbs (about 5 whole cookies)
  • 1 C. powdered sugar
  • 2 T. butter, softened
  • 1-2 T. milk 
  • 2 C. semi-sweet or bittersweet chocolate chips
  • 1 t. shortening
  • sprinkles, for decorating (optional)

Line a large baking sheet with parchment, waxed paper, or non-stick foil and set aside.

In a large bowl of stand mixer fitted with paddle attachment, stir together Nutella, Oreo cookie crumbs, powdered sugar, and butter until well-combined.  Add 1 T. milk and mix on medium speed until a cohesive dough starts to form.  If necessary, add a little more milk, & blend until the dough holds together well after shaping into a ball.  (Dough should be soft & pliable, almost like Play-Doh.)

Place a large piece of waxed paper or parchment over countertop and place ball of dough on top.  Using a rolling pin, roll out dough to 1/2 inch thickness.  Cut out with desired cookie-cutters, and place shapes on prepared baking sheet.  Combine dough scraps back into a ball and re-roll, cutting more shapes until you use all dough.

Place baking sheet with shapes in freezer for about a half hour.  Line another baking sheet with waxed paper or nonstick foil & set aside.

Melt chocolate chips with shortening in large microwave-safe measuring cup or bowl, in 30 second increments, stirring after each.  Using a fork, dip shapes into chocolate, then shake off excess chocolate and scrape bottom of fork on side of cup or bowl to take off more chocolate from bottom.  Place on bare baking sheet, and decorate with sprinkles if desired.  (Note: You may need to re-melt chocolate if it starts getting hard.  You may also need to place un-dipped shapes back in freezer if they get too soft.)

Once shapes are all coated with chocolate, place in refrigerator 15 minutes to set chocolate.  Makes 30-40 1” bites.  Store in airtight container – does not require refrigeration, but bites will keep longer in the fridge than at room temp and also be more solid.

Recipe Adapted from The Whimsical Princess

Thursday, October 27, 2011

Fun with Fondant


Decorating with fondant is something I've been wanting to try for a while, but I was kind of intimidated.  I didn't know where to begin.

Have you ever felt like that with something? Like just it seemed too overwhelming, so you didn't bother?

Well I got one of those 'daily deal' type of things that we were talking about last week for a 3-hour fondant class at a local bakery, and I knew this was the perfect opportunity to give it a shot.

I took the class with my friend Danielle from work, and we learned all sorts of interesting things about this decorative technique from the owner of the bakery, Francesca.

The best part was that we got to try it ourselves, and then take our mini-cake home with us.

Even Mr. Vittles (who knows and cares little about food) was pretty impressed with the final product.

So this is more an informational post than a recipe.  I would like to share with you the basics I learned, especially if you are like me and find the whole idea of fondant to be both intriguing and mystifying.

(If you are an old pro at this, stop here.  This is my first go-around with fondant so everything seemed interesting to me - but I doubt it will to you.)  

When we got to the class, we each had a work station set up with two 7" layers of vanilla cake and a scoop of chocolate buttercream.  We also had a toolkit with an offset spatula, a plastic fondant rolling pin, a small round cookie cutter, a small cup of shortening, a pastry wheel-cutter, and a 'puff' made of cheesecloth with cornstarch in it, secured with a rubber band.

Francesca wanted us to use the buttercream (homemade by the bakery) as the filling of the cake, so we spread it on the bottom layer and placed the other layer on top.  Then she gave us white buttercream to lightly ice the entire outside of the cake - fondant cannot stick to a dry cake, it needs the layer of buttercream to stay in place.

Once the entire cake was iced (in a very thin, even layer) we got to work on softening the fondant.  And here's where everything became foreign to me.

First of all, I always thought people made the fondant before they assembled the cake.  And though I'm sure plenty of people do, Francesca actually recommended we purchase the fondant ready-made.  As she put it "For your first cake at home, you may want to try to make your own fondant - and then I'm fairly certain you will never make it again."

Hmm.  This lady seemed to know her stuff, so fair enough.  'No making of the fondant.'  Got it.

She recommended the brand Ballina, which is from somewhere in South America, because she said it is a good consistency for beginners.  Not too hard and not too soft.  According to her, the South Americans are masters at fondant?

However I was having trouble finding this brand for purchase online, or at least in small quantities.  But I believe she said Satin Ice was also good.  

In her opinion, the most popular (or at least the most readily-available) brand, Wilton, is not too tasty and also tough to work with (a couple of fondant veterans in the class attested to that as well).  So I guess I'll try to stay clear of that.

Anyway, she gave us each a package of white fondant and we had to break the 'brick' in two pieces to make it easier to soften.  Unless you're a masseuse or something, this process is pretty tough on your hands.  You have to grease up your digits with some vegetable shortening, then knead it into the fondant until it's soft & easy to work with.  (If you get a little too shortening-happy, you can always fix a sticky fondant with some cornstarch or confectioners sugar, so no worries).

Once you get your fondant nice & soft, you can color it if you want.  (FYI - you may want to wear gloves when working with the gel food coloring.  And make sure you grease up the gloves with shortening as well).  First we tried for a marble look, where you put little dots of coloring all over the piece you want to color, then twist it & smush it together until the color swirls throughout the fondant.  

You can also just keep working the fondant until it becomes a solid color.

Or, if you don't want to bother coloring the fondant yourself, many companies sell it already colored.  And if you want a bold color like black or red, Francesca said it's a must to buy the fondant pre-colored.  Otherwise you will have to use so much of the gel coloring that it actually degrades the structure of the fondant.

Once we got our fondant colored, it was time to roll it.  We dusted our surface area with plenty of cornstarch and placed the fondant in the middle.  

Now if you're a baker your first instinct here will be to roll back & forth like you would cookie dough or pie crust.  

But no.  

This is bad.  It weakens your fondant and makes it tear.  So you want to place your fondant rolling pin in the middle of the fondant and roll outward - one stroke at a time.  

Roll out from the middle, then return to the middle and roll into another direction.  Gently and evenly, so the thickness is the same throughout.  And if your cake is a circle, you want to roll the fondant into a circular shape that's a little bigger than the diameter of the cake plus twice the height.  

(For example, our cakes were 7" in diameter and 3" in height.  So we rolled our circles to about 15").

Once we got it rolled, the tricky part was getting it onto the cake.  Unfortunately it seemed there is really no good way to do this.  Since our cakes were small, I just picked it up and plopped it on the top, which seemed to work fine at that size.  But if you have a big sheet of fondant, I would guess you need to roll it loosely around the rolling pin and then unroll it onto the cake.

For any of us whose piece was much bigger than the cake we then had to trim the excess from the bottom - otherwise the fondant will start to get weighed down & tear.

Then we had to smooth it to the top & sides of the cake.  Francesca's advice was to get it smoothed on the top, then work around the side by pulling the fondant up & away from the side of the cake (to avoid pleating) and then smoothing it down.  (As you work your way around you will get to a point where you have so much extra that you feel like there's no way you can get it to smooth.   But you can.  Just do it.)

Once the sides were smooth, there was still excess fondant at the bottom, so then we had to take our wheel cutters around the bottom edge to clean things up. You want it to be tight against the cake.


After that, we smoothed the cake more using fondant smoothers.  You need two - one to hold the cake in place (on the top), and the other to smooth around the sides.  Otherwise you will end up touching the cake with your hands and leaving fingerprints on it!  The smoothers are pretty simple, just glide back & forth across the surface.  This should smooth out any dings or bumps in the fondant, but for those of us that had serious difficulties we took a little shortening on one fingertip to try & smooth the imperfections out.

Then came the fun part - decorations.

We got to use our leftover pieces of fondant to roll & cut out shapes or sculpt flowers.  I decided to make mine simple, with three roses on top, a couple leaves, and some dainty tendrils. 


Since I was making flowers that needed hold their shape, I had to turn the fondant into gum paste by kneading in a powder called Gum Tragacanth (sold as CAI Tylose Powder).  This made the piece of fondant stiffer and drier.

To attach my shapes to the cake, I used a dab or two of water but Francesca actually recommended using a little vodka - it attaches the fondant to itself well, but evaporates quickly due to the alcohol.  (And by hour 2 of working with fondant you may need to take a shot of it as well?  Just saying).

Once we got the top and/or sides decorated, we had to finish the bottom edge where we cut the fondant.  She suggested either placing small beads or balls at the base (like I did) or rolling pieces of fondant into ropes & braiding them together.  

And then... we were done!  We placed the cakes in our boxes and headed home to marvel at our creations.

And eat them, of course.

A few tips for fondant storage- if you have any unused fondant left over, you can coat it in a layer of shortening, then wrap it well in plastic wrap and stick it in a ziploc bag.  Francesca said it will keep for months like this without drying out.

Also, for the cake itself, when you are choosing your flavor for filling make sure it's not something that needs to be refrigerated (like chocolate mousse, whipped cream, or pudding).  Fondant cannot be refrigerated because water is it's worst enemy - you don't want condensation ruining your beautiful masterpiece, now do you?

By the way - if I have any occasions in the near future to make a fondant cake, I will try to add some photos of the process.  I didn't take pictures until I got home, so all I can show you is the finished product.  

Sorry  :(

But tell me ... have any of you worked with fondant in the past?  What do you think?  

So much fun, or too much work?

I'm really glad I tried it, and I had a great time.  But I also don't think I'll be quitting my day job to start making fondant cakes any time soon.  Special occasions only!  

Saturday, October 22, 2011

Candy Corn Crispy Rice Treats


I seriously debated whether or not to put this one up on the blog.

Not because it's bad, just because I wasn't sure if it would be up your alley.

I asked Mr. Vittles what he thought.  His parents were over last night, so I also had them weigh in.  And the consensus was to post the recipe.

But I'll be perfectly honest about these.  Full disclosure.

The flavor is very similar to the plain marshmallow version, but sweeter & with a subtle candy corn flavor.

The texture is a little more sticky & chewy.

And the color is a little... odd.  Almost unappetizing.  In fact, you might want to add some orange food coloring so your treats don't end up looking like the color of barfed-up Cheetos.

(Sorry for that visual, but honestly there is just no other way to describe this color).

But they are pretty delicious.

They are pretty festive.

They are pretty fun.


And I don't know what possessed me to melt candy corn, but I've gotta admit - it's a good time.  I kinda feel like everyone should try it once in their life.

Just don't say I didn't warn you.

Candy Corn Crispy Rice Treats

  • 2 T. butter
  • 3/4 C. candy corn
  • 2 C. miniature marshmallows
  • 3 C. crisp rice cereal

Line an 8x8 pan with foil.  Grease with nonstick spray or butter, and set aside.

In large saucepan, melt butter over medium-low heat.  Add candy corn and stir until completely melted, about 5 minutes.  Use the back of your spoon or spatula to smash any pieces still intact, to speed up melting.

Add marshmallows and stir until entire mixture is melted.  (Note: If you do decide to add orange food coloring to deepen the color, now would be the time.)

Add crisp rice cereal and stir well, until cereal is completely coated with marshmallow mixture.

Empty into prepared pan and press evenly using a piece of waxed paper or a buttered spatula.  Let cool completely, then lift bars out of pan using foil.  Cut into squares.  Keeps in airtight container up to 3 days.  Makes 9 squares.

Recipe Adapted from Kellogg's Rice Krispies

Friday, October 21, 2011

Review: Macadamia Crunch Truffles by bubo


Have you been noticing that there are so many sites like Groupon now, that offer a deal of the day?

I have.

And I am probably a member most of them.

Ok, well that may be a slight exaggeration ... but it's true that I'm a total sucker for these sites.  I love a good deal, and a site that does the legwork of finding one for you is a bargain-hunter's dream.

Especially when the deal involves delicious foods.

Enter Foodsherpa.

Not only do they find you a deal, they find it on really cool stuff you probably would never find on your own.  Like Hot Caramel Ginger Sauce and Pistachio Nut Butter.  And in their daily email, they tell you where the product was "born" and why it's awesome.

Can't go wrong with that.

So when they reached out to me and asked me to preview a product that is on sale today, naturally I jumped at the chance.

It's a can of macadamia crunch truffles, imported from a dessert shop in Barcelona.
Spain.

How cool is that?

Let me answer that for you.

It's really cool.  Not to mention delicious.  These bad boys are macadamia nuts covered in white chocolate and rolled in cocoa powder.


I don't even really like white chocolate and I devoured two of these without blinking an eye.

Apparently Carles Mampel knows his stuff.  Guess that's why he's an award-winning pastry chef?

Anyway if you are interested in these, then go get yourself some at Foodsherpa and enjoy!


Note: I did not receive any compensation to write this post, only the product for review.  The opinions are entirely my own.  However, please also note that as a member of their affiliate program, I do receive a percentage on orders placed at Foodsherpa via links from my blog. 

Saturday, October 15, 2011

Apple Cider Ginger Punch


I know I just posted an apple-related recipe, but let's be honest.

Fall is my favorite season, and I have no self control.  

I heard a commercial for Dunkin' Donuts' pumpkin products on the radio the other day that made me laugh.  This guy goes to order, and finds out the pumpkin flavor is only available for a limited time during fall.  So he wants to load up on pumpkin donuts & muffins... in some random lady's purse and also some other guy's briefcase.  Plus a dump truck for the coffee.

You kinda have to hear it to find it amusing, but I was thinking OMG, that's so me.

I tend to go a little overboard during fall.  I want to make everything pumpkin & apple.

I've been able to restrain myself fairly well thus far, but I can't sit on this drink any longer.  It's too good.  

If you've never had ginger beer, it's a non-alcoholic beverage that's really just ginger ale with lots of ginger.  My dad & my stepmom introduced me to it, apparently it's popular in Bermuda.  I found this Jamaican kind in our local grocery store.


I was having trouble deciding if I liked this better with vodka or spiced rum, though.  I eventually decided on vodka.  But tell me what you think?

Apple Cider Ginger Punch

  • 2 oz. good-quality vodka 
  • 2 oz. apple cider
  • 4 oz. ginger beer
  • club soda (I actually used unsweetened pomegranate seltzer) 
  • apple slices (optional)

Combine vodka, apple cider, and ginger beer.  Pour over glass filled with ice.  Top off with club soda & apple slices, if desired.  Makes one drink.

Adapted from Drinksmixer.com

Tuesday, October 11, 2011

Apple Crumb Cake


Crumb cake was always a favorite treat in my mom's family.

My grandparents would get crumb cake sometimes on weekends when I stayed over their house, and we almost always had it when they rented a beach house at the Jersey Shore for a week in the summer.

The best crumb cake in our area is from a bakery called Mueller's.  It's not overly big or fancy, but on the rare occasion that I go in there, it still brings back happy childhood memories.

Plus I want to eat everything there.

In one sitting.

Is that wrong?

Another time we always had crumb cake was at my great-grandmother's house (a.k.a. "Gigi").  She and my great-aunt had a favorite bakery where they lived in Lyndhurst NJ, and Aunt Joyce would stock up on all sorts of treats there before our visits.

No matter how many times my mom told her "Don't go crazy," we knew Aunt Joyce would be hitting up Mazur's for some crumb cake at the very least.

Or... half the store, at most.

Honestly, I think Aunt Joyce was perfectly happy to have an excuse to buy loads of goodies at the bakery.  (Needless to say, she was pretty much the coolest great-aunt ever.)

In any event, crumb cake is a treat that will always have a place in my heart.

I got to thinking about it recently, but I'm pretty sure I can never make it as good as Mueller's or Mazur's, so I needed to put a twist on it.


We just went apple-picking last weekend and still have loads of apples, so it seemed like a natural combo.  I'd never actually had an apple crumb cake before, but really - apples... butter... sugar... what could go wrong?

And while the crumbs are still the best part, at least with this you have something to look forward to in the cake itself.

I might cut down on the sugar a bit if I make this again, as I thought it was a little sweet - but then again Mr. Vittles enjoyed the extra sugar.

Either way, for as easy as this was, it was pretty scrumptious.

I think Aunt Joyce would approve.

Apple Crumb Cake

Cake
  • 3/4 C. sugar
  • 1 C. flour + 2 T.
  • 1 t. baking powder
  • 1/4 t. nutmeg
  • 2 eggs
  • 1/2 c. oil
  • 1/2 t. vanilla
  • 1 medium apple, peeled, cored & grated (about ½ C.)

Crumb Topping
  • 1/2 c. flour
  • 1/4 c. sugar
  • 1/4 tsp. salt
  • 1 tsp. cinnamon
  • 1/4 t. allspice
  • 2 1/2 T. butter, melted

Preheat oven 350 degrees.  Grease an 8x8 pan and set aside.

In a large bowl, whisk together sugar, flour, baking powder, and nutmeg until evenly distributed.  In a small bowl, whisk eggs, oil, and vanilla until combined and add to dry ingredients.  Mix well, then fold in grated apples. Pour into prepared pan and smooth evenly.

Prepare crumb topping: add first 5 crumb ingredients together in bowl, then add small amounts of melted butter, stirring with a fork or your fingers to combine into a crumbly mixture resembling wet sand.  Sprinkle crumbs on top of cake batter.  Bake 30-35 mins or until a toothpick inserted in center comes out clean with only a few dry crumbs attached.  Let cool on wire rack, then dust with powdered sugar before serving, if desired.

Recipe Adapted from Cooks.com

Tuesday, October 4, 2011

Chocolate Chip Cherry Cake


Mr. Vittles loves cherry & vanilla.

He also loves Cherry Garcia ice cream by Ben & Jerry's.

And he really loves his wife who makes him cakes that combine cherry, vanilla, chocolate, & whipped cream.


Now I already told you his favorite cake is angel food cake with chocolate whipped cream, which is what I made on his birthday.

But his dad and sister both have birthdays have right after his, so we celebrate them all during a family meal.

...where my mother-in-law not only cooks a fabulous meal, but dutifully makes each of their favorite desserts.

This year, I asked her what I could bring, and since she knew Mr. Vittles already got his angel food cake, she suggested an alternate dessert for him.

I knew it was the perfect opportunity to make this cake, which I've been saving in my recipe annals for just such an occasion.

The assembly is a little time consuming, though, so I actually cheated and used a boxed vanilla cake mix.

Just don't tell Mr. Vittles' grandmother.  I already got in trouble on Sunday for the angel food cake I made last year that only had two layers and a level of chocolate whipped cream that had her 'concerned.'

(Thank goodness I made three layers this year, because I bet Nana Vittles could sniff out a liar from a mile away.)

Either way, I think it's safe to say my husband is one of the luckiest guys in the world.

Like... really?  A grandma who's worried he's not getting enough chocolate whipped cream, and a wife who makes him two birthday cakes?

Hmph.  Lucky.


And did I mention he's also pretty special?

'Cause I wouldn't hand-dip maraschino cherries for just anyone :)

Chocolate Chip Cherry Cake

Cake
  • 1 recipe white cake batter (either a cake mix with all its necessary ingredients, or your favorite recipe) 
  • 1 (21-ounce) can cherry pie filling  
  • 1/2 C. mini chocolate chips  

Chocolate-Dipped Cherries
  • 1 1/2 C. chocolate chips (or you can use more of the mini)
  • 1 T. vegetable shortening  
  • 1 (10-ounce) jar maraschino cherries with stems, drained and wiped dry 

Vanilla Buttercream
  • 3 C. confectioners sugar
  • 1 1/2 C. butter (3 sticks) 
  • 1 T. vanilla extract
  • 1 T. heavy cream 
  • 4 drops red food coloring

Whipped Cream
  • 1/2 C. heavy cream
  • 1 - 2 T. sugar

Preheat oven to to temperature required for white cake recipe.  Grease and flour two 9" cake pans, and set aside.

Drain and rinse cherry pie filling under running water. Press cherries between several layers of paper towels until very dry. Chop cherries fine and reserve 1/2 cup (discard remaining cherries, or reserve for other use).

Make white cake batter per instructions.  Gently fold cherries and 1/2 C. mini chips into cake batter, and divide evenly among prepared pans.  Bake on middle rack according to directions for your white cake recipe in two 9" pans.  (Probably 25-30 minutes in 350 degree oven, but check your recipe or cake mix box).

While cake is baking, dip maraschino cherries: Melt remaining 1 1/2 cups chips and shortening in bowl. Holding stems, partially dip dry maraschino cherries into chocolate and place on parchment-lined plate. Refrigerate until hardened, at least 10 minutes.

Once cake has cooled, make buttercream: In standing mixer fitted with whisk attachment, beat butter at medium-high speed until smooth, about 20 seconds. Add confectioners' sugart; beat at medium-low speed until most of the sugar is moistened, about 45 seconds.

Scrape down bowl and beat at medium speed until mixture is fully combined, about 15 seconds; scrape bowl, add vanilla, heavy cream, and red food coloring, and beat at medium speed until incorporated, about 10 seconds.  Then increase speed to medium-high and beat until light and fluffy, about 4 minutes, scraping down bowl once or twice.

Place one layer of cake on a cake plate or platter.  Using an offset spatula, spread buttercream evenly over layer, and top with second layer of cake.  Spread remaining buttercream over top and sides of cake, and smooth out frosting.

Make whipped cream: Place 1/2 C. heavy cream in bowl of stand mixer fitted with whisk attachment.  Add sugar as desired, and whip on on highest speed possible until mixtures stiffens & soft peaks form.  Mound whipped cream in center of cake and pile on chocolate-dipped cherries.  (If desired, you can pipe whipped cream from a pastry bag fitted with a decorative tip).  Serve immediately or refrigerate until serving.

Recipe Adapted from Cooks' Country

Friday, September 30, 2011

Buffalo Chicken Meatloaf


For all the things that I cook and bake, sadly there are very few dishes that get much of a rise out of Mr. Vittles.

For someone like me... this is kind of a nightmare.

I like feedback!

But if I had a dollar for every time I heard "It's pretty good" from my husband, I'd have a full little piggy bank.

(Luckily, he has other good qualities.)

Nonetheless, every now & again I stumble upon something that gets a reaction.

Pepperjack Bacon Mac & CheeseCoconut Kona Ice CreamRicotta Cookies.

And now... Buffalo Chicken Meatloaf.

I asked him if it would be better with the addition of blue cheese crumbles but he said it was already pretty "solid."  However, I will throw that suggestion out there in case you are so inclined.  You could also serve it with a side of blue cheese dressing.

Buffalo Chicken Meatloaf

  • 1 lb ground chicken
  • 3 T. ranch dressing
  • 3 T. Frank's Red Hot (or the hot sauce of your choice)
  • 2 T. milk
  • 1 egg
  • 1/2 C. plain bread crumbs
  • 1 t. garlic powder
  • 1/2 t. onion powder
  • 1/4 t. celery seed
  • dash cayenne pepper
  • 1/8 t. salt
  • freshly ground pepper, to taste

Glaze
  • 2 T. Frank's Red Hot
  • 2 T. ketchup
  • 1 T. honey

Preheat oven to 350 degrees, and spray a shallow Pyrex dish or pie plate with nonstick spray and set aside.  (You can also make this in a loaf pan, surprisingly little fat comes out of it).

In a medium bowl, whisk together ranch dressing, hot sauce, garlic & onion powder, celery seed, salt, pepper, cayenne, milk & egg.  Add bread crumbs & stir.  Add ground chicken and mix thoroughly with your hands until combined.

Form into a loaf and place into prepared dish.  Cook 45 minutes.

Meanwhile, combine remaining 2 T. hot sauce with ketchup and honey.  Brush glaze over meatloaf, and return to oven for another 15 minutes.  Let sit 10 minutes before slicing and serving.  Serves 2-4.

Recipe Adapted from About.com

Sunday, September 25, 2011

Pumpkin Caramel Snickerdoodles


Today is Mr. Vittles' birthday.

His favorite cake is very simple (angel food cake filled with chocolate whipped cream) so I tend to feel guilty if that's the only thing I make for him. 

Especially since he also wants to go out to dinner tonight!

So last night we had one of his favorite meals (steak with garlic mashed potatoes) and I decided to make these cookies.


He likes anything pumpkin (one year I made him a Pumpkin Spice cake) so I thought this recipe would be a no-brainer.

When I took the dough out of the refrigerator, I gave him a taste and he said "It's good.  I have to say I was a little worried when you said they were going to be pumpkin snickerdoodles."

I guess he thought the taste would be too strong? 

Luckily, it's very subtle.

Then about a third of the way through the batch, I had him try just a piece of one of the finished cookies.  He tried to take a bite out of the half, but all the caramel came out with it. 

I asked him what he thought, and he said "It's ok.  The caramel is kind of a pain in the #*$ though."

Really?

I know someone else that's kind of a pain in the @#$.


I'm so sorry that gooey caramel deliciousness was just too much trouble for you, Mr. Vittles.  

(We should all have such problems.)

But since it is his birthday, I decided I better make a batch of just plain ones.  And for the record, they were also very delicious. 

...even though I forgot to put cinnamon in the rolling sugar until the last batch.

Oops!

Anyway, if you think the caramel is too daunting, feel free to leave it out :)

Pumpkin Caramel Snickerdoodles

Dough:
  • 3 C. all-purpose flour
  • 3/4 C. whole wheat pastry flour (you can just use all-purpose for all the flour if you prefer)
  • 1 1/2 t. baking powder
  • 1/4 t. salt
  • 1/2 t. ground cinnamon
  • 1/8 t. allspice
  • 1/8 t. nutmeg
  • 1 C. (2 sticks) butter, softened
  • 1 1/2 C. granulated sugar
  • 3/4 C. canned pumpkin puree
  • 2 t. vanilla extract
  • 1 large egg
  • 24 soft caramel candies (such as Kraft)

Coating for Rolling:
  • 1/2 C. granulated sugar
  • 1 t. ground cinnamon
  • 1/2 t. ground ginger
  • 1/8 t. ground cloves
  • 1/8 t. ground nutmeg
  • 1/4 t. allspice

Make Dough: In a medium bowl, mix together flour, baking powder, salt, cinnamon, allspice, and nutmeg.  Set aside. 

In large bowl of a stand mixer, beat butter and sugars on medium-high until light & fluffy (2 or 3 minutes).   Add pumpkin puree, and beat until well-combined.  Add egg and vanilla, and beat until combined.

Scraping down sides as necessary, add half of flour mixture and beat on low speed until just incorporated.   Add remaining flour mixture and beat only until no streaks remain.  Do not overmix.  Cover and chill dough thoroughly, for at least an hour, until consistency is easy to roll without sticking to your hands.

When dough is almost done chilling, unwrap caramels and slice each one in half.  Set aside.

Make Coating:  Mix sugar with cinnamon, ginger, cloves, nutmeg, and allspice in a small bowl and set aside. 

Preheat oven to 350 degrees, and prepare baking sheet with parchment or non-stick spray.

Using a large cookie scoop or rounded tablespoon, scoop out dough into 6-8 balls (return bowl of unused dough to refrigerator.)  Break each ball in half and place caramel piece on one half of dough.  Top with other half and shape back into a ball (so the dough completely surrounds the caramel). 

Roll each ball in spiced sugar coating and place on prepared sheet (if you're like me & want an extra-crispy coating on the outside, you can re-roll all the balls again before baking.) 

Bake 11-13 minutes, until edges are lightly browned.  Transfer to wire racks to cool completely.  Repeat with remaining dough.  Store in airtight container up to 1 week.  Makes about 36-48 cookies. 

Pumpkin Snickerdoodle Recipe adapted from DLYN, and Caramel-Center inspiration from The Baker Chick

Monday, September 19, 2011

Chunky Monkey Thighs

Let me apologize in advance for not having a personal recipe or lengthy post ready for you - but for the past few days, I was down in South Carolina visiting the BFF, Lauren!


And the BFF's handsome-adorable-squeezable-tickletastic-chunkalicious-sweet-as-sugar munchkin... Holt!


Actually, perhaps 'meatball' is a better term... considering his thighs have to be physically jammed into his Bumbo seat in order for them to fit.


Man oh man.

I wish I could have giant thighs and still be the cutest thing the world has ever seen.

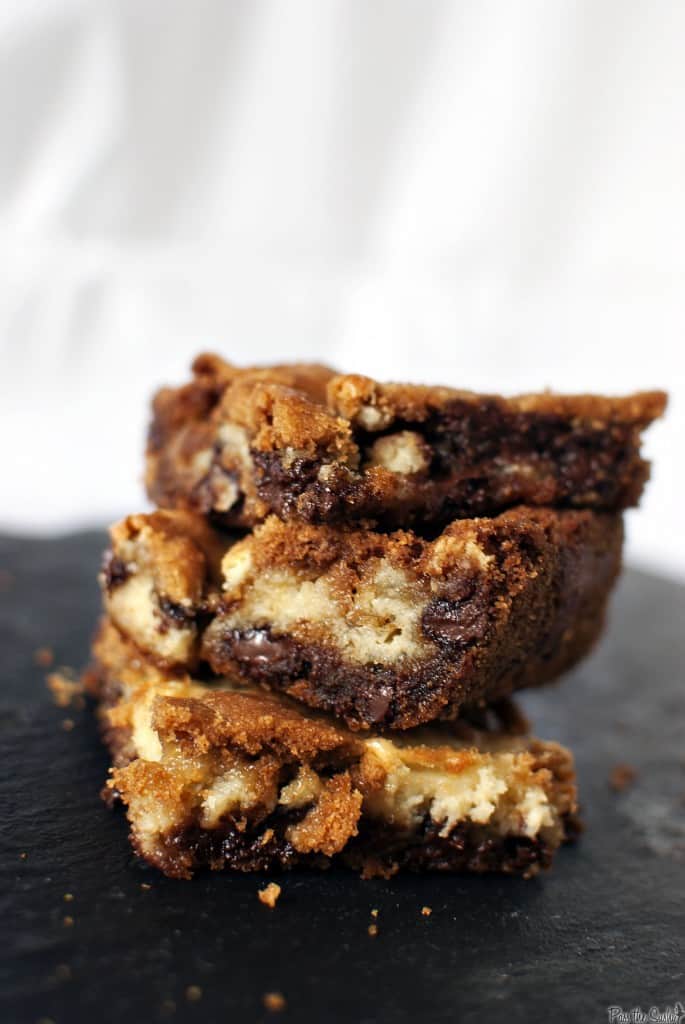
Then I could spend my days mowing through these Cheesecake Chocolate Chip Cookie Bars from Pass the Sushi:


...with a side of these Dark Chocolate Mint Crackle Cookies from Simply Scratch:


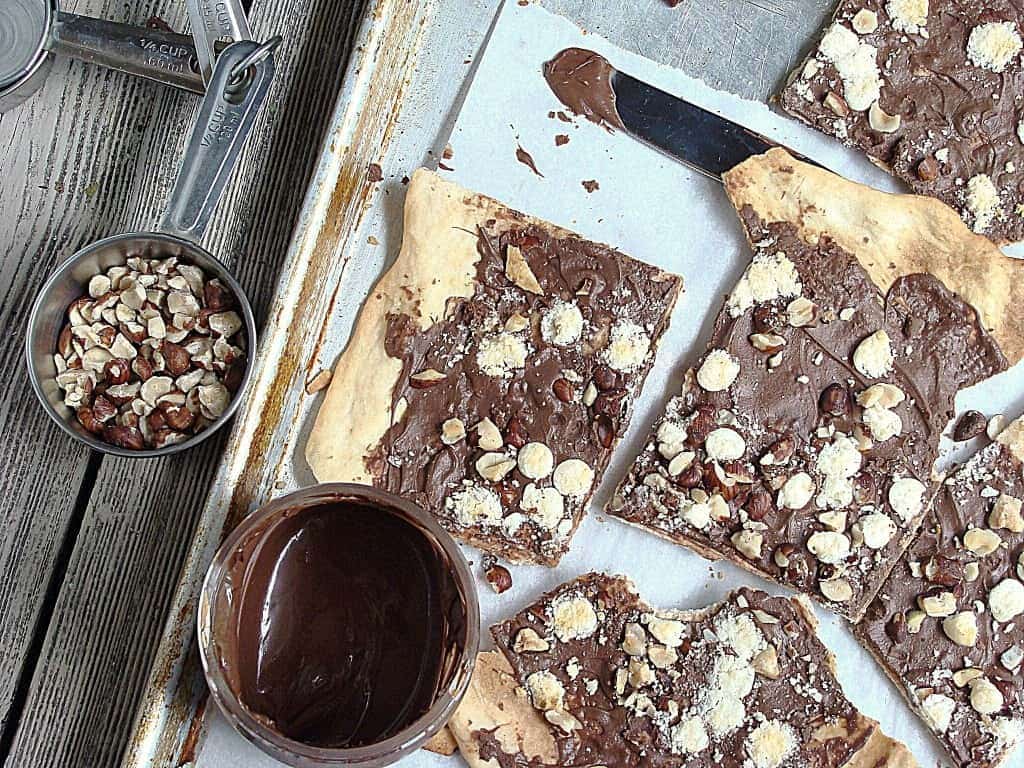
...right after I have this Pizza Nutella from Diethood:


... and this Back to School Cinnamon Bread from Scarletta Bakes:


I mean... is that really too much to ask?

Sunday, September 11, 2011

Pumpkin Cornbread


Today was a very emotional day for many people - not just in this country, but all across the globe.

I stopped by my grandmother's house (my stepdad's mom) for an early birthday celebration, and she has some friends visiting from the Netherlands.

When we arrived a little after noon, they were in the middle of watching the names being read at the ceremony held in New York City for the 10th anniversary of 9/11.

Her friends had actually insisted on watching it.  In fact, her one friend Nelly says she has watched it every year since 2002, from Holland.  And a few days ago, they visited New York City to see Ground Zero in person.

My stepdad and I were initially a little surprised to hear this, but they pointed out that the world changed after 9/11... not just America.

That comment really struck me.

Before I left my house, I had been watching the ceremony too - particularly to see my high school friend Mary's sister, who had the honor of reading their father's name.

He was in the South tower when the second plane struck it, and he never came home.

I can't believe that was 10 years ago. 

On September 11, 2001, I was a college freshman at the New College of Florida, in my first few weeks of school.  I woke up a little early that morning, so I went on the internet before class.

That was the heyday of Instant Messenger, and a friend of mine from home messaged me, asking if I heard about the plane hitting the World Trade Center.

I had no idea what he was talking about.

"Your class is probably cancelled," he wrote, but I wasn't comprehending the seriousness of the situation.

Wasn't it just an accident?  Why would classes be cancelled?

But they were, and this was no accident.  I didn't have a television in my dorm room, so I spent the rest of the day either glued to the TV in the student lounge or on my laptop.

I frantically tried to reach my father, who didn't work in the WTC specifically but sometimes had business there.  Of course, cell phones weren't working, so it took me a while to find out he and my stepmom (they also had an apartment in NYC) were physically fine.

Emotionally... not so much.

And then I heard about Mary's dad.

At the age of 18, I had little experience with devastating news of this caliber.

My heart went out to her, but I didn't know what to do.  I didn't know how to talk to her.  I didn't know what to say.

Watching that ceremony this morning, the same awful feeling of helplessness came back to me.

Seeing children pay tribute to mothers and fathers that they never really even knew brought tears to my eyes.  And my heart broke again for all the people that lost their family members & friends so suddenly. 

I look at Mary now and think how much has changed in 10 years.  She finished college, got a good job, and has an amazing husband and an adorable baby boy who's about to be a year old in November.

Her oldest brother is also married, with two kids.  Her older sister and other brother are happy and successful.

Why their father had to be taken from them in such a senseless act is beyond me.

But if there is another 'side' or another life out there beyond our understanding (as I like to believe) then I know that he is watching them, smiling, so proud of everything his family has accomplished and become.

Mary & her son Bryce, February 2011

Last week, I promised you the fall-flavored cornbread recipe I made with my slow-cooker chicken chili.

I think it's a good choice for today when we could all use a little 'comfort'.


Pumpkin Cornbread

  • 1 C. whole wheat pastry flour (regular all-purpose is also fine)
  • 1 T. baking powder
  • 1 t. kosher salt
  • 1/2 t. ground cinnamon
  • 1/4 t. ground nutmeg
  • 1/2 C. brown sugar
  • 1 C. cornmeal
  • 2 eggs
  • 1 C. pumpkin purée
  • 1/4 C. canola oil
  • 1 T. molasses
Preheat the oven to 400 degrees and grease an 8×8″ baking dish. In a medium bowl, whisk together the flour, baking powder, salt, spices, brown sugar, and cornmeal.

In a small bowl, lightly beat the eggs, and then stir in the pumpkin, oil, and molasses.

Stir the wet ingredients into the dry ingredients just until combined, and then pour the batter into the pan, smoothing out the top as much as possible.

Bake 30 minutes or until a knife inserted in the center comes out clean.

Serve warm, with butter if desired.


Recipe Slightly Adapted from Sugarcrafter

Monday, September 5, 2011

Slow-Cooker Summer Chicken Chili


I know I've been kinda MIA lately, but we made it through Hurricane Irene safe & sound!

The worst that happened was that we lost power until Tuesday night, and also had some flooding in our basement. 

Thankfully nothing got ruined except for a few things I unfortunately forgot to take off the floor, and a lot of empty cardboard boxes we were storing for our next move. 

But there was a decent bit of cleanup and a decent bit of me being in a really bad mood over the whole thing.

And... a decent bit of Mr. Vittles being in a bad mood because I was in a bad mood.

So I decided that yesterday I needed to make something nice. 

I haven't made hardly anything in about 2 weeks, let alone any new recipes, but I saw this recipe for Slow Cooker Summer Chicken Chili on Friday evening and knew I had to try it.


Especially before summer is OVER! Can you believe it's Labor Day already?  I have no idea where August went. 

Maybe it got washed away in the storm?

 McLoone's, Asbury Park Boardwalk 8/28/11 - © 2011 Reuters

(This picture was taken right up the street from my house!  As I'm sure you can tell, waves are not supposed to be crashing onto the boardwalk.)

In any case, since the summer to fall transition is nearly upon us, this was actually a dual-season meal - I made a really fun & different fall-flavored cornbread to go with that I think you guys are going to like.  But more on that soon!

Until then - enjoy these final days of summer and have a safe & happy Labor Day!

Slow-Cooker Summer Chicken Chili

  • 8 oz. can tomato sauce
  • 15-oz. can kidney beans, drained and rinsed
  • 15-oz. can black beans, drained and rinsed
  • 1 C. frozen corn
  • 1 medium onion, diced
  • 1 green pepper, diced
  • 1 clove garlic, minced
  • 1 jalapeno, seeds removed, finely diced
  • 1 1/2 lbs. tomatoes, diced
  • 3 T. chili powder
  • 1 T. cumin
  • 2 T. oregano
  • 1 t. brown sugar
  • Salt & freshly ground pepper, to taste
  • 1/4 C. white wine
  • 1/2 C. water
  • 2 large, boneless, skinless chicken breasts (about 1 lb. total)
  • optional : shredded cheese, sour cream, chopped cilantro for serving


Combine all ingredients except for the chicken breasts in the basin of a large slow cooker.  Place chicken breasts on top, and cover slow cooker.

Cook on high for 4-6 hours or low for 8-10.  Remove chicken 30 minutes before serving, and shred using two forks.  Return to chili and stir well.  Adjust seasonings if necessary, then continue cooking.  Serve chili with sour cream, cheese, and/or chopped cilantro if desired.

Recipe Adapted from Back to Her Roots

LinkWithin

Related Posts Plugin for WordPress, Blogger...