Tuesday, March 22, 2011

Thai-Style Iced Tea


In college, my two best friends there Natalie and Flavia were both vegetarians and Thai is one of their favorite cuisines.

They are the ones who introduced me to Thai food, and since then I've never looked back.

My past 3 birthday dinners with Mr. Vittles were spent at our local Thai restaurant.  (Mr. V is not as much of a fan as I, so that's why I always pick it then - he can't say no!)

Usually when I eat out, I get water to drink and maybe an appetizer to share on rare occasions.  But every time I have Thai food, I'm sure to get spring rolls as an appetizer and thai iced tea to drink.

After my birthday last month, I decided to see if I could replicate Thai-style iced tea at home (spring rolls, no - I'm not even going there).  A lot of online research seemed to suggest I had to buy some sort of orange "Thai seasoning" powder from an Asian market.

Yeah... not so much.

But I didn't give up, and my perseverance led me to SustainabiliTEA, the weblog of Arbor Teas, where I learned I could can make it by simply brewing strong black tea & adding sweetened condensed milk, sugar, and evaporated milk. 

Ok, now we're talking.

I wouldn't go as far as to say it tastes just like you'd get at a restaurant - but it's pretty darn close, and I like the fact that I can use items readily available at any supermarket.

And the best part is - I don't have to wait til next February to enjoy this yummy drink.

Thai-Style Iced Tea

  • 8 bags high quality black tea (I used organic 'breakfast blend' black tea)
  • 4 C. boiling water
  • 1/3 C. sweetened condensed milk
  • 2 T. sugar (you can use more or less to taste, but Thai iced tea is usually very sweet)
  • 3/4 C. evaporated milk (most traditional) or half & half, whole milk, or coconut milk
Steep tea bags in boiling water for 5 minutes, then remove.  Add sugar and sweetened condensed milk immediately, and stir to combine.

Refrigerate until ready to serve.   Add ice to 4 glasses, and pour tea mixture over ice.  Top off each glass with evaporated milk, but do not stir - it should remain at the top of the glass as it's own layer.  Serve immediately.

Note: The color is not very orang-ey, so if you want to make it look more authentic you can add a little yellow and red food coloring to the mixture before refrigerating it.

Recipe Adapted from Arbor Teas

Saturday, March 19, 2011

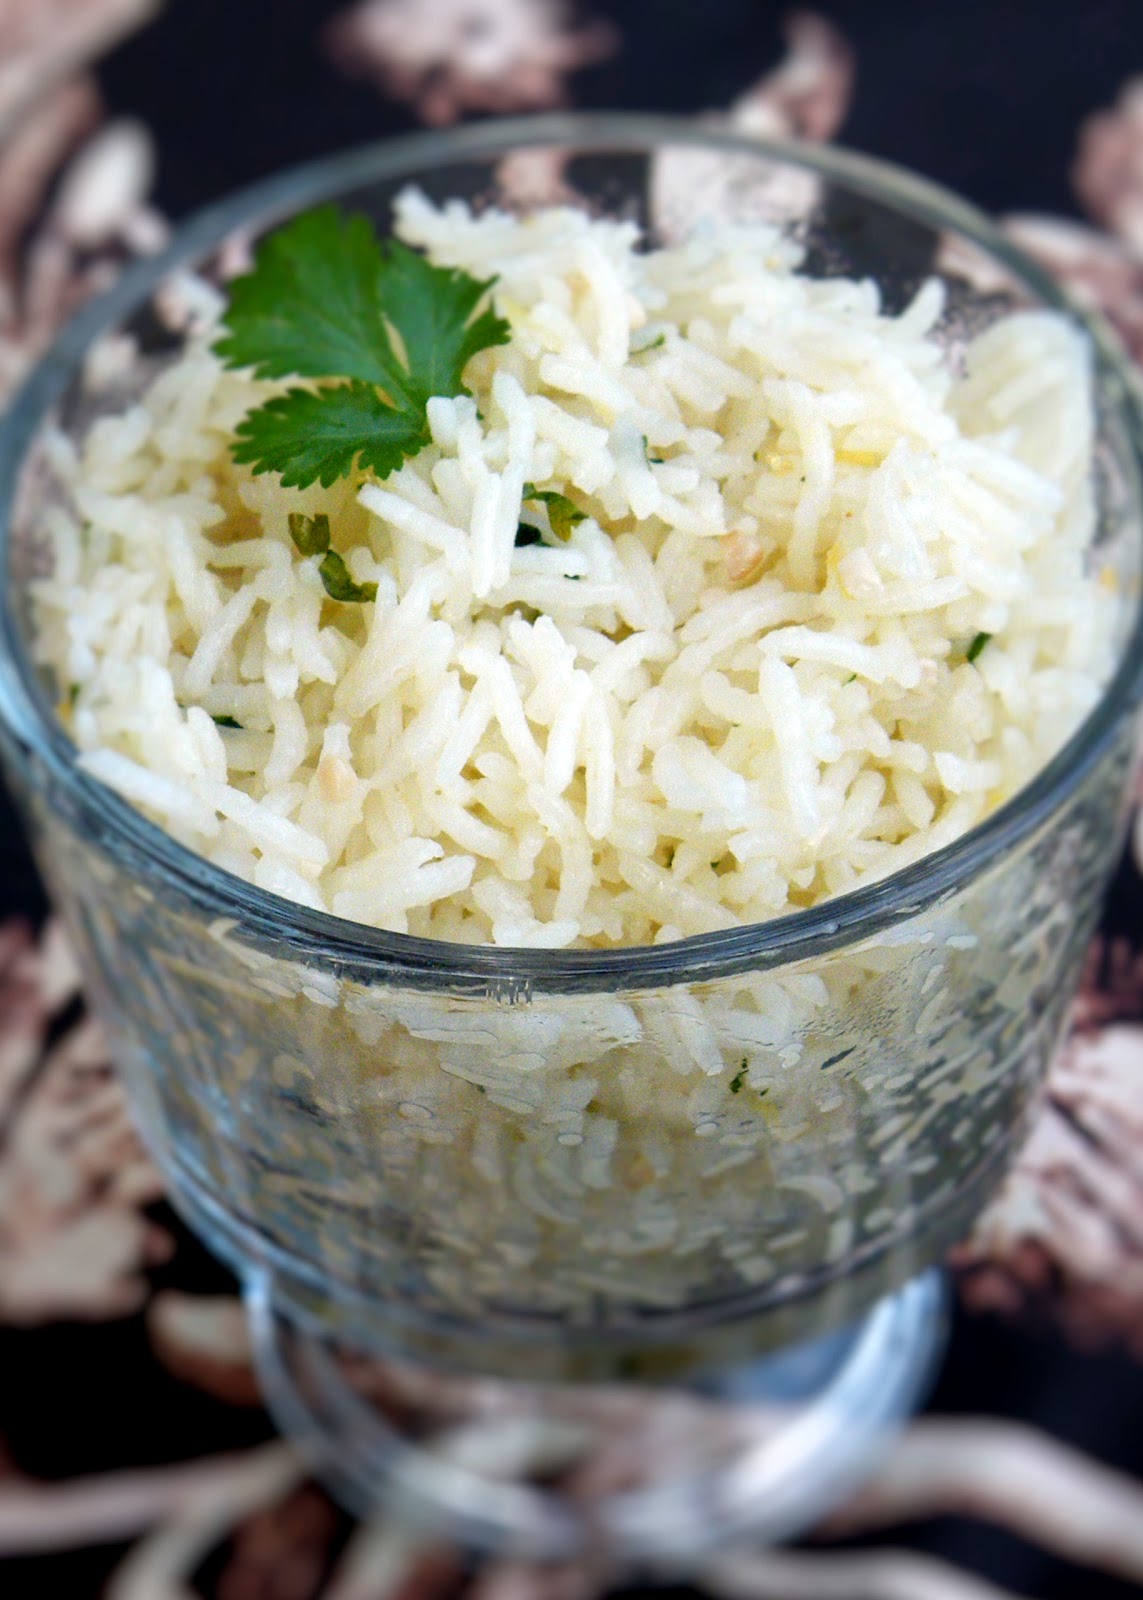
Lemon-Spiked Basmati Rice


A long, long time ago I shared with you a recipe for Chili Lime Basmati Rice.  Since then, it has become my go-to rice recipe and to put it mildly - I'm obsessed with it.

Mr. Vittles calls it "Your Rice" (meaning mine) because every time I make it I can't shut up about how delicious it is.

I pile giant scoopfuls on my plate and sometimes go back for seconds.

I eat the leftovers without anything else as the 'main' dish (because it's really the main dish of MY meal anyway.)

Let me tell you why I love this rice.  First of all- it's made in the oven.  Which is perfect for someone like me, who always manages to completely ruin a pan of rice on the stoveptop.

Second of all, the citrus in the rice makes it smell and taste absolutely heavenly.  Nevermind the cream and the butter, which certainly don't hurt either!

The Chili Lime recipe was the result of minor changes to a recipe by Kathy Casey for Lemon-Spiked Basmati Rice but I recently decided that since I loved the lime so much, I should at least give the lemon one a try.

And while the lime version is still my favorite, the lemon is awesome

I beg of you - try one of these versions of this rice.  It will seriously change your life.

Lemon-Spiked Basmati Rice
  • 1 C. basmati rice, rinsed and drained well
  • 3 T. butter
  • 3/4 C. 1/4-inch-diced onions
  • 1 1/2 t. minced garlic
  • small pinch cayenne
  • 1 1/2 C. water
  • 1 T. fresh lemon juice
  • 2 t. minced lemon zest
  • 1 1/4 t. salt
  • 2 T. thinly sliced chives or fresh cilantro
Preheat oven to 375°F. Place the very well-drained rice in a 1 1/2-quart baking dish.

Heat the oil in a nonstick or heavy saucepan. Add the onion and sauté over medium heat until the onions are soft, about 2 minutes. Add the garlic and cook for about 30 seconds. Add the remaining ingredients, except the rice and chives, and bring to a boil.

Stir the mixture into the rice, being sure to scrape up and include all the goodies. Seal tightly with foil and bake for about 20 to 25 minutes, or until the rice is tender and all the liquid is absorbed. Fluff with a fork before serving, then fold in the chives.

Recipe from Kathy Casey

Tuesday, March 15, 2011

Chocolate Peanut Butter Candy Cake


So I like to think I've been around the block and back with baking... but I have to admit, this cake kinda threw me for a loop. 

I am used to creaming the butter and sugar, then adding the wet ingredients.  But this cake barely has any butter (no oil either) and the sugar gets treated like a 'dry' ingredient.

Hmm.  So what gives?

I read up on this method of baking cakes, and apparently it yields a shorter cake but one that's more tender and velvety.

Umm...I can get down with that. 

Especially when it's slathered in chocolate and peanut butter. 

Chocolate Peanut Butter Candy Cake

  • 2 eggs
  • 1/2 t. vanilla
  • pinch salt
  • 1 C. sugar
  • 1 C. flour
  • 1/2 C. milk
  • 1 T. butter, melted
  • 1 t. baking powder
  • 1/2 C. peanut butter
  • 2 T. powdered sugar
  • 1/2 C. semisweet chocolate chips
  • 1/4 C. milk chocolate chips
  • 1/4 C. heavy cream
Preheat oven 350 degrees.  Grease 8" square metal pan.

In small bowl, combine sugar, flour, baking powder, and salt.  Whisk to distribute ingredients evenly.  In separate large mixing bowl, beat eggs on medium-high until lemon-colored.  Add milk and butter, and whisk together. 

Add dry ingredients and stir briefly to combine, then increase speed to medium and mix about one minute more.  Pour into prepared pan and bake 20-25 minutes - do not overbake.

While cake is baking, blend powdered sugar into peanut butter until fluffy.  When cake is finished baking, spread peanut butter mixture evenly over top and refrigerate 30 minutes until set.

Then combine chocolate chips with heavy cream in microwave-safe bowl or large measuring cup.  Heat in 20 second intervals, stirring after each, until mixture is smooth.  Pour over cake and use spatula to spread evenly.

Refrigerate aboute an hour or until chocolate is set and serve.  Keep leftovers refrigerated.

Recipe Adapted from Allrecipes.com

Sunday, March 13, 2011

Iced French Toast Latte


I was in a grocery store this week that has a fabulous coffee bar, and saw that one of their specials this month was a french toast latte.

Hold. The. Phone.

French toast latte? That sounded amazing.

However, this was in the early evening, and I try not to drink coffee that late in the day (otherwise I don't sleep well).

But I could not get this latte off my mind.

So, this weekend I decided to try and replicate it at home.  Without tasting it, I have no idea what the ingredients of said latte actually are - but I took a guess.

I'm no stranger to making my own simple syrups for coffee at home, and I figured a Cinnamon Maple simple syrup would be appropriate in this case.  Depending on your preference, you can use as little or as much of the syrup as you want, and the same goes for the milk.

Also, I happen to like my lattes iced, but you can also use the ingredients hot - just warm the milk in a saucepan first.

Iced French Toast Latte
  • 3 oz. brewed espresso or strong coffee, cooled
  • 1 - 2 T. cinnamon maple simple syrup (see below), cooled*
  • 1 C. milk*
  • ice
Place ice in glass, then pour in simple syrup and espresso.  Add milk to taste and serve immediately.

Cinnamon Maple Simple Syrup

  • 1/2 C. water
  • 2 cinnamon sticks
  • 1/2 C. brown sugar
  • 1 T. real maple syrup
Place water and cinnamon sticks in a small saucepan, and bring to a boil.  Add brown sugar and maple syrup, and stir until sugar is dissolved.  Remove from heat.  Makes about 1/2 cup.  Refrigerate any unused portion in airtight container up to 1 week.

*The amounts listed for syrup and milk are just guidelines - use as much as you like per your tastes.

Original Recipe

Thursday, March 10, 2011

Low-Fat Molasses Cookies


I don't know about you, but I always love a good molasses cookie.

However, after sitting on the couch for a month and a half rehabbing my tootsies, I don't love the thought of buying a size bigger pants.  I'm moving around a lot better these days, but physical therapy is really the most 'exercise' I can do at the moment.

Translation- if I want to eat cookies (and I do) then I'm going to have to find something slightly healthier for now.

I won't bother trying to convince you that you won't miss the butter- let's not lie, butter makes everything more delicious.  And Lord knows I'm usually quite liberal with it.

But then we're back to getting bigger pants.

And I really don't want to go there right now.

So for the time being, I'll just have to settle for less butter and hope to continue fitting in the clothes already in my closet.

Low-Fat Molasses Cookies
  • 1/4 C. butter, softened
  • 1 C. sugar
  • 1 large egg, beaten
  • 1/4 C. molasses
  • 2 C. all-purpose flour
  • 2 t. baking soda
  • 1 t. ground cinnamon
  • 1/4 t. salt
  • 1/4 t. ground cloves
  • 1/2 t. ground ginger
  • 3 T. large granulated sugar (optional, for sprinkling)
Preheat oven 375 degrees.  In medium bowl, combine flour, baking soda, salt, and spices. 

In large bowl, cream butter & sugar together until fluffy.  Add egg and molasses and mix until combined.  Add flour mixture gradually, and beat just until combined.  Chill dough 30 minutes to 1 hour, covered, in refrigerator.

Roll into 1-inch balls, and place on greased or parchment-covered cookie sheet, about 1 1/2 inches apart.   Bake about 5 minutes, sprinkle with large granulated sugar and bake 3-5 minutes more until crackled and lightly browned.  (Alternately, you can roll the balls in regular granulated sugar, then bake them for 8-10 minutes)  Transfer to a wire rack to cool.  Makes about 3 dozen cookies.

Nutrition per cookie: 79 calories; 1 g fat ( 1 g sat , 0 g mono ); 9 mg cholesterol; 16 g carbohydrates; 1 g protein; 0 g fiber; 106 mg sodium; 43 mg potassium.

Recipe Adapted from EatingWell.com

Sunday, March 6, 2011

Feta, Almond, & Roasted Red Pepper Stuffed Chicken


My kitchen is barely out of boxes from moving to our new place, and I feel like it's been soooo long since I've made anything!  Sadly, we've eaten mostly take-out the past couple weeks.

I wanted to post something for you though, so I took a look at some of my old photos. 

This was the recipe from the V&B annals that won out. 

I have a sick obsession with feta.  Almost as sick as my obsession with coconut and popcorn (not necessarily together, but then again maybe that would be a good idea?) however Mr. Vittles does not share my feelings.  I make us separate salads so I can put feta on mine, and he calls it "toe jam."

Ok, sorry to put that image in your head.  But he does!

In any case, he actually enjoyed this recipe so that says a lot. 

Ahh, remembering back to this dish makes me so hungry for a home-cooked meal!

And... tonight we had grilled cheese. 

Oh well.  Baby steps!

Feta, Almond, & Roasted Red Pepper Stuffed Chicken
  • 4 large boneless, skinless chicken breasts
  • 1 oz. softened cream cheese
  • 1/4 C. feta cheese
  • 3 T. crushed almonds, divided
  • 2 T. minced roasted red peppers
  • 1/2 t. (1 clove) minced garlic
  • 1/2 t. oregano (divided)
  • salt & freshly-grated pepper, to taste
  • 2 T. fresh lemon juice
  • 1/4 C. chicken broth
  • 1 T. olive oil
Preheat oven to 400 degrees. 

Chop or crush almonds.  In small bowl, mash cream cheese, feta, garlic, red peppers, 2 T. almonds, 1/4 t. oregano, salt & pepper until well-combined.

Using a small knife, cut a pocket in the side of each breast and stuff with mixture (1/4 of mixture per breast).  Gently press to flatten.

Heat olive oil in large ovenproof skillet until shimmering over medium heat.  Season breasts with salt & pepper and cook in skillet, turning once, til browned (about 6 minutes).

Transfer skillet with breasts to oven and cook until heated through, about 7-10 minutes or until thermometer inserted into meat registers 170 degrees.  Transfer breasts to platter & keep warm.

Add lemon juice and broth along with remaining 1 T. almonds and 1/4 t. oregano to skillet.  Cook over medium high, scraping up any browned bits, and simmer 3 minutes.  Pour over breasts & serve.

Recipe Heavily Adapted from Food & Wine

Sunday, February 27, 2011

Chocolate Chip Coconut Cookies


So... the madness of my life continues.

With the move in high gear, I barely have anything left in my kitchen - but I managed to make a pasta salad and an appetizer for a family party this weekend.

However, that is not what I am sharing with you today.  I wanted to post this recipe for chocolate chip coconut cookies that I made while Lauren Vittles was here.

I know, I know - my obsession with coconut is bordering on obscene at this point.

But there is a method to my madness.  Lauren's husband Tyler housed about 75% of the batch single-handedly, and 'hinted' (not-so-subtly) to her that he is hoping she'll make some.

And by 'some,' I mean like... a truck load.  ASAP.

But I can't say I blame him - these are pretty awesome! 

Chocolate Chip Coconut Cookies

  • 1/2 C. (1 stick) butter
  • 1/2 C. white sugar
  • 1/4 C. light brown sugar
  • 1 egg
  • 1/2 t. vanilla extract
  • 1 C. flour
  • 1/2 t. baking soda
  • 1/2 t. salt
  • 1 C. semisweet chocolate chips
  • 1 C. sweetened flaked coconut
Preheat the oven to 375 degrees.

In a large bowl, cream together the butter, brown sugar and white sugar until light and fluffy. Beat in the egg, then stir in the vanilla. Combine the flour, baking soda and salt; stir into the creamed mixture. Fold in chocolate chips and coconut. Drop by rounded spoonfuls onto cookie sheets.


Bake for 8 to 10 minutes in the preheated oven. Allow cookies to cool on baking sheet for 5 minutes before removing to a wire rack to cool completely.  Makes about 3 dozen.

Recipe from Allrecipes.com

Sunday, February 20, 2011

Penne and Vodka Sauce


I know I haven't posted in a while but the last 7 days have been a little crazy!

For one, I went back to work.  After sitting around the house with my feet up for almost a month and a half after my foot surgery, it was a little tough to get back in the swing of things.

I also started physical therapy, which I expected to be painful - but no one said I was going to be gripping the side of the table, gritting my teeth, and stifling a moan while the therapist "worked" my big toes like the stick shift of a BMW.

I know, it has to be done, but it's not exactly pleasant.

Thirdly we are moving to another place in 2 weeks.  So on top of going back to work & going to therapy, I've been packing & moving boxes.

Like 99% of the population, I despise moving.  The end result is usually great, but the packing, carrying, and unpacking are all pretty brutal.

However, this weekend has been busy in a good way.  My best friend Lauren Vittles is staying with us, along with her awesome hubby Tyler and their ADORABLE 3 month-old Holt.


You remember Holt, from my visit to see them in South Carolina in December?

They arrived Friday evening and are staying until tomorrow.  Even though probably 60% of our house has already been moved or at the very least packed, I wanted to make them a nice dinner their first night here.

I decided on penne and vodka sauce (one of my personal faves) with garlic bread & salad.  Easy but delicious.

I find that 'penne & vodka' rarely turns out as well at home as it does in a restaurant, but I have to say this one is pretty awesome.

Penne and Vodka Sauce
  • 4 T. (1/2 stick) butter
  • 1 C. heavy cream (I used a mixture of heavy cream and half &half)
  • 1/4 C. tomato paste
  • 1/3 C. plus 2 Tbs. vodka
  • 2 T. slivered fresh basil
  • Pinch of red pepper flakes 
  • 1/2 t. garlic powder
  • 1/2 t. plus 2 Tbs. salt
  • 1 lb. penne or other tubular pasta
  • 1/2 C. grated Parmigiano-Reggiano cheese 
Bring a large pot of water to a boil over high heat. Add the 2 Tbs. salt and the pasta to the boiling water. Cook, stirring occasionally to prevent sticking, until al dente, according to the package instructions. Drain, reserving about 1/2 cup of the cooking water.  Place drained penne in large bowl.

Meanwhile, in a medium saucepan over medium-low heat, melt the butter with the cream. In a small bowl, dissolve the tomato paste in the vodka. Stir into the cream mixture. Add the basil and red pepper flakes. Season with the garlic powder & salt.

Cook until most of the alcohol has evaporated and the sauce is thick enough to coat the back of a spoon, about 5-7 minutes.  When ready to serve, remove from heat and stir in cheese until melted.  Add as much of the reserved cooking water as needed to loosen the sauce.  Pour over penne in bowl, mix to combine, and serve. Serves 4.

Recipe Adapted from Williams-Sonoma 

Saturday, February 12, 2011

Cinnamon Sugar Kettle Corn


So tell me... is it wrong to post another popcorn-based recipe in the span of a few weeks?

Don't answer that.

Because I seriously cannot get enough of this.

First of all, let's just have a moment of honesty amongst friends here -  I have a sick obsession with popcorn.

Or at least Mr. Vittles says so. 

I may or may not need counseling, that is yet to be determined. 

I can't go anywhere that sells popcorn without losing what little all self control that I have.  Like, I can spend an hour at a fair or market and not buy a single thing... but God forbid there is a stand with kettle corn anywhere near the vicinity, and out comes the wallet.

I can't help it!  Even Target gets me sometimes.  From the minute you walk in the door, they torture you with heavenly smells of freshly popped, buttery popcorn and it's not even fair.

"Ok, let's focus now.  I need paper towels, dish soap, deodorant, shaving cream, and... POPCORN!  I mean, er, toothpaste...  And POPCORN!"

Ahhhh!  And... all focus goes right out the window. 

In any case, I've been making my own 'kettle corn' for quite a while now, and unfortunately I've long forgotten where I found the original instructions.

Actually no, the truly unfortunate part is that I no longer need to look at the instructions I wrote down, because I make it so often.

But I honestly think it's as good as anything you'd get from someone that makes authentic kettle corn.

(Even so, Mr. V is worried that I'm going to come home with giant kettle one day for the real deal.  I assured him I'm fine with the stovetop variety, but then again they say the first sign of addiction is denial that you have a problem?)

Anyway, I don't know what came over me recently, but I decided to throw a little cinnamon in there and that took things to a whole new level!  But if you're a purist, feel free to leave it out for some good old-fashioned sweet & salty popcorn.

Either way, just go make this.  Immediately.  For both our sake.

I won't judge.  Your secret is safe with me, I swear.

Cinnamon Sugar Kettle Corn
  • 1/4 C. unpopped popcorn
  • 3 T. canola oil
  • 2 T. sugar
  • 1/4 t. cinnamon (or more, if preferred)
  • salt, to taste

Mix sugar and cinnamon in small bowl, and set aside.  Place large, empty bowl on counter near stove (this will be the bowl you'll dump the popcorn into).

Place popcorn in 2-quart saucepan (with handle & cover), and pour oil over top.  Shake pan to distribute evenly and coat popcorn kernels with oil. 

Place uncovered on burner at medium to medium-high heat.  In 2-3 minutes, oil will start to sizzle.  When first kernel or two pops, sprinkle cinnamon sugar over top and quickly cover.

Holding handle of saucepan, shake pan back & forth and side to side while keeping on the burner.  (Think old-school Jiffy Pop on the stove.)  Popcorn may not immediately start popping once you put the sugar on, but it won't take long.  Keep shaking until popping slows.

Immediately empty into bowl, being careful not to burn yourself on the hot sugar.  Sprinkle with salt to taste and serve.

Recipe Adapted from Unknown Source

Tuesday, February 8, 2011

Fauxstess Cupcakes


So I know it's a little late for me to be boarding the Fauxstess Cupcake train, but this is honestly the first time I've tried such a recipe.

Mr. Vittles and I went to our friends' Super Bowl party this weekend, and I was on cupcake duty. 

But I didn't want to make just any cupcakes- I wanted to make something special!  And what could be more special than a homemade version of Hostess cupcakes?

I will not lie to you though - these are a lot of work. 

And the cream filling (aka seven-minute frosting) is... terrifying.  It turned out absolutely fine, but those seven minutes were riddled with quite a bit of self-doubt (rivaled only by arm-muscle fatigue.)

However, it was all worth it in the end. 


I thought these were awesome, and everyone at the party seemed to enjoy them as well.  So if you have the free time to make these, I would definitely recommend it!

Fauxstess Cupcakes

Cake Recipe:
  • 1/2 C. plus 2 T. cake flour
  • 1/3 C. Dutch-process cocoa
  • 1/2 t.baking powder
  • 1/4 t. baking soda
  • 1/8 t. salt
  • 2 large eggs, separated and at room temperature
  • 1/3 C. canola oil
  • 1/2 C. plus 2 T. sugar
  • 2 T. water

Preheat the oven to 350.
In a medium bowl, whisk together flour, cocoa, baking powder, baking soda and salt.
In a large mixing bowl, beat together egg yolks, canola oil, 1/2 cup sugar and water until well combined. Add the dry ingredients and stir by hand just until combined.
In a clean medium bowl, beat egg whites at high speed until soft peaks form. Gradually add remaining 2 tablespoons sugar and beat until stiff and glossy. Beat one quarter of the whites into the batter to lighten the mixture. Add remaining whites and gently fold the mixture together until no streaks remain.
Evenly divide the batter between the wells of a 12-cup muffin tin coated with nonstick spray (they will be about one-half full). Bake until the cupcakes spring back when lightly touched in the center, about 13 to 16 minutes. Remove and let the cupcakes cool slightly before turning them out onto a wire rack to cool completely.

Once cupcakes are almost cooled, make cream filling.

Cream Filling (Seven Minute Frosting):
  • 2 large egg whites
  • 1/2 C. sugar
  • 1/4 C. light corn syrup
  • 2 T.s water
  • 1 1/2 t. pure vanilla extract

Combine filling ingredients with a pinch of salt in a metal bowl set over a saucepan of simmering water and beat with a handheld electric mixer at high speed until frosting is thick and fluffy, 6 to 7 minutes. Remove bowl from heat and continue to beat until slightly cooled. Reserve 1/2 cup of the filling to use for piping the swirls on top of the cupcakes at the end.
Once cupcakes are completely cooled, use a sharp knife to slice circles (that end up being cone-shaped pieces) out of the center of each cupcake.  Keep in mind that the closer your sliced circle is to the outside circumference of the cupcake, the bigger the well in the center of the cupcake will be (and the more filling will go on it!).  So slice according to your preference.


Once the cone is cut out of the cupcake, set it aside and fill the well with the cream filling, almost to the top.  (I find that using a pastry bag and large tip was the neatest way to do this, but yo can use a spoon if you prefer). 

Slice off the pointy bottom part of the cake cone so that just the top layer of it remains, then place it on top of the filling.  Press down to adhere.  (How you go through the above steps is up to you - you can either do all the steps on each cupcake one at at a time, or do each step to all the cupcakes, then the next step to all, etc.)

Once all cupcakes are filled, make the ganache.

Chocolate Ganache:
  • 1/4 cup cream
  • 4 ounces bittersweet chocolate, finely chopped
  • 1 tablespoon unsalted butter, softened

In a small saucepan, heat cream until steaming. Remove from the heat, add chocolate and let stand for 5 minutes. Add the butter and stir until smooth. Transfer the frosting to a small bowl and dip the top of each cupcake to thoroughly coat.
Spoon the reserved filling into a pastry bag fitted with a very small plain tip and pipe swirls across the center of each cupcake. Refrigerate the cupcakes for 10 minutes to set the frosting.
Recipe from Beantown Baker, (via Heather Drive, Smiten Kitchen, and Culinary in the Desert)

Friday, February 4, 2011

Coconut Bread


Ok so I today I turn 28.

And for my birthday I made myself a little treat.

As you may have already noticed, I loooove me some coconut.

Let's see... Coconut Kona Ice Cream, Chewy Chocolate Coconut Blondies, Coconut Cake, Coconut Tres Leches Hot Chocolate... ok, you get the idea.

Well I didn't think it was right to make myself a cake on my own birthday.

I'm assuming Mr. Vittles is handling that - my favorite is actually ice cream cake anyway.

But I did think it was not only right, but perhaps necessary, to make myself some of this coconut bread.

Happy birthday to ME!

Coconut Bread
  • 1/2 C. canola oil
  • 1/2 C. unsweetened coconut cream (or coconut milk)
  • 2 eggs
  • 1 t. vanilla extract
  • 1 1/4 C. flour
  • 3/4 C. sugar
  • 1/4 t. baking soda
  • 1/4 t. baking powder
  • 1/4 t. salt
  • 1/2 C sweetened flaked coconut
Preheat oven to 350 degrees.  Grease one 8 1/2 x 5 1/2 loaf pan.

In a small bowl, whisk canola oil, coconut cream, eggs, and vanilla extract until blended.

In large bowl, combine flour, sugar, baking soda, baking powder, salt and flaked coconut and mix well.  Add wet ingredients from small bowl, and mix just until combined - do not overmix.

Pour batter into prepared pan, and bake 45 minutes to 1 hour, until golden brown on top and a toothpick inserted in center comes out clean.  Cool on baking rack (I took mine out of the pan after 10 minutes).  When completely cooled, cut into slices.  Store in airtight container. 

Recipe Adapted from
The Food Nanny Rescues Dinner, by Liz Edmunds

Wednesday, February 2, 2011

Easy Chocolate Pudding


Last week was Grammy Vittles' 80th birthday!

My grandmother is just adorable.  I love her to death. 

Let me tell you a little about her...

She is super stylish and loves to shop (but at good stores, like J.Crew and Anthropologie- not 'old lady' stores).

Her favorite hobby is hooking rugs, and over the years she has made so many amazing keepsakes for everyone in our family.

She spoils her grandchildren rotten, and her nickname for us is "Pumpkin" (except she says it like "punkin.")

She calls grilled cheese sandwiches "toasted cheese sandwiches." 

On the first day of the month, she tells people "Hello Rabbit" because it's supposed to be good luck.

She got a computer just so she could play Mahjong Solitaire on it.

She gave me the cutest ruffled polka dot apron for my birthday last year, and suggested "You can surprise [Mr. Vittles] one night and wear it with nothing underneath." 

!!

(In case you were wondering- no, I have not done that)

She makes a fierce grilled skirt steak and potato salad.

Whenever she spills on herself, or if something goes 'down the wrong pipe' when she's eating, she says "Don't mind me- I'm just learning."

And... she keeps her bourbon under the kitchen sink, where it's "more easily accessible."

How cute is she?

Grammy, October 2009

Although Grammy does not really go on the internet, she's been very supportive of Vittles and Bits.  She even gave me one of her recipe boxes, as well as the recipe box that belonged to her mother.


I never knew my great-grandmother on her side, in fact not even my mom did - she passed away in 1954, not long after after my mother was born.

So to see her recipes (many of them written in her own hand) was extremely special. 

I couldn't help but notice she had a ton of recipes with orange- orange pound cake, orange sherbert, orange ice, orange icebox cake...etc, etc.  And Grammy conceded that she did enjoy citrus desserts!

But one that I picked to try first was this recipe for chocolate pudding.  "For utmost deliciousness," it said, "serve with whipped cream.

Utmost deliciousness?  Apparently, being adorable runs in the family.

Easy Chocolate Pudding
  • 2 C. milk
  • 5 T. cornstarch
  • 1/3 C. cocoa powder (dutch processed)
  • 1/3 C. + 1 T. granulated sugar
Mix sugar, cornstarch, and cocoa with 1/2 C. milk.  Heat remaining 1 1/2 C. milk in small saucepan over med-low heat until steaming.  Add cocoa mixture to pan, and heat until thickened, stirring constantly (2-3 minutes).  Increase heat slightly if necessary to thicken.  Transfer to bowl or individual ramekins, and sprinkle tops with sugar to prevent skin from forming on pudding.  Cover and refrigerate until chilled.  Serve plain or with whipped cream (for "utmost deliciousness" ;)) Serves 2-3.

Recipe Origin Unknown


Linked to Full Plate Thursday

LinkWithin

Related Posts Plugin for WordPress, Blogger...