Sunday, October 31, 2010
Roasted Pumpkin Seeds
As I've already mentioned, Halloween is my favorite holiday - it has been since I was a kid. I still love it for much of the same reasons as I did as a child... namely, being scared and eating lots of candy & pumpkin seeds. I mean, costumes are fun too but horror movies and treats take the cake!
As long as you don't eat too many and get a big belly...
I know. You wish you could look that good in a penguin suit.
I don't dress up much these days, but I did make an exception for my nieces' joint birthday party yesterday - they turned one and three years old. Here they are with their dad and grandpa (better known to you as my stepdad Chris Vittles):
I thought about resurrecting The Penguin but instead went as a witch.
Mr. Vittles was a hockey player, which is not much of a stretch, as he "dresses up" in that costume about once a week for his Mens' League hockey games. But I thought we might have another hockey player on our hands when Chloe asked Mr. V if she could borrow his hockey stick:
Are elephants and Winnie the Pooh balls are allowed on the rink?
After the party, Mr. V and I finally picked up some pumpkins for carving. We didn't get any when we went apple-picking because we were afraid they'd be rotten. But then apparently we waited too long, because every place we tried to get them Friday night was all out!
We did eventually find them yesterday, and we each got one to carve. Considering today is Halloween and it was already so late in the day, I planned on doing something simple. But Mr. V (who is apparently a bird whisperer now) said that our parrot CJ "told him" she wanted me to carve her likeness into a pumpkin.
I'm pretty sure the only thing CJ tells anyone is "Hi," but I can't resist a good challenge. So I made a silhouette of her on a branch outlined by the moon. It certainly won't be winning any prizes but you get the idea:
Mr. V made a very creative one as well - he decided to pay tribute to our boat:
However, during the carving process I noted that he is definitely not down with the pumpkin seeds. He wanted nothing to do with picking them out of the pumpkin guts, apparently because he doesn't like to eat the roasted seeds.
Now I love me some pumpkin seeds, so I was dutifully fishing each one out and saving them in a plastic colander. But at that rate, Mr. V would be done carving his entire pumpkin before I finished, so I suggested that if he wasn't going to help me pick out the seeds then he should clean out the inside of my pumpkin.
Naturally he chose seed hunting, but he was not a happy camper. "This is a pain in the *#$," he complained.
I pointed out, "So are you."
"That's true," he conceded, "it takes one to know one. But so is this."
We only do this one a year though, so it was all worth it. CJ agrees.
Roasted Pumpkin Seeds
Boil seeds in heavily salted water for 10 minutes. Drain in colander, and spread seeds on paper towels. Blot dry.
Preheat oven to 300 degrees. Spray rimmed baking sheet with nonstick Canola oil spray. Spread out seeds in a single layer and spray with more Canola oil. Sprinkle generously with salt.
Bake 45 - 60 minutes or until browned, stirring seeds every 15 minutes and re-spraying & salting as necessary.
Recipe origin unknown
Thursday, October 28, 2010
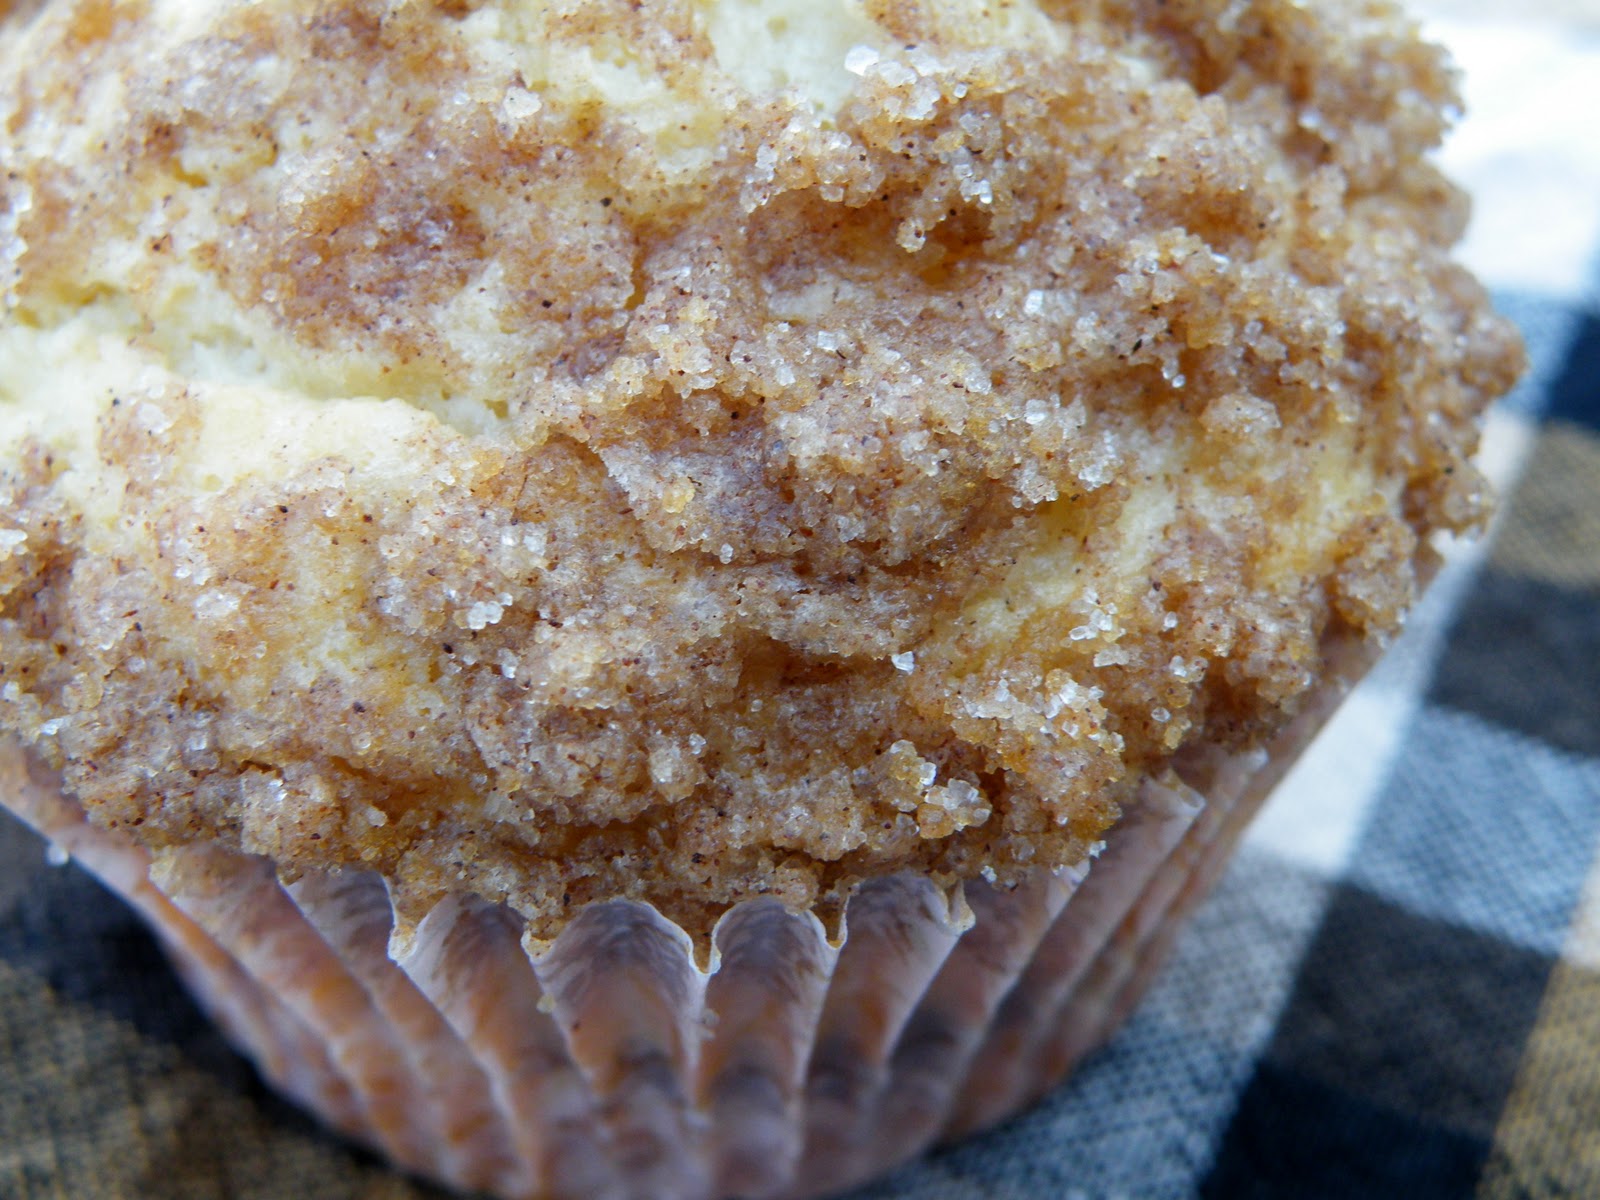
Coffeecake Muffins
This past weekend I attended two very different but equally wonderful weddings.
Saturday evening, Mr. Vittles' childhood friend was married at a beautiful country club in a traditional fashion. Then Sunday morning, my childhood friend, Vanessa Vittles, was married to her (very) long-time boyfriend in a low-key beach wedding with just their close friends & family.
Since I already endured the (sometimes-amazing-but-mostly-hellacious) process of planning a large, traditional wedding, I now have a greater appreciation for what couples go through trying to decide how they want to get married and how to to make it happen.
And, particularly in light of Mr. Vittles and I recently celebrating our first anniversary, these weddings have made me feel a bit nostalgic.
For only being married a year, Mr. V and I have been through a lot. As many of you already know, my mother passed away not more than two weeks after our wedding - and I don't know how I could have gotten through the single most devastating event of my life without my new husband.
It didn't take us long to figure out that the promise to love each other through good times and bad is definitely no joke, but I believe we are a stronger couple for it.
When you think about it, finding one person you want to spend the rest of your life with is a pretty amazing thing. And the evolution of a relationship from casual dating, to serious commitment, to engagement, to marriage, kids & beyond is astounding as well.
I look at people like my grandparents, who have been together 60 years, and wonder - what must it feel like to have a permanent fixture in your daily life for that long?
The thought that Mr. Vittles and I (and so many of our friends who've found their soulmates) have the rest of our lives to find that out gives me The Warm Fuzzies inside. Maybe I'm turning into a mush in my old age, but it's official - seeing people in love makes me smile!
In any case, a special day calls for special treats. I brought these muffins to the breakfast following Vanessa's wedding, where our very pregnant and (admittedly) very hungry friend Mary Vittles could not stop raving about how delicious they were.
She asked for the recipe, but not for herself - she plans to have her wonderful husband Brent make these for her. So Brent, get out your food processor (and about 5 bowls) and get to work! You're cooking for three now, fella.
Oh, snap. There's those Warm Fuzzies again. :)
Coffeecake Muffins
Make Streusel/Cinnamon Filling:
- 8 T. granulated sugar
- 1/3 C. packed light brown sugar
- 1/3 C. all purpose flour
- 1 T. ground cinnamon
- 4 T. butter, cut into 1/2" pieces and chilled
- 1/2 C. pecans (optional)
Muffins:
- 2 large eggs
- 1 C. sour cream
- 1 1/2 t. vanilla
- 1 3/4 C. all purpose flour
- 1/2 C. granulated sugar
- 1 T. baking powder
- 1/4 t. salt
- 5 T. butter, cut in chunks & softened
Whisk eggs, sour cream, and vanilla in bowl. Pulse flour, sugar, baking powder, salt, and butter in food processor until mixture resembles wet sand. Transfer to large bowl. Using rubber spatula, gradually fold in egg mixture until just combined.
Place 1 T. of batter in each muffin cup and top with 1 T. cinnamon filling. Using back of spoon, press cinnamon filling lightly into batter, then top with remaining batter. Sprinkle streusel topping evenly over batter.
Bake until muffins are light golden brown and toothpick inserted into center comes out with a few dry crumbs attached, 22 to 28 minutes. Cool muffins in tin for 30 minutes, then carefully transfer to rack to cool.
Muffins will keep in airtight container at room temperature for up to 3 days. Makes 12 muffins.
Recipe from Cook's Country
Sunday, October 24, 2010
Apple Pie (with Fooproof Pie Crust)
In life, there are good wives and there are great wives.
I'm happy to report that I'm actually neither of these, as my status exceeds far beyond great.
In fact, I may even in the running for Wife of the Year. Let me tell you (just one of the many reasons) why.
After we picked apples and I made my applesauce, I asked Mr. Vittles what type of apple dish he would like me to make with our spoils.
Without hesitation, he replied, "Apple pie.
And without hesitation, I thought, CRAP!
"Like apple crumb pie?" I suggested (fingers crossed) but nooooo. Not my husband.
He insisted on the elusive double-crust apple pie.
Awesome to eat and dreadful to make.
Even his Nana, who probably makes more of her amazing apple pies in one year than I've made in my entire life, seems to dread this daunting process.
If the peeling and chopping of the apples wasn't bad enough, then you have to make not one, but two, fickle pastry crusts.
Ugh.
I despise pie crust. It's like rolling out one giant, dry, crackly sugar cookie that you then have to transport across a few inches that may as well be the Atlantic Ocean.
I don't know about you, but my pie crust formation always goes something like this : after cracking in at least 3 of the most inconvenient places during transfer from counter to pie plate, the crust barely fits the circumference of the plate and I must haphazardly piece it back together into some mortifying, Frankenstein-like abomination.
Why would I voluntarily put myself through such torture?
Luckily, I was able to find a pie crust recipe in a Cook's Illustrated publication with a 'secret ingredient' that supposedly helps to keep the crust from cracking - vodka.
(FYI- vodka also helps to keep the baker from cracking under the tremendous pressures of crafting a double crusted pie, so feel free to pour yourself a cocktail while you have the bottle out.)
But the vodka in the crust did help fix some of my usual problems. It also helps to use shortening, which is an ingredient I virtually never use, but it's consistency is arguably necessary to achieve the perfect crust.
And I must say that, despite the unavoidable tedium of apple pie assembly, things did go much smoother for me this time than they have in the past.
Most importantly, the result was pretty phenomenal. Finally, a 100% homemade pie that had a delicious, flaky crust and I was NOT embarrassed to show it off! Mr. Vittles suggested that I make one on the first of the month, "like paying the rent."
That won't be happening.
But if you're feeling bold or perhaps just hoping to overtake me in the race for Wife of the Year, I encourage you to get in on this double-crust action. It's a lot of work, but if you have the time you won't be sorry!
Apple Pie (with Foolproof Pie Crust)
Make Crust & refrigerate:
- 2 1/2 C. flour (plus extra for rolling out dough)
- 1 t. salt
- 2 T. sugar
- 12 T. cold unsalted butter, in 1/4" slices
- 1/2 C. cold vegetable shortening, in 4 pieces
- 1/4 C. cold vodka, combined with 1/4 C. cold water
Scrape bowl with rubber spatula and redistribute dough evenly around processor blade. Add remaining cup flour & pulse until mixture evenly distributed around bowl & mass of dough has been broken up (4-6 quick pulses).
Empty mixture into medium bowl & sprinkle with some of vodka mixture. With rubber spatula, use a folding motion to mix, pressing down on dough until slightly tacky & sticks together. Use more of the vodka mixture as needed.
Divide into 2 even balls & flatten each into 4" disk Wrap each in plastic wrap and refrigerate 45 mini, or up to 2 days.
When ready to bake, preheat oven 400 degrees and place a rimmed baking sheet on rack on lowest rack in oven. Spray 9" pie plate with nonstick spray.
Remove one disk of dough from fridge & roll out on a generously floured surface to 12" circle, about 1/8" thick. Roll loosely around rolling pin and unroll onto pie plate, leaving at least 1" overhand on each side.
Working around circumference, ease dough onto plate by gently lifting edge of dough with one hand while pressing into plate bottom with other hand. Leave dough that overhangs in place, and refrigerate until firm, about 30 minutes.
Prepare Filling:
2 1/2 lbs apples, peeled, cored & cut into 10 wedges (about 5 medium-large apples)
1 t. lemon zest
3 T. flour
1/2 t. ground cinnamon
1/4 t. ground allspice
1/4 t. ground cloves
1/8 t. salt
2/3 C. sugar
1 T. fresh lemon juice
1 large egg, lightly beaten & mixed with 1 t. water (for egg wash)
In large bowl, whisk flour, zest, spices, salt & sugar together. Gently toss with apples and lemon juice, and fill shell when finished chilling in refrigerator. Set aside.
Roll out second disk on floured surface to 11" circle, 1/8 " thick. Roll loosely around rolling pin & unroll over pie, leaving at least 1/2 " overhang on each side. Using kitchen shears, trim the bottom crust's overhanging dough leaving 1/2" overhang.
Fold both pieces of overhanging dough under itself so that edge of fold is flush with outer rim of pie plate. Flute edges using thumb & forefinger, or press with tines of fork to seal top crust to bottom. Brush top & edges with egg mixture. If dough is very soft, chill in freezer 10 minutes.
With small sharp knife, cut 5 steam vents in top of crust. (Optional - sprinkle with 1 T. sugar and/or use a metal pie crust shield to prevent edges from burning*). Place pie on baking sheet & bake 30 minutes. Reduce oven temperature to 350 degrees and continue to bake until crust is deep golden brown (30-40 minutes longer). Transfer pie to wire rack & cool to room temperature, 2-3 hours.
*If you don't have a pie crust shield: Use an 8" bowl or other round circle to cut a hole in the middle of a piece of aluminum foil. Place over pie and secure over edges to prevent from burning. Take off during last 20-30 minutes of baking.
Filling recipe adapted from The Gourmet Cookbook; Pie Crust recipe from Cooks Illustrated
Monday, October 18, 2010
Caramel Apples
This is going to have to be another short post because the power cord on my computer broke again (this time not my fault - just faulty design!) So I am on borrowed time here until the new power cord I ordered arrives in the mail.
Luckily this one has a 2-year warranty because I can't believe the piece of crap I bought 3 months ago is already broken!!
Grr.
Something to look forward to when I get full power - Mr. Vittles and I celebrated our first anniversary and I made a double-crust apple pie from scratch!
I'm not sure which event was more monumental ... I guess I have a few business days to ponder that ;)
In the meantime, enjoy this recipe for caramel apples in time for Halloween!
Caramel Apples
- 1/2 C. brown sugar
- 1/4 C. light corn syrup
- 2 T. butter
- 1/2 C. sweetened condensed milk
- 1/4 t. vanilla extract
- 3 popsicle or craft sticks
- 3 medium tart apples, washed & dried
In saucepan, combine syrup, sugar, and butter. Stir well. Bring to a boil over medium heat, stirring constantly. Slowly stir in milk (so as not to stop the boiling) and continue to stir constantly until mixture reaches 235 degrees (soft ball stage) on a candy thermometer.
Remove from heat and stir in vanilla. Allow caramel to cool about 5-7 minutes, stirring constantly.
Dip apples one at a time, tipping saucepan on it's side if necessary, and set coated apples on prepared waxed paper. Allow to cool or refrigerate to set. Serve within a day or refrigerate up to 3 days to keep fresh.
Recipe from Justapinch.com by Wendy Rusch
Thursday, October 14, 2010
Garlic & Herb Roasted Potatoes
I have made some good new recipes lately, but today I want to post one of my old favorites.
These are my go-to potatoes when I'm looking for a side that's delicious but doesn't require a ton of work. As long as you use red, white, or yukon gold potatoes, you don't have to peel them.
This makes me happy ------> :)
Because I do not like peeling potatoes! Just make sure you give them a good scrub to get the dirt off.
Garlic & Herb Roasted Potatoes
- 3 lbs. small red or white potatoes (or, yukon gold)
- 1/4 C. good olive oil
- 1 1/2 t. kosher salt
- 1 t. freshly ground pepper
- 2 T. minced garlic (about 6 cloves)
- 1 T. Italian seasoning*
*Italian seasoning is usually some type of a mix of dried thyme, marjoram, basil, oregano & rosemary. If you don't have it in your pantry, use whatever of those spices you do have (including dried parsley, if you like) to suit your taste.
Recipe slightly adapted from Food Network's Ina Garten
Sunday, October 10, 2010
Snack Sunday : Homemade Chex Mix and Garlic-Buttered Popcorn
I love homemade snacks.
While they are not necessarily healthy, at least you have a better understanding of what ingredients are going into them. Not to mention, you can tailor them to your tastes.
So I decided to have a Snack Sunday and post two of my favorites. Now that fall is in full swing, they are easy to do and perfect for settling down to watch movies or football.
Don't get me wrong - Chex mix from the store is not bad, but I really only like the corn Chex, the pretzels, and the plain bagel chips (in that order). I always pick around the breadsticks and the wheat Chex. So when I make it at home, I only add the ingredients I like.
For one birthday, my mom actually made it for me with strictly corn Chex! (Mr. Vittles made fun of me, but it was delicious.)
So bear in mind that you can customize the mix to include whatever ingredients you like. General Mills (the makers of Chex cereal) suggests using a mix of wheat, rice, and corn chex (3 C. of each) and 1 C. each of pretzels, mixed nuts, and bite-sized bagel chips. My recipe below is the way I like it- but as long as it adds up to 12 C. of dry ingredients, you are good to go.
As for the popcorn, I read not long ago on RealSimple.com that you could pop it plain in the microwave. I was pretty excited because my popcorn popper is a pain to clean & this means one less dish!
Homemade Chex Mix
- 7 C. corn Chex cereal
- 2 C. bite sized bagel chips
- 3 C. mini pretzels (I like the checkerboard ones too)
- 6 T. butter
- 2 T. Worcestershire sauce
- 1 1/2 t. seasoned salt
- 3/4 t. garlic powder
- 1/2 t. onion powder
Bake 1 hour, stirring every 15 minutes. Let cool and store any leftovers in airtight container. (Makes 24 half-cup servings).
Recipe slightly adapted from Chex.com
Garlic-Buttered Popcorn
- 1/2 C. unpopped popcorn kernels
- 1 T. canola oil
- 2 T. butter
- 1/2 t. minced garlic (or 1 small minced clove)
- 1/4 t. salt
In small skillet over medium heat, melt butter. Add minced garlic and saute 30 seconds until fragrant. Drizzle over popcorn and sprinkle with salt. Toss to coat and eat warm.
Popcorn recipe from Real Simple; Topping is Original Recipe
Tuesday, October 5, 2010
Three Cheese Roasted Red Pepper Lasagna
Tonight was one of those nights where I looked in the fridge & realized I had a multiple things open that were about to go bad.
More specifically, I had roasted red peppers and ricotta that needed to be used STAT. I also had some provolone on it's last legs. And last week I noticed a package of no-boil lasagna noodles hiding in the back of a cabinet that were only half-used.
From, oh, a year or so ago.
I guess it doesn't matter? But still, they are taking up precious storage space in my cabinets.
Hmm... what to do, what to do.
Clearly all signs were pointing to red pepper lasagna. So I decided to wing it and see what I came up with.
The results were pretty stellar, if I do say so myself. Super cheesy and a little zippier than your usual lasagna thanks to the roasted red peppers.
I was wondering if Mr. V would notice anything different, but I just asked my usual "How is it?"
"Good." Pause. "Really good." Longer pause. "What's in it? Jalapenos?"
Which of course cracked me up, but I guess he was on the right track. He said it tasted "way better than regular lasagna, which is usually really boring."
Maybe it's the Italian in me, but I love when I find new ways to get the V Man to enjoy pasta :)
Three Cheese Roasted Red Pepper Lasagna
- 1 C. roasted red peppers
- 1 15-oz. can tomato sauce
- 8-10 fresh basil leaves
- 1/2 t. onion powder
- 1 t. minced garlic
- freshly ground black pepper, to taste
- 1 C. ricotta cheese
- 1 C. grated mozzarella, divided
- 8 no-boil lasagna noodles
- 8 slices provolone cheese
- 4 T. freshly shredded parmesan cheese
In small bowl, combine ricotta and 1/2 C. mozzarella (reserve other 1/2 cup).
Lightly grease a 2-quart square baking dish with non-stick spray, and pour 1/2 C. of the red pepper sauce on the bottom of dish. Top with two of the noodles, side by side, so bottom of pan is covered. Then layer ingredients as follows:
-spread half the ricotta mixture over the noodles
-top with 2 T. parmesan cheese
-pour 1 C. red pepper sauce on top
-place 4 slices provolone
-place two more noodles on top
-remaining half of ricotta mixture
-two more noodles
-4 slices provolone
-two more noodles
-the rest of the red pepper sauce
-sprinkle with other 2 T. parmesan
-sprinkle with reserved 1/2 C. mozzarella
Cover dish tightly with foil and bake 45 minutes. Remove foil and bake an additional 5 minutes. Then remove from oven & let stand 15 minutes before serving.
Original Recipe
Monday, October 4, 2010
Spiced Applesauce
Grocery-store apples have nothing on ones straight from the tree.
I hate when apples are mushy and mealy - I think they are best when they're crisp and a balance of sweet & tart. Granny Smiths usually fit the tart & crisp bill, but they get tiring after a while.
Mr. Vittles likes them to be sweet (shocker), which is why he loves Red Delicious, but that gets boring too.
So picking apples is just one of the many reasons I look forward to fall. Surrounded by rows of apple trees, they all look so good I just want to pick every single one.
It's a sickness, I know.
Tragically, with our wedding in mid-October, Mr. Vittles and I did not have a chance to go apple-picking last year.
Broke my little apple-lovin' heart :(
So this year I knew that not only did we have to go, we had to go early to get the good pickings. Which was a wise decision because we got to choose from SEVEN different types - Red & Yellow Delicious, Stayman Winesap, Jonathan, Empire, Fuji, Crispin, and McCoun.
I, of course, sampled them all.
Normally I would never be ok with spending $25 on apples. But these bad boys are totally worth it
Once I got my paws on all these scrumptious fruits, my first order of business was to make applesauce.
Growing up, my mom always made it after apple-picking (among many other treats, such as apple crisp & apple pie) and it's so much better than applesauce from a jar! For mine, I used 3 different kinds of apples to make it a little more interesting.
If you don't have a crockpot/slow-cooker, you can probably make this on the stove - I would put all the ingredients in a pot with enough water to just cover the apples, bring to a boil, then cover and reduce heat to a simmer until apples are soft (my guess is 20-30 mins). If large chunks remain, mash with the back of a fork or potato masher.
Spiced Applesauce
- 8-10 medium-sized cooking apples
- 1/2 C. water
- 1/3-3/4 C. sugar*
- 1 t. ground cinnamon
- 1/4 t. ground cloves
*Sugar amount depends on how sweet you like it and also what types of apples you are using. If they are mostly apples that are naturally sweet (ie Red/Yellow Delicious, Fuji) use less sugar. If you are using ones that are slightly tart (ie Winesaps), use more sugar.
Family Recipe, Origin Unknown
Friday, October 1, 2010
Turkey Shepherd's Pie with Yukon Golds
I have two announcements and one recipe.
Announcement 1: I officially have a sponsor. If you live in NJ, check out Taskmasters Handyman Services. For all those jobs that are too small for a contractor but too big to fit on your husband's to-do list - they're da bomb.
And... I just said "da bomb." Yikes. Don't ever let me do that again.
Announcement 2: V&B has it's own official EMAIL ADDRESS! I noticed a few readers have left comments that probably would be more appropriate in email format (not that commenting is bad - keep 'em coming! Lets me know you are reading :)) So if you have any questions, comments, advice, pictures, whatevs - email away at vittlesandbits@gmail.com. I may not check it every single day but I promise I'll respond to you at some point.
And lastly - on to the recipe.
For someone who used to think it was a mild catastrophe to have different foods touching on my plate, eating Shepherd's Pie is equivalent to man landing on the moon.
Alright so that's a slight exaggeration. But if you like your meat, potatoes and vegetables segregated, I will flat out tell you this is not for you.
For whatever reason, men seem to love dishes like this though. So when I make things like Spinach & Feta Rigatoni, I have to throw Mr. V a bone every now & again.
A bone that just happens to look kinda like something in your 4-month old's diapers, and for that I apologize.
This and the meatloaf could seriously stand to take some modeling lessons. I mean, it's downright brutal to snap a good pic. But hopefully by now, at our six-month anniversary as blog friends (yay!), you know I would not steer you wrong.
Turkey Shepherd's Pie with Yukon Golds
Turkey Base:
- 1 1/3 - 1 1/2 lbs. ground turkey
- 1 T. olive oil
- 1/2 large sweet onion, minced
- 1 t. minced garlic
- 3/4 t. each of dried thyme and sage
- 1/2 t. cumin
- 1/4 t. celery seed
- 1/4 C. all purpose flour
- 1 1/2 C. chicken broth
- 1 1/2 C. frozen mixed vegetables, drained (or 1/2 C. each of carrots, peas, & corn)
- 1 t. Worcestershire sauce
- salt & freshly ground pepper to taste
- 2 1/2 lbs. yukon gold potatoes, peeled & quartered
- 1 heaping t. minced garlic
- 1/3 C. milk
- 1 T. butter
- 1 egg, lightly beaten
- 1 t. seasoned salt (or regular salt)
- freshly ground pepper to taste
- optional - grated cheddar cheese & paprika for garnish
Boil quartered potatoes and garlic in large saucepan until potatoes are soft. Drain water and mash. Add beaten egg, butter, milk, salt and pepper and mash (or mix with hand mixer) until well blended. Set aside.
While potatoes are cooking, heat olive oil in large skillet over medium-low/medium heat. Add onions and saute until soft, about 2 minutes. Add garlic and saute until fragrant, about 30 seconds. Add ground turkey and, stirring occasionally, cook until no longer pink.
Stir in flour, thyme, sage, cumin, celery seed, and chicken broth. Bring to a boil, then reduce heat and simmer 10 minutes. Add mixed vegetables and Worcestershire sauce, and season with salt & pepper to taste.
Remove from heat & place in prepared pan. Spread mashed potato mixture over the top evenly, then rough up the surface with a fork. Garnish with a sprinkling of grated cheese & paprika, if desired.
Place in oven and bake 25-30 minutes until cheese is melted & potatoes are golden brown in color. Let rest for about 10 minutes after removing from oven before serving. Serves 6.
Note: You can substitute russet/white potatoes and beef for the yukon golds & ground turkey if you prefer, I just happen to be partial to those ingredients.
Recipe adapted from RecipeTips.com
Monday, September 27, 2010
Angel Food Cake with Chocolate Whipped Cream
I don't know about you, but week-long birthday celebrations are always OK in my book.
Mr. Vittles is
The first was last Saturday, the 18th, where two amazing things happened- one, I was actually able to surprise my husband with a party at an art gallery.
And two, I convinced him to step foot in said art gallery.
Ok, so it was only under the guise of attending my friend's parents' surprise 40th anniversary party... but he went there nonetheless. (FYI, an art gallery is a perfect venue for a party - it's a big empty room that's already been decorated for you! Especially if you find a fabulous, non-stuffy place like this one.)
Mr. V is a tough one to keep secrets from, though. He is not only very smart but very nosy. Not that I don't have a little Curious George in me too, but this is a difficult trait to work with with when you're trying to plan a party right in front of someone without them knowing.
Thankfully he works almost twice the amount I do (yes, I have a full-time job) so I was able to do most of it when he wasn't home. Everything else I was able to do out in the open because he thought I was helping my friend.
Bwah hahahaha!
So the good news is that he was super surprised, but the bad news is that I have broken all trust in our marriage.
!!
Kidding.
I think?
But either way, we had a fabulous night filled with good friends, close family, delicious food & desserts, and lots of alcohol. Then, when the formal party was over, a group of us went to a bar, stayed up way past our bedtime (not that that's saying much for Mr. V and I), and some of us even passed out in a pile of spilled cookies in the hotel room.
What could be better than that?
Devon Vittles put it best when she said "If your 30th birthday party is any indication of how much fun you are going to have in the next decade, I'd say you are all set."
Insanity.
Anyway, since I purchased a cake for the party, I decided I should make the V Man's favorite cake on Friday. But his actual birthday (September 25) was spent in Cape May celebrating the marriage of our friends Bryan and Pauline, so he has barely had a chance to eat any of this cake yet.
It's probably not as good as when his mother or Nana Vittles makes it, though - it's my first go-around and Nana "wings it" so I had no real measurements to accompany the list of ingredients.
It's also slightly painful for me to cover a virtually fat-free cake in an entire pint of whipped cream & melted chocolate - especially since, like these flourless chocolate cookies, angel food cake is made almost entirely of sugar.
So between you, me, and the entire internet community (which includes my mother-in-law who reads this blog religiously)-
I made my cake with less whipped cream & glaze than my in-laws do.
(Ahh! I thought lightening might strike me down as I typed that but I seem to have all my limbs & mental facutlies, so I guess we're all good.)
Mr. V... was none too happy to hear this.
Maybe that's why the cake was still sitting in the fridge untouched until about an hour ago?
He claims he was waiting for candles and a song. He also says that he's going to tell my dad on me (?) because not only did I refuse to sing to him, I did not do the Birthday Dance of Joy that is customary in my family.
I pointed out that I already gave him a cake with candles and sang 'happy birthday' at his party, but there's no reasoning with him.
And to think I voluntarily agreed to an eternity of this abuse!
Luckily he was able to get the full-fat/full-deliciousness version, complete with song and candles, at his final celebration yesterday (courtesy of Pammy Vittles). So all is right in the world, and it's a happy birthday indeed :)
Now if you love sweets on top of sweets like Mr. V, just double the whipped cream and glaze amounts below for one angel food cake - you will also want to cut the cake into 3 layers rather than two to make room for the extra whipped cream!
Angel Food Cake with Chocolate Whipped Cream
- 1 angel food cake (either made from your favorite recipe or purchased from a store)
- 8 oz. heavy cream
- 3 T. unsweetened cocoa powder
- 1/4 C. - 1/2 C. powdered sugar (depending on how sweet you like it)
- 1/2 t. vanilla extract
- 2 T. butter
- 1 oz. baking chocolate (I used semi-sweet)
- 2 T. milk
- 1/4 C. powdered sugar, plus more as needed for desired consistency
In a separate medium, microwavable bowl, combine butter and baking chocolate. Melt together in 10-15 second increments, stirring after each until smooth. Add milk and 1/4 C. confectioners sugar, and mix until combined (I used a hand mixer here, still fitted with whisk attachment, for convenience).
Add more confectioners sugar if needed to reach desired consistency. Pour glaze over the top of the cake, allowing to drip down sides. Serve immediately, or refrigerate to serve cold. Refrigerate any leftovers.
Family Recipe, Origin Unknown
Tuesday, September 21, 2010
Pumpkin Whoopie Pies with Molasses Cream Cheese Filling
I had all intentions of posting something fun for you tonight.
However, its already after 10PM and I just helped Mr. Vittles write a (glowing) cover letter for a job application.
My creative juices are all tapped out.
:(
Luckily, my creativity was flowing the night I made these whoopie pies - so I guess we'll just have to live vicariously through that memory.
I got the recipe for the cookie part from Joy of Baking, and the filling is just an original recipe that I made to complement the pumpkin.
Mr. V said the whoopie pies tasted like pumpkin bread (one of his absolute most favorite things) with whipped cream icing.
Or in other words-heaven.
Pumpkin Whoopie Pies with Molasses Cream Cheese Filling
Cookies:
- 2 C. all purpose flour
- 1 1/4 t. baking powder
- 1 t. baking soda
- 1 t. cinnamon
- 1/4 t. ground ginger
- 1/8 t. ground cloves
- 1/2 t. salt
- 2 large eggs, room temperature
- 1 1/4 C. light brown sugar
- 1/2 C. canola oil
- 1 t. vanilla extract
- 1 C. canned pumpkin
In separate bowl of electric mixer, beat eggs & sugar til light & smooth, about 2 minutes. Beat in oil, vanilla, and pumpkin. Add flour mixture & beat until just incorporated.
Using a small ice cream scoop (if you want large pies) or a small cookie scoop (for bite-sized pies), place mounds of batter onto prepared sheets 2" apart. Using a metal or rubber spatula, slightly flatten the mounds and spread into a circle shape. (The cookies pretty much hold their shape in the oven so you want them to be as uniform as possible going in!)
Bake 15-18 minutes (for large size, or 10-12 minutes for small) or until toothpick inserted in middle comes out clean. Remove from oven & cool a couple minutes on sheet, then transfer to wire rack to cool completely.
When cookies are cool, prepare Molasses Cream Cheese Filling:
- 6 T. butter
- 6 oz. cream cheese
- 1 1/2 C. confectioners sugar
- 1 t. vanilla
- 1/4 t. cinnamon
- 1 T. molasses
- 1 T. milk
Spread a layer of filling to desired thickness onto the flat side of one cookie. Lightly place a matching cookie flat side down on top of the icing, and twist gently to evenly distribute filling.
Makes about 9 large pies, or 18 bite-sized ones.
Cookie recipe from JoyofBaking.com, filling recipe original
Friday, September 17, 2010
Sweet Yellow Cornbread
Ok. So I can't leave you hanging with the cornbread recipe.
The turkey chili needs it... like the Giants are going to need some serious 'rooting' this Sunday night when they play Indianapolis.
You promised, remember? I'd give you the cornbread and you'd wish for my team to make it to the Superbowl.
But the season just started so we're gonna have to take this one game at a time.
Manning vs Manning, how utterly exciting!
C'mon. Your chili told me it was lonely....
Chili & Cornbread.
Manning & Manning.
Travis Lindquist/Getty Images found on Yahoo! Sports
Mr. V is a Dolphins fan (I married him anyway) but he was reading an article with this pic from the last time Indy played NY & noticed the brothers have the SAME look on their faces!
Gonna be a crazy game.
At least I know which Manning you'll be cheering for.
Anyhoo... this cornbread recipe is actually from the back of the cornmeal package.
I'll (sadly) admit that I used to make the Jiffy brand out of the box for convenience sake - but I started noticing it had a strange aftertaste. Not to mention it probably has hydrogenated oils and all that bad stuff you're not supposed to eat.
The one thing I do like about the Jiffy cornbread is that it's sweet. Like cake.
Mmmm. Cake with dinner.
So I used Indian Head's suggestions for making their original recipe moister and sweeter.
Slightly more work for a cornbread that's waaaay better than anything out of a box!
Sweet Yellow Cornbread
- 1 C. yellow corn meal
- 1 C. flour
- 1/2 C. sugar
- 3 t. baking powder
- 1 t. salt
- 1/2 C. oil
- 2/3 C. milk
- 2 eggs, beaten
Recipe from Washington Quality Foods, the makers of Indian Head Corn Meal
Subscribe to:
Posts (Atom)