Friday, April 6, 2012

Coconut Patties


I don't know why these seem appropriate for Easter to me, but they do.

Maybe it's just because I love chocolate and coconut, so it seems appropriate for every occasion?

The only person I know who enjoys this combo as much as me is Mr. Vittles.  He doesn't usually get too excited about my treats, but coconut patties are one of his favorite things.

If you have ever taken a trip to Florida, you have probably seen these in airport gift shops and rest stops.

Mr. Vittles grandparents lived down there when he was growing up, so I'm assuming that's how he got introduced.  As for me, my mom's parents had a second home down there and I eventually went to college in Sarasota.

My dad and I used to make the trip to and from school together, so I could have my car on campus.

We always had grand plans for stopping along I-95 & I-75 to see some attractions, such as the Weeki Wachee mermaids.  But as the hours and miles ticked by (and it seemed more & more cramped inside my little 2-door Chevy Cavalier) my dad would inevitably get too impatient to make any side trips.

So after almost 4 years the only things we saw were some rest stops boasting 13-foot gators, this weird place called Alligator Town (where oddly enough we saw not one alligator, nor one other human being?) and South of the Border.

Which, judging by the myriad billboards along the highway, should have been way cooler.  Instead it was mostly disgusting and run-down and just overall tired.

Anyway... back to the coconut patties.  These bad boys are cavity-inducing, chocolate-covered sugar bombs.

But they are freakin' delicious.

Hope you all have a happy holiday!

Coconut Patties

  • 1 1/4 C. powdered sugar
  • 1/2 stick (4 T.) butter, cubed
  • 1 egg white
  • 1 1/4 cups sweetened shredded coconut
  • 1 t. vanilla extract
  • 1/2 t. coconut extract (optional)
  • 1 C. semi-sweet chocolate
  • 1 t. vegetable shortening

Fill a medium saucepan with an inch of water, and set it over medium heat to simmer.
In the bowl of a double boiler (or a heatproof bowl that fits snugly on top of your saucepan), combine the powdered sugar, butter, and egg white, and whisk together. Place the bowl over the saucepan of simmering water, and continue to heat and stir until the mixture is well-combined and very runny, about 5-10 minutes.

Remove the bowl from the heat and stir in the coconut, vanilla, and coconut extract (if using). Cover with plastic wrap, and refrigerate until it is firm enough to scoop, about 2 hours.

Once the candy has firmed up, line a baking sheet with waxed paper or nonstick aluminum foil. Using a teaspoon or small cookie scoop, scoop small balls of the coconut mixture and flatten them into discs between your palms.  Place the discs on the baking sheet, and place sheet in freezer while you prepare the melted chocolate.

Place the chocolate chips and shortening in a microwave-safe bowl and microwave until melted, stirring after every minute.

Remove baking sheet with discs from freezer.  Using a fork or dipping tools, dip the discs in the chocolate and drag the bottom against the lip of the bowl to remove excess chocolate. Place the dipped patty on the prepared baking sheet and repeat with remaining coconut candy and chocolate.

Place the dipped patties in the refrigerator to set the chocolate, about 20 minutes. Store coconut patties in a airtight container in the refrigerator for 1-2 weeks.

Recipe slightly adapted from About.com

Monday, April 2, 2012

Hazelnut Carmelitas


So call me crazy, but Pinterest is one of the best things that's ever happened to me.

To say that I'm obsessed with it is a serious understatement.  I have wasted spent hours upon hours on this website, scrolling through pins.  Salivating over delicious foods.  Simmering with jealousy over other people's fabulous sense of style.  Willing my pea brain to remember all the handy tips I've read.  And wishing I had more time to make all the neat crafts I've seen.

(In a more practical sense, I also love Pinterest because it has brought so many new visitors to my blog.  Yay! I like new friends!)

Now, I recently noticed a very popular Pinterest recipe, for Carmelitas from Lulu the Baker, that I have been dying to try.

I'm sure the original recipe is amazing, but I wanted to put a slightly different spin on it - so I added some Nutella and toasted hazelnuts.

Oh my word.  These things are dangerous.

My dad and stepmom had Mr. Vittles and I over for dinner, and we brought these for dessert.  My stepmom specifically asked to be quoted on V&B that she "thoroughly enjoyed" this dessert.  Which, might I add, is a lot coming from a person that doesn't much care for sweets.

My dad... well that's another story.  I only brought a few because they don't like to keep bad-for-you food in the house, but he quickly determined that the two leftover bars would definitely not be going home with us.

I did have a couple more left at our house though, so I brought one to my friend (and cube buddy) Joe at work.  He loves caramel, so I figured he would enjoy it.  It lasted until about 8:30AM on his desk, when I heard a muffled "These are amazing!" over my cubicle wall, amidst lots of chewing.
So please, do me a few favors.

One, get on Pinterest if you aren't already.  

And two, make some carmelitas.  Plain, hazelnut, whichever - just please make them!

I can't be the only one wearing pants with an elastic waist around here.

Hazelnut Carmelitas

  • 16 caramel squares, unwrapped
  • 1/3 cup heavy cream
  • 1/4 C. nutella spread
  • 3/4 cup butter, melted
  • 3/4 cup brown sugar, packed
  • 1 cup flour
  • 1 cup rolled oats
  • 1 teaspoon baking soda
  • 1 C. semisweet chocolate chips
  • 1/2 C. chopped hazelnuts (I recommend toasting them first, but that's up to you)

Preheat oven to 350 degrees Fahrenheit.  In a large bowl, combine melted butter, brown sugar, flour, oats, and baking soda. Pat half of the oatmeal mixture into the bottom of an 8x8" pan.  Bake in preheated oven for 10 minutes.

While crust is baking, melt caramel squares with heavy cream and nutella in saucepan over low heat.  Stir until melted & smooth.

Remove pan from oven and sprinkle chocolate chips and hazelnuts over baked crust. Pour caramel mixture evenly over pan. Crumble remaining oatmeal mixture over caramel. Return to oven and bake an additional 15-20 minutes, until the edges are lightly browned. Remove from oven and cool completely before cutting.*

*The original recipe says you can put these in the fridge to speed up cooling if you are short on time. The bars shouldn't be served cold, but the caramel takes a long time to cool down.  I would wait until they are cooled a little bit though first if you used a glass pan (don't want it to crack).  Bars should be stored and served at room temperature.  Mine were good for about 5 days in an airtight container.  Makes 1 8x8 square pan.

Recipe Adapted from Lulu the Baker

Saturday, March 24, 2012

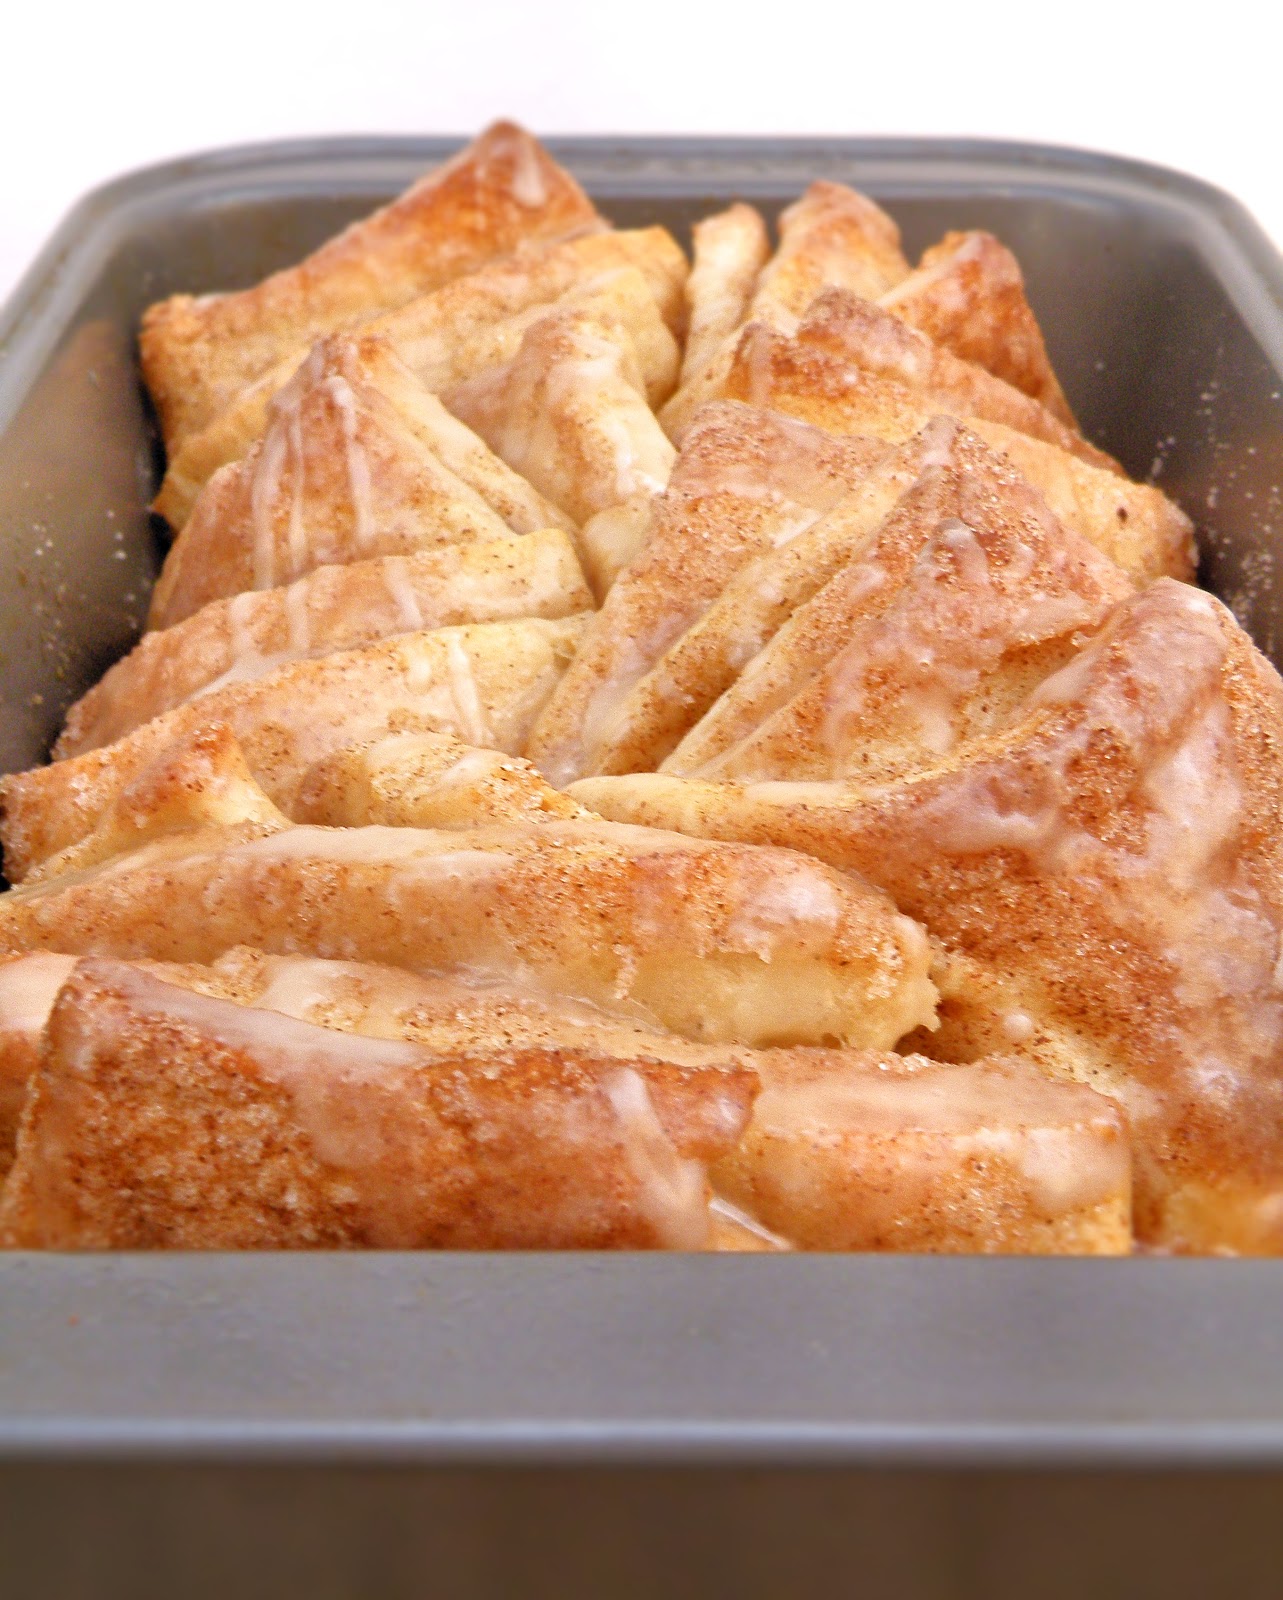
Overnight Pull-Apart Cinnamon Loaf


I was reading the April issue of Better Homes & Gardens when I came across this recipe.  

And there was no doubt in my mind that it would be part of my weekend menu.

I think my dough didn't rise as fully as it was supposed to... probably because the 'active' dry yeast was being lazy.

(Actually I believe it was because I didn't warm the milk enough to activate the yeast fully.  But it sounds better to blame lazy yeast than myself.)

Anyway, a half-risen dough ball meant I didn't have as big of a rolled-out rectangle as I was supposed to.  So then the stacked rectangles seemed too puny for the loaf pan.

But despite these issues, my loaf ended up filling out rather nicely while baking, and the smell in the house was incredible.   And the taste did not disappoint either - this was soooo delicious!

It's a perfect combo of sweet, sticky, soft & pillowy, and with a little crunch on top.

Mmmm.


What's also nice is that you can start the recipe the night before, let the dough rise overnight in the fridge, and finish it the next morning to cut down on the wait time.

Mr. Vittles had to give an estimate for a job this morning, and my loaf was done a little while before he came home.  Which worked out well because I could take my photos without any of his usual teasing... but I must admit, being left alone with this loaf was almost deadly for my waistline.

I seriously considered eating the whole thing and telling Mr. V that it got ruined and I had to throw it away.  

But luckily I got a hold of my self-control, and he came home a few minutes later anyway ;)

So be warned - make sure you are not left with this unsupervised!

Overnight Pull-Apart Cinnamon Loaf

Dough:
  • 3/4 C. milk
  • 1 package active dry yeast
  • 1/4 C. (4 T.) butter, melted
  • 2 T. granulated sugar
  • 1 egg, lightly beaten
  • 1/2 t. salt
  • 2 1/2 C. all-purpose flour 
  • 1/2 C. whole wheat flour (or more all-purpose flour)

Filling:
  • 1/4 C. (4 T.) butter, melted
  • 3/4 C. granulated sugar
  • 2 t. ground cinnamon

Glaze:
  • 1/2 C. powdered sugar
  • 1/2 t. vanilla
  • 1 - 2 T. milk (however much is needed to achieve pourable consistency)

Make dough:  In a microwave-safe measuring cup, heat the milk until just warm (105 to 115 degrees F).  Pour into large bowl of a stand mixer, then add the yeast.  Stir until yeast is dissolved.  Let stand 5 minutes or until foamy.

In small bowl, combine flours & set aside.  With a mixer, beat 1/4 cup melted butter, 2 tablespoons sugar, egg, and salt into the yeast mixture until combined. Add half the flour (1 1/2 cups), then beat on low for 30 seconds, scraping bowl as needed.  Increase speed to medium and beat 3 minutes more.  Stir in remaining flour. 

Shape into a ball (dough will not be smooth).  Transfer dough to an oiled bowl, and cover top of dough with a little more oil. Cover and refrigerate overnight, or up to 2 days. (Or, to make right away, cover and set in a warm place to rise for 45 to 60 minutes or until nearly double).

Grease a 9x5x3-inch loaf pan; set aside.  Remove dough from the refrigerator.  On a lightly floured surface, roll dough to 20x12-inch rectangle (or as close to it as possible).  Brush surface of dough with 1/4 cup melted butter, then sprinkle with the mixture of sugar and cinnamon (I actually ended up not using all the cinnamon sugar, but it's up to you).  

Cut the dough rectangle crosswise in five equal strips:
Stack strips on top of each other, then cut the stack into six pieces.  
You will now have 6 stacks of five rectangles.  Leave the stacks intact, and turn stacks on their side (cut sides up).  Place the pan lengthwise (so the short side is facing you) and loosely stagger pieces, diagonally, in pan. 


Coat top with any leftover butter and cinnamon sugar.

Let rise in a warm place for about 30 to 45 minutes. Meanwhile, preheat oven to 350 degrees F. 

Bake loaf about 30 minutes or until golden brown.  Place pan on wire rack to cool.  (Here you can either let the loaf cool 10 minutes, and then take out of pan & place on serving plate to glaze. OR you can glaze it immediately, while it's still in the pan, for a more informal serving. I did the latter, and just pulled the pieces right out of the pan.  Depends on your preference!)  Make glaze:  In a small bowl or measuring cup, stir together powdered sugar, vanilla, and enough milk to make a glaze of drizzling consistency.  Pour glaze over top of loaf.  I would recommend eating while it's still warm, but you can also let cool before serving.  Makes 8-10 servings.

Recipe Slightly Adapted from Better Homes & Gardens

Sunday, March 18, 2012

Irish Cream Mocha Fudge


Happy belated St. Patrick's Day, everyone!

I would have liked to post this before the holiday, but this past week really got away from me!

I made this fudge on Friday night for a party we went to yesterday in NYC.

In the spirit of starting festivities early, some of Mr. Vittles' friends hosted a brunch... in their amazing apartment that has not one but three decks.  It turned out to be a beautiful day, so we were able to spend a lot of time outside.

But since we wanted to take the train into New York, which takes about an hour & 45 minutes from our house, we had to be on the train by 7:50AM.

Usually on a Saturday morning, I am not even awake yet at that time.   (I get up at 6:15AM on weekdays for work though - don't worry, I'm not a total bum).  And to make matters worse, I overslept because I set my alarm incorrectly, so I was rushing and had no time for coffee or food.  The foggy weather here yesterday morning was not helping me pep up, either.  So I would have liked nothing more than to take a little nap on the way up to NYC... but I quickly found out that was not in the cards.

The train was filled with young (mostly college-aged) people, all decked out in green, I guess heading into the city for the St. Patrick's Day parade.  NJ Transit allows people to drink on the train, so they were already getting rowdy.  About twenty minutes into the trip it was already standing-room only.  On our particular car, there was a girl who was apparently having a birthday, and we must have heard the song "Happy Birthday" about ten times over the duration of the trip.  Not to mention other songs ("99 Bottles of Beer on the Wall"), various screams and chants, and also lots of banging on the roof of the train car.

My dad warned me from experience that the "drunk train" was going to be interesting.  But we were expecting that to be at night, not at 8 in the morning.

Surprisingly the train ride home around 5PM was much calmer.  I think at that point people were exhausted from drinking all day and ready for a nap.  Luckily, that early in the evening we were with either the lightweights or the smart people who had enough sense to call it quits - not the heavyweights, or ones that were forced by their friends to rally for the good of the group, and would likely end up spending more time in the bathroom than their seats.

If they even made it that far.

...

Yucky.

So anyway, St. Patty's Day is not one of my favorite holidays (mainly for the above reasons).  But we had a great time at the party, and hopefully everyone enjoyed the fudge.


It has loads of sugar, so it at least got the Mr. Vittles seal of approval!

Irish Cream Mocha Fudge

  • 1/3 C. Irish cream (such as Bailey's)
  • 1 T. instant coffee granules
  • 3/4 C. (1 1/2 sticks) butter
  • 1 7-oz. jar marshmallow cream
  • 3 C. sugar
  • 1/2 C. evaporated milk
  • 1 12-oz. bag milk chocolate chips
  • 1/2 C. semi-sweet chocolate chips
  • dash salt
  • 1 t. vanilla

Line a 9x13" pan with foil, and grease with nonstick cooking spray.  Combine milk and semi-sweet chocolate chips with salt in a large heatproof bowl & set aside.

Combine Irish cream with instant coffee in a small, microwave-safe bowl or measuring cup.  Microwave 20 seconds (more if needed) and stir to dissolve coffee granules.  Set aside.

In large saucepan over medium heat, combine butter, marshmallow creme, sugar, and evaporated milk, stirring until melted.  Slowly add irish cream mixture and bring to a simmer, stirring frequently, about 5 minutes.  (Reduce heat if mixture starts to burn).

Pour mixture over chocolate chips, and add vanilla.  Stir until mixture is smooth and creamy.  Pour into prepared pan and smooth evenly to sides.  Let chill in refrigerator until set, then cut into 1" squares.  Can be kept at room temperature, or in refrigerator if desired.  Makes one 9x13 pan of fudge.

Recipe Adapted from Justapinch.com

Sunday, March 11, 2012

Baked Zucchini Chips


Well I said last week that I'd probably be up to my old tricks by now.

But much to my own surprise, I decided to try another 'healthy' recipe I've been thinking about - zucchini chips!

If you ever look at the sidebar of my blog that lists 'popular recipes' you will see that Apple Chips are number one.

They have been for a while now, but the funny part is that they are number one by a landslide.

Mr. Vittles occasionally looks over my shoulder while I'm reviewing my blog's stats, and he is always so amused by the fact that the Apple Chips completely dwarf every other post.

This fact is absurdly evident by a bar graph that shows the top 10 posts' all-time number of views... basically one long bar, with a whole bunch of short ones beneath it.

Up until this week (when Cheesy Bacon Oven Chips suddenly blew up on Pinterest) the Apple Chips had four times more views than the 2nd most popular post.

So... in light of people's apparent interest in this recipe, Mr. V decided that I need to make chips out of something else.

And the next, most logical thing that came to my mind was zucchini.


To me, these chips taste kinda like thin & crispy pumpkin seeds.  (I guess that shouldn't be too much of a surprise since they are relatives in the squash family).  Much lighter, but the taste is similar.

And the seasoning possibilities are endless - you can tailor them to your liking.  Garlic, paprika, chili powder... use your imagination!  I went with a basic Seasoned Salt and they came out great.  But whatever you choose, just make sure you go easy on the seasonings, and only use a little bit - these do shrink a lot in the oven, so what looks like a reasonable amount on the raw veggies could turn out to be way too much!


Baked Zucchini Chips

  • 1 zucchini 
  • canola cooking spray
  • seasoned salt, or other seasoning(s) of your choice

Preheat oven to 225 degrees Fahrenheit.  Line a baking sheet with parchment paper or nonstick foil, and spray with canola oil.  Set aside.

Slice zucchini into thin medallions, about the thickness of a quarter.  (You can either use a knife & a very steady hand, or a mandoline slicer.)

Lay out slices on prepared baking sheet, and spray tops lightly with additional cooking spray.  Sprinkle with seasonings of your choice. (A note on seasoning, however - use LESS than what seems appropriate.  These shrink considerably in the oven, and if you use too much it gets very concentrated.  It's better to end up underseasoning and add more later.)

Place in preheated oven and bake 45 minutes.  Rotate baking sheet, and bake an additional 30-50 minutes, until chips are browned and crisped to your liking.  These are best eaten within a couple hours of removing from the oven, as they start to get chewy if left out.  One zucchini makes one serving (1/4 C. - 1/3 C. of chips depending on the size of your squash).

Original Recipe

Sunday, March 4, 2012

Blueberry Oat Muffins


For the past few months, Mr. Vittles and I have been on a house hunt.

And so far, the process of becoming a home-owner has been exhilarating, frustrating, and terrifying all at the same time.

I have literally memorized the MLS listings in our price range and geographical area, yet they all start to run together after a while.

This past week, we set out to visiting 7 houses we'd seen online and wanted to drive by.  As we were on our way to the third one, Mr. Vittles kept commenting about how familiar everything seemed.  We had looked at other homes in the neighborhood so I thought nothing of it - until we pulled up to the house and realized we had already looked at it in December, and crossed it off the list.

Whoops.  My bad.

We've had one house in mind, though, from the very beginning.  And I think negotiations are finally about to wind down, and (barring any serious issues) the house will likely be ours!

YAY!!

Owning a home has actually been our goal for years, but with Mr. Vittles' job as an assistant golf course superintendent, it was very likely that we'd have to move for him to be promoted to running his own course.  But we had no idea when he'd be able to move up, or (worse yet) where that would be.

Then this fall, he had an opportunity to become a partner with his brother & father in a construction business, and ultimately decided it was time to leave the industry he worked in for 13 years.  Everything has been going really well with their company, and we finally have the stability we needed to start putting down some roots.

For me the move is bittersweet, though.  While I am thrilled at the prospect of owning a home, I'm also sad to leave the house & neighborhood we live in now.

I am also pretty bummed about moving, in & of itself... once again.  We're hoping this is our last move for while, but since graduating college seven years ago this will be my fifth time moving.  And Mr. V has the same amount under his belt, if not more.

It's basically just one giant, exhausting game of Tetris and I am not looking forward to it in the least.

Still, the bright side is that you typically shed a lot of unwanted or unneeded items (we already have 8 huge shopping bags of stuff to donate to Goodwill).

You also inevitably eat way less, because you are so busy there's hardly time to concern yourself with petty things like hunger except for extreme situations.

And then... there's the workout.  Scrubbing down both the house you're in and the house you're moving to.  Lifting boxes. Going up & down stairs. Standing for hours on end, fitting items into boxes, then fitting those boxes into vehicles. (See? It's Tetris, I'm telling you.)

Our move last February came at a rough time, though - I was recovering from foot surgery on both feet.  So a lot of the work fell on my poor hubby, and yet I still pushed the envelope more than I should have.

(When my doctor & physical therapist told me to 'take it easy for a while' I'm thinking they probably didn't mean 'move everything you own into a house with 3 floors & a basement'?)

But this time I will be ready.

This time I will not wimp out on Mr. Vittles.

My feet are fine, I'm feeling energized, and this week I'll be eating these healthier, whole grain blueberry muffins instead of dark chocolate cupcakes with strawberry buttercream.


Yep.

That's me.

Super duper health-conscious.

...

Ah, who am I kidding?  Next week I'll be back to my old tricks, I'm sure.

(In fact, today's post would have been very un-healthy, had a recipe I was working on not backfired on me!)

But in the meantime, we can all have a slight reprieve from my usual.

My landlord said these were some of the best blueberry muffins he had ever tasted (thank you, Warren!), so despite the 'healthier' take, I think you will still enjoy them :)

Blueberry Oat Muffins

1 C. old-fashioned oats
1 C. all-purpose flour
1/2 C. whole wheat flour
1/2 C. packed brown sugar
2 t. baking powder
1/2 t. baking soda
1/2 t. salt
1/4 t. ground nutmeg
1 large egg
1 C. + 2 T. low-fat buttermilk
1/4 C. canola oil
1 1/2 t. vanilla extract
2 C. blueberries, rinsed & dried
granulated sugar, for sprinkling (optional but recommended)

Preheat oven to 400°F. Spray 12-cup muffin pan with nonstick cooking spray, or line with paper liners.

Place oats in a food processor, and pulse until finely ground.  Add flours, brown sugar, baking powder and soda, salt, & nutmeg- pulse to combine.  Empty dry ingredients into a large bowl.

In small bowl, whisk egg, buttermilk, oil, and vanilla.  Add to flour mixture and stir just until flour is moistened.  Fold in berries.

Spoon batter into muffin-pan cups (I like to use a large cookie scoop to divide batter evenly) and sprinkle tops with a little granulated sugar.  Bake 23 to 25 minutes, or until toothpick inserted in center of muffins comes out clean. Cool briefly in pan, then transfer to wire rack; serve warm, or cool to serve later.  Makes 12 muffins.

Recipe Adapted from Delish (Originally from Good Housekeeping)

Monday, February 27, 2012

Bacon, Lettuce & Granny Smith Apple Sandwiches with Goat Cheese


Besides having a break from cooking, I love going out to eat because I usually end up getting so many new ideas.

Recently I was inspired by an appetizer we had, to make the recipe for Cheesy Bacon Oven Chips.

And now this idea came from another local pub we like, called the Brickwall Tavern.  A while ago, I tried their bacon, avocado, and granny smith apple sandwich, with a lemon aioli.

And fell in love.

Honestly, I would never have thought of adding granny smith apples to a bacon sandwich, but it was soooo good.

However, as much as I love avocados, in this instance I felt like that was a little much.  (Though you might disagree).  The aioli was good too, but I thought the only thing better would be some lemon & garlic-spiked goat cheese!

People, let me tell you.  The result was heaven between two slices of bread.


(I am pretty much obsessed with goat cheese.  If you don't like the addition of lemon and/or garlic, just use plain- it will still be amazing.)

Mr. Vittles prefers a plain ol' "BL" so he did not partake in this concoction.  But I savored every single bite.

And that night I tried a new nitrate-free bacon, which did not have as many slices in the package.  So we only got three sandwiches out of it - two for Mr. V, and one for me.

I was quite sad that there was no bacon left.

:(

I would've liked to have leftovers for another sandwich the next day.

:( :(

Oh well.  Guess I'll just be forced to eat the remainder of my goat cheese on salads and crackers!

By the way - since this is so simple, this is not really a recipe but more of an idea.  The amounts are up to you & your tastes!

Bacon, Lettuce & Granny Smith Apple Sandwiches with Goat Cheese

  • whole wheat bread (or whatever kind you prefer)
  • bacon slices, cooked
  • baby lettuce (or spring mix)
  • granny smith apple, sliced into thin rounds
  • softened log of goat cheese
  • lemon juice and/or zest, if desired
  • garlic powder, if desired

Toast bread slices.  (If making flavored goat cheese, mix it with lemon juice/zest and garlic powder in the meantime.)  Spread goat cheese on the toast, and top with bacon, granny smith apple slices, lettuce, and another slice of toast.  Enjoy the fiesta on your taste buds!

Monday, February 20, 2012

Mug Banana Bread


This morning I was really craving banana bread, but no way was I going to make a whole loaf for one just piece.

First of all, Mr. Vittles doesn't really like it- so then I get stuck with all this bread, that I either have to eat by myself or give away.

Secondly, I had a very busy President's Day morning ahead that included sitting on the couch and watching Wife Swap reruns on Lifetime.  I needed banana bread, pronto.

But how?

I was thinking, since I've been seeing mug brownies & cakes all over Pinterest, maybe it's possible to make muffins or quick bread in a mug?

After a quick Google search, I found a lot of recipes that didn't look very appetizing.  I was starting to get discouraged when I finally found one that had some promise, on a blog called Micki's Morsels.  She had some really yummy-looking photos on her main page, so this seemed like a good source.

I still had my doubts that the microwave could produce a worthy substitute for oven-baked banana bread, but I decided to give it a shot.  Let me tell you, I was happy to be proven wrong.


It isn't an exact replica, and has a slight eggy aftertaste - but for me the good points definitely outweigh the bad.  The bread has a good consistency, and is very moist & yummy.  Not to mention it's a quick & easy way to make a single serving.   I will make this again for sure!

Mug Banana Bread

  • 3 T. + 1 t. all-purpose flour 
  • 1 packet stevia (or other sweetener of your choice equivalent to 2 t. sugar)
  • 2 T. brown sugar
  • 1/8 tsp. salt
  • 1/8 tsp. baking powder
  • 1/8 tsp. baking soda
  • 1 egg
  • 1/4  t. vanilla extract
  • 1 T. vegetable oil
  • 1 T. lowfat milk
  • half a banana, mashed
  • cinnamon, for sprinkling (optional)

In a large microwaveable mug lightly misted with non-stick spray, blend flour, sugars, salt, baking powder & baking soda. Add egg & mix until all the dry ingredients are incorporated. Stir in vanilla, oil & milk, then mashed banana.  Microwave 1-1/2 minutes to 3 minutes, depending on your microwave.

*You can stop it & peek in the door at 90 seconds to check if its done - it will probably rise over the top of the mug as it's heating, & if it's still runny it's not done yet.  But be careful not to overcook!  I have a pretty bad microwave, and mine took about 2 1/2 minutes.

Adapted from Mickis Morsels

Tuesday, February 14, 2012

On Love & eHarmony (and a Giveaway!)


I know that Vittles and Bits is a place where most of you come to get recipes, but some of you come to get stories, too. And today I want to share with you a story very close to my heart. (And also a giveaway! So even if you hate stories-just read on, k?)

Now given the nature of my blog, I typically only consider food-related reviews, but when I was recently offered an opportunity to review the online dating site eHarmony, I jumped at the chance.

Maybe some of you have already tried online dating, but if not, you might have ideas about what it's like.

It's weird.

The people on there are probably freaks.

They might lie to you.

They might hurt you.

And you know what? I thought a lot of those things too, until a time in my life when I was approaching the age of 25 and things were not going nearly as great as I had planned.

I was living in a crappy little place, working at a crappy job, and had just gotten out of a crappy 2 year relationship. (In all fairness, only the last half of that relationship was crappy, but you get the point).

I knew, though, I was ready to be serious with someone.

I knew the characteristics I wanted in a man.

I knew what I could live with and what was a deal-breaker.

I knew I didn't want to start back at Square One with a guy only to have it turn out to be n-o-t-h-i-n-g.

What I didn't know, however, was where to find another person in this same frame of mind.

But I had seen eHarmony commercials and was intrigued. I had some friends who had tried other 'popular' sites with no luck, saying it's no different from meeting a stranger at a bar. What attracted me instantly to eHarmony was the fact that they matched you with people.

This is where the old adage, "You get what you pay for," comes into play. Since I was looking for a quality relationship, I went to a quality website.

No sifting through pages upon pages of profiles that fit some vague criteria you thought would 'narrow things down.' No trudging through countless dates with people you have nothing in common with. No canoodling with people who could care less about your values and life goals, let alone share them with you. (Plus, this process seemed to lessen the probability of running into the aforementioned Freaks, Liars, and People That Can Hurt You. Bonus!)

To be honest, at this time in my life my paycheck barely covered my bills, let alone extras. But I reasoned that what I'd spend over one or two nights out at some lame bar with a bunch of predatory losers could cover a whole month's subscription to eHarmony. And if, in that month, I found no one of interest, then I would chalk it up to experience and move on.

Either that, or it would be the best money I ever spent.

Luckily for me, the latter turned out to be true. In that one month, I went on dates with three people from the site-Mr. Vittles was the first one I started emailing but the last one I met in person. We connected instantly on our first date. The next day, I called the other two gentlemen and told them while I had enjoyed our dates, I would not be able to see them again.

Not because I had psychic abilities and foresaw Mr. Vittles and I enveloped in wedded bliss, but because I knew the way I felt with him was the way every first date should feel. Not casual. Electric. And I wasn't going to settle for anything less.

After a few months, I knew this was light years ahead of any other relationship I'd had in the past. I had been in love before but never like this. After four months of dating, we took our first vacation together. (Belize!) After only six months of dating, we got an apartment together. After a year and a half of dating, we got engaged. And we were married just days before the two-year anniversary of our first date.


Like any couple, we've had our ups and downs. We've been through good times and bad.  But after more than 4 years together, I can honestly say I found not only a 'quality relationship' but a life partner.

Someone to share my hopes & dreams with. Someone who makes me laugh every single day. Someone I can wipe out in front of and not feel embarrassed. Someone whose shoulder I can cry on. Someone I can share my secrets with. Someone I can disagree with on silly issues, but is always on the same page with the things that truly matter. Someone who looks toward the future in the same direction as I do.

Someone who adores me as much as I adore him.

And even though we lived not more than 8 miles from each other, I probably would never have met my husband if it weren't for eHarmony. I owe my greatest happiness in life to this company.

And yet they paid me to write this post. How crazy is that??

Told ya it was the best money I ever spent!

Speaking of spending...eHarmony and BlogHer were cool enough to offer one of you lucky readers a $100 Visa gift card!

If you're like me and already have a great lady or fella in your life, you can take that lucky person out for a night on the town. Or if you're single, you can get yourself a new outfit to help you feel fabulous on your next date.

***PLEASE NOTE THAT THE GIVEAWAY PERIOD HAS ENDED, AS OF 3/15/12***

Either way, to enter for a chance to win just leave me a comment answering the question: "What is the most important character trait your partner must have, and why?"

Rules:
No duplicate comments. You may receive (2) total entries by selecting from the following entry methods: a) Leave a comment in response to the question above b) Tweet about this promotion and leave the URL to that tweet in a comment on this post c) Blog about this promotion and leave the URL to that post in a comment on this post d) For those with no Twitter or blog, read the official rules to learn about an alternate form of entry. This giveaway is open to US Residents age 18 or older. Winners will be selected via random draw, and will be notified by e-mail. You have 72 hours to get back to me, otherwise a new winner will be selected. The Official Rules are available here. This sweepstakes runs from 2/14/2012 -3/15/2012.

Thanks to everyone for indulging me in this chance to share a story that's very special to me. Now get to entering!

Visit the BlogHer.com eHarmony page to check out more blogger success stories and for more chances to win!

Saturday, February 11, 2012

Dark Chocolate Cupcakes with Strawberry Buttercream


I've always had a funny little relationship with Valentine's Day.

As a kid, I guess it was kinda fun to pick out your mini valentine cards for all your classmates and eat candy, but as soon as 'love' started getting involved I became mostly uninterested.

Once, in the 6th grade, I was surprised to find a full-sized Hallmark card mixed in my stack of tiny envelopes.  It was from a classmate of mine who apparently had a crush on me.

His name was Nick.  And if I remember correctly, the card asked if I would be his girlfriend.

Such a sweet thing to do, right?

Well I wrote on it "Never in a million years" and promptly returned it to him.

True story.

I was a mean, horrible, rude little person at the age of 12.  Definitely not my proudest moment.

(By the way, years later I sincerely apologized to Nick for being so awful to him in that situation, and we actually became friends).

But even though I can appreciate a gesture like that now, the truth is I'm still not much of a romantic.

I would choose to watch 300 over Sweet Home Alabama any day.

And while I do indulge in The Bachelor, I view it more as a train wreck you can't look away from then a fairy-tale love story.

Mr. Vittles would wholeheartedly agree.  On one of the few occasions he tolerated Bachelor-viewing in his presence, he said to me "I don't understand why they always have to have rose petals & candles everywhere in this show - somebody's gotta go and light all those candles, and vacuum all those things up afterwards."

So luckily for him, I've really never been a fan of Valentines Day.

Not because I don't like love.  I do!  There's no better feeling in the world than truly being in love, no matter what stage of the relationship you're in.

But I don't need jewelry or overpriced dinners in the company of every other couple in America to celebrate my love.

Plus V-Day comes right on the heels of my birthday, so it seems wrong having my husband shower me with gifts twice in a matter of weeks.

Though I guess most ladies would welcome this.  Some would even demand it.

But that's just not my style.

I can get down with a simple card, and maybe a little chocolate - best way to a Maggie's heart is through her stomach.

(Another true story).


Actually, some chocolate-covered strawberries would be excellent.

Almost as good is... a chocolate strawberry cupcake.


But since I'm fairly certain that Mr. Vittles will be making me neither of these treats, I guess it's up to me to do the baking!

Dark Chocolate Cupcakes with Strawberry Buttercream

Dark Chocolate Cupcakes

  • 1 stick (8 T.) butter, cut in 4 pieces
  • 2 oz. bittersweet chocolate, chopped
  • 1/2 C. Dutch-processed cocoa
  • 3/4 C. all-purpose flour
  • 1/2 t. baking soda
  • 3/4 t. baking powder
  • 2 large eggs
  • 3/4 C. sugar
  • 1 1/2 t. pure vanilla extract
  • 1/8 t. salt
  • 1/2 C. sour cream (4 oz.)

Adjust oven rack to middle position and preheat oven 350 degrees.  Line a standard-sized muffin pan with baking-cup liners and set aside.

Combine butter, chocolate pieces, and cocoa in medium heat-proof bowl.  Set bowl over saucepan containing barely simmering water, and heat mixture until butter and chocolate are melted.  Whisk until smooth & combined.  Set bowl aside to cool mixture until just warm to the touch.

Whisk flour, baking soda, and baking powder in a small bowl to combine.  Set aside.

In second medium bowl, whisk eggs to combine, then add sugar, vanilla and salt.  Whisk until fully incorporated.  Add chocolate mixture and whisk until combined.  Add about 1/3 of flour mixture over chocolate mixture and whisk until combined.  Add sour cream and whisk to incorporate.  Then add remaining flour mixture and whisk to combine, using a spatula as necessary to fold in any un-incorporated parts at the bottom of the bowl.

Divide batter evenly among muffin cups.  Bake until toothpick inserted in center of cupcakes comes out clean, about 18-20 minutes.

Cool cupcakes in pan set on wire rack until cool enough to handle (about 15 minutes).  Carefully lift each cupcake from pan, and set on wire rack to room temperature (about 30 minutes) before frosting with strawberry buttercream (recipe below).

Strawberry Buttercream

  • 3 large strawberries, hulled, washed & dried, and at room-temperature
  • 1 stick (8 T.) butter, room temperature
  • 1/4 t. vanilla extract
  • pinch salt
  • 3 - 4 C. powdered sugar
  • 1 T. heavy cream
  • 1 t. strawberry jam (optional)

In the bowl of a food processor, pulse berries until chopped.  Add butter, vanilla, salt, and 2 C. of powdered sugar.  Pulse until well-combined.

Add cream and small amounts of powdered sugar, pulsing after each, until strawberries are pureed and mixture reaches desired consistency.  The frosting should be smooth & soft, yet hold its shape.  Pipe or spread onto cooled cupcakes.

Store leftover cupcakes in refrigerator, and bring to room-temperature before serving again.  Makes 12 cupcakes.*

*If you want to double the amount of cupcakes, make 2 separate batches of batter and bake separately.  According to Cook's Illustrated, doubling the recipe and baking the trays together does not yield as good of a cupcake.

Cupcake Recipe Slightly Adapted from Cook's Illustrated; Buttercream Recipe Slightly Adapted from Sophistimom blog

Sunday, February 5, 2012

Cheesy Bacon Oven Chips with Chipotle Ranch Sauce


Ok so I can hardly contain my excitement for the Super Bowl tonight, and I decided that a special weekend like this deserves a double post!

Mr. Vittles and I had an appetizer similar to this at a restaurant recently, and I thought I might be able to replicate it at home.

Well, all I can say is - sorry if you had any health-related New Years resolutions, because I'm pretty sure you will not be able to keep them with these puppies around.


The dipping sauce really takes things to the next level.  But if you don't like spicy dips, start with just a tiny bit of cayenne (or none) and adjust from there.

Also, feel free to use more cheese and/or bacon to your taste.  Never hurt anyone except their pants size.

Now... LET'S GO BIG BLUE!

Cheesy Bacon Oven Chips 

  • 1 large, uniformly-shaped russet potato, scrubbed well and sliced into 1/8" rounds*
  • cooking spray
  • 3/4 C. shredded colby jack or cheddar cheese
  • salt & pepper to taste
  • 2 T. crumbled bacon (about 2 slices) - I used real bacon bits
  • chopped parsley or chives, for garnish (optional)

Preheat oven to 375 degrees.  Bring sliced potatoes to a boil in cold, salted water to cover for 5 minutes.  Carefully drain, and transfer slices to a paper-towel lined countertop or cutting board.  Pat to dry.

Grease a baking sheet with cooking spray, and lay out potato slices so they are overlapping on it.  Spray lightly with additional cooking spray, then sprinkle with salt & pepper to taste.  Sprinkle evenly with shredded cheese & bacon.  Bake 12-14 minutes in preheated oven until cheese is melted & bubbly.  Serve with chipotle ranch sauce (recipe below).  Serves 2.

*You can use 2 medium-sized potatoes rather than 1 large.  Also, I like to leave the skin on but you can peel the potatoes if you prefer.

Chipotle Ranch Dipping Sauce

  • 1 T. ranch dressing
  • 3 T. sour cream
  • 1/4 t. chipotle chili powder
  • 1/8 t. cayenne (adjust more or less depending on how spicy you want).
  • 1/8 t. salt
  • 1/8 t. garlic powder

Place all ingredients in a small bowl, and stir to combine.  Refrigerate any leftovers.

Original Recipes

Saturday, February 4, 2012

Frosted Sugar Cookie Bars


Today is my 29th birthday.

Tomorrow, the New York Giants play the New England Patriots in Super Bowl XLVI.

I seriously don't know which I'm more excited about?

Probably the Giants, actually, because let's face it - once you hit the age of 21, birthdays kind of go downhill from there.

A couple weeks ago I texted my friend Natalie  - you know, the mom of two in Law School, with the awesome granola who likes those stupid breadsticks & bagel chips in Chex Mix?  Anyway it was her 29th birthday also, and I asked her if she was doing 'anything fun.'

She responded "Absolutely not. Kindergarten tour, homework, sitting through a two hour training right now, then class tonight.  Being old sucks."

Boy I couldn't have said it better myself.

And to top things off, I've been sick with a cold!

Oh well.  It could definitely be worse.  While I'm not 100% I do feel the best I have so far this week, and at least I don't have to tour kindergartens today or do homework.

Nope, today I can devote all my time to celebrating (whatever that entails at 29?) and making Giants-themed sugar cookie bars.


But I talked to my mother-in-law and she pointed out that when people get to her age, the running joke is "How old are you today, 29?"

Which is an excellent point.

So this is it for me, folks.  I'm never getting any older.

Yay!

Frosted Sugar Cookie Bars

Bars

  • 1 stick (1/2 C) butter, room temperature
  • 1 C. sugar
  • 2 eggs + 1 yolk
  • 1 t. vanilla
  • 2 1/4 cups flour
  • 2 T. cornstarch
  • pinch of salt
  • 1/4 t. baking soda
  • 1/2 t. baking powder

Preheat oven to 375 degrees.  Grease 8x8 baking pan & set aside.

In bowl of mixer, cream butter and sugar on medium speed until fluffy.  Add eggs & yolk, one at a time, mixing after each.  Add vanilla & mix well.  In a separate bowl combine flour, cornstarch, salt, baking soda, and baking powder and stir with a whisk to combine.  Add to wet mixture and mix just until combined. Spread evenly in prepared pan. Bake for 14-18 min, until light golden brown and no longer shiny. Cool completely and frost.

Frosting

  • 1/4 C. butter, room temperature
  • 2 oz. cream cheese, room temperature
  • 1/2 t. vanilla
  • pinch of salt
  • 1 1/2 C. powdered sugar
  • 1 T. milk 
  • food coloring (if desired)
  • sprinkles/decorations (if desired)

For frosting, combine butter and cream cheese until smooth and creamy. Add vanilla and salt. Add powdered sugar in 1/2 cup increments until combined, then add milk (and food coloring, if using) & mix until smooth.  Add up to 1 t. more milk if needed to achieve spreadable consistency.  Spread over cooled cookie.

Makes 9 bars.

Recipe Adapted from Anissa's Kitchen

LinkWithin

Related Posts Plugin for WordPress, Blogger...